Quantcast
Channel: Short notes on everything
Viewing all 66 articles
Browse latest View live
↧

Wireless sensor/actuator network with CC430 RF SoC.

$
0
0

The ideaΒ 

This piece of hardware originated as an entry for Texas Instruments Analog Design Contest'13 (come check it out, it's an annual event and YOU could score some great prizes).

The main idea of the project was to create a wireless network of sensors and actuators (grouped into arbitrary nodes) for data acquisition and control in the automated greenhouse. All data is collected from sensors and sent to the gateway node connected to web server, where processing of the obtained information takes place. Commands to actuators follow the same route in the opposite direction. This structure allows flexible and versatile solution for automation with modular approach that can be deployed quickly to any greenhouse.


Fig. 1 - 2. Potential victim of automation.

A place to deploy the system was fortunately found in my own university, where senior students built this (fig. 1, 2) hydroponic greenhouse to test various automation solutions (if memory serves me, the last thing that ran this greenhouse was PLC, hence the relays on the bottom).


Some theory and planning

A wireless sensor network (WSN) consists of spatially distributed autonomous sensors and is used to monitor physical or environmental conditions, such as temperature, sound, pressure, etc. and to cooperatively pass their data through the network to a main location. The more modern networks are bi-directional, also enabling control of sensor activity. The development of wireless sensor networks was motivated by military applications such as battlefield surveillance; today such networks are used in many industrial and consumer applications, such as industrial process monitoring and control, machine health monitoring, and so on. (From Wikipedia, the free encyclopedia)

The general diagram of the network that I've devised is shown in the figure below:
Β 
Fig. 3. Schematic diagram of the system.

Each sensor/actuator is equipped with a microcontroller that uniquely identifies this sensor in I2C network and allows the user to easily plug them to nodes in any order and any quantity (not exceeding the I2C address space size, obviously). The bidirectional link is established via radio with the gateway node, which sends the commands to nodes and receives data from sensors relaying it to the server. The server could be any single-board computer (like Rappberry Pi) or even an actual PC running the application which handles the link to gateway node.

Hardware

Each node is equipped with CC430F5137 RF SoC, which is responsible for RF link between the nodes and connection to I2C network of nodes. Frequency was chosen to be 433MHz, that is, an unlicensed frequency for ITU Region 1. The schematics of each node is shown below:
Fig. 4. Schematics of WSN node built around CC430 RF SoC.
The balun circuit was taken from TI app notes and is designed specifically for reception and transmission of 433MHz radio waves. Programming of the board is done via Spy Bi-Wire interface (J2) inherent to all microcontrollers of MSP430 series. J3 connects the node to its sensors and actuators (you'll see later how a bus connection allows to use only one connector to join virtually unlimited number of sensors/actuators).
Each sensor/actuator module is comprised of MSP430G2230 uC and the sensing element itself. Figures 5 to 8 are the schematics of sensor/actuator modules already implemented:
Fig. 5. Mains switching module (BT139 TRIAC + MOC3041 driver).

Fig. 6.Air temperature and humidity sensor (DHT22).

Fig. 7. Light intensity sensor (Merely a CdS photoresistor).

Fig. 8. Water temperature sensor (DS18B20 in waterproof enclosure).
System architecture provides an opportunity to integrate sensing and actuating modules alike into the node. This simplifies the management of the system as well as provides a way to organize units with similar purposes to the same node (e.g. temperature sensor with the heater relay, salinity sensor with water pump relay).

Results


Here are some pictures of assembled PCBs taken with my potato:

Physical manifestation of a WSN node.

Even more of them!

Node connected to mains swithing modules

Mains switch (BT139 TRIAC + MOC3041)

Left to right: water temp. module (with the sensor sticking from below), light int. sensor, air temp. and humidity sensor.

Air temperature and humidity sensor (DHT22).

Light intensity sensor (CdS photocell).

Water temperature sensor (DS18B20).

Final showdown - flourishing(ish) greenhouse.

What's yet to be done.

I'm planning to develop this project and further improve it.
For now, the project requires firmware for microcontrollers that will realize mesh network and software for the server. The list of improvement include:
1)Β Β Β  Adding a miniature energy harvesting system to each node, making it completely wireless and autonomous. The energy will be collected from solar cells and stored in supercapacitors. The most suitable integral solution for this is, probably, BQ25504.
2)Β Β Β  Development of PCBs with AC switches (relays or TRIACs). Those will make it an actual control system, enabling us not only to get data from sensors but also to control pumps etc. Done shortly after the project was submitted.
↧

БСспроводная ΡΠ΅Ρ‚ΡŒ сСнсоров/ΠΈΡΠΏΠΎΠ»Π½ΠΈΡ‚Π΅Π»ΡŒΠ½Ρ‹Ρ… устройств Π½Π° основС систСм-Π½Π°-Ρ‡ΠΈΠΏΠ΅ CC430 с Ρ€Π°Π΄ΠΈΠΎΠΌΠΎΠ΄ΡƒΠ»Π΅ΠΌ.

$
0
0

Π—Π°Π΄ΡƒΠΌΠΊΠ°

Π­Ρ‚ΠΎΡ‚ ΠΏΡ€ΠΎΠ΅ΠΊΡ‚ Π²ΠΎΠ·Π½ΠΈΠΊ ΠΈΠ· Π΄Ρ€ΡƒΠ³ΠΎΠ³ΠΎ ΠΏΡ€ΠΎΠ΅ΠΊΡ‚Π°, с ΠΊΠΎΡ‚ΠΎΡ€Ρ‹ΠΌ я участвовал Π² конкурсС Texas Instruments Analog Design Contest'13 (ΡΠΎΠ²Π΅Ρ‚ΡƒΡŽ ΠΏΠΎΡΠΌΠΎΡ‚Ρ€Π΅Ρ‚ΡŒ Π½Π° ΠΈΠ½Ρ„ΠΎΡ€ΠΌΠ°Ρ†ΠΈΡŽ ΠΏΠΎ ссылкС, вСдь ΠΈΠΌΠ΅Π½Π½ΠΎ Π’Π«, ΠΌΠΎΠΉ Π΄ΠΎΡ€ΠΎΠ³ΠΎΠΉ Π³ΠΎΡΡ‚ΡŒ, моТСшь Π²Ρ‹ΠΈΠ³Ρ€Π°Ρ‚ΡŒ классныС ΠΏΡ€ΠΈΠ·Ρ‹ Π² этом конкурсС).Β 

Основная идСя ΠΏΡ€ΠΎΠ΅ΠΊΡ‚Π° Π·Π°ΠΊΠ»ΡŽΡ‡Π°Π»Π°ΡΡŒ Π² создании бСспроводной сСти Π΄Π°Ρ‚Ρ‡ΠΈΠΊΠΎΠ² ΠΈ ΠΈΡΠΏΠΎΠ»Π½ΠΈΡ‚Π΅Π»ΡŒΠ½Ρ‹Ρ… устройств (ИУ), сгруппированных Π² ΡƒΠ·Π»Ρ‹ ΠΏΡ€ΠΎΠΈΠ·Π²ΠΎΠ»ΡŒΠ½ΠΎΠΉ ΠΊΠΎΠΌΠΏΠ»Π΅ΠΊΡ‚Π°Ρ†ΠΈΠΈ для сбора Π΄Π°Π½Π½Ρ‹Ρ… ΠΈ управлСния Π² Π°Π²Ρ‚ΠΎΠΌΠ°Ρ‚ΠΈΠ·ΠΈΡ€ΠΎΠ²Π°Π½Π½ΠΎΠΉ Ρ‚Π΅ΠΏΠ»ΠΈΡ†Π΅. ВсС Π΄Π°Π½Π½Ρ‹Π΅ ΡΠΎΠ±ΠΈΡ€Π°ΡŽΡ‚ΡΡ с Π΄Π°Ρ‚Ρ‡ΠΈΠΊΠΎΠ² ΠΈ ΠΎΡ‚ΠΏΡ€Π°Π²Π»ΡΡŽΡ‚ΡΡ Π² ΡƒΠ·Π΅Π»-шлюз, ΠΊΠΎΡ‚ΠΎΡ€Ρ‹ΠΉ ΠΏΠΎΠ΄ΠΊΠ»ΡŽΡ‡Π΅Π½ ΠΊ Π²Π΅Π±-сСрвСру, Π² ΠΊΠΎΡ‚ΠΎΡ€ΠΎΠΌ происходит ΠΎΠ±Ρ€Π°Π±ΠΎΡ‚ΠΊΠ° ΠΏΠΎΠ»ΡƒΡ‡Π΅Π½Π½ΠΎΠΉ ΠΈΠ½Ρ„ΠΎΡ€ΠΌΠ°Ρ†ΠΈΠΈ. ΠšΠΎΠΌΠ°Π½Π΄Ρ‹ Π½Π° ΠΈΡΠΏΠΎΠ»Π½ΠΈΡ‚Π΅Π»ΡŒΠ½Ρ‹Π΅ устройства ΡΠ»Π΅Π΄ΡƒΡŽΡ‚ ΠΏΠΎ Ρ‚ΠΎΠΌΡƒ ΠΆΠ΅ ΠΌΠ°Ρ€ΡˆΡ€ΡƒΡ‚Ρƒ, Ρ‚ΠΎΠ»ΡŒΠΊΠΎ Π² ΠΎΠ±Ρ€Π°Ρ‚Π½ΠΎΠΌ Π½Π°ΠΏΡ€Π°Π²Π»Π΅Π½ΠΈΠΈ. Π­Ρ‚Π° структура прСдставляСт собой Π³ΠΈΠ±ΠΊΠΎΠ΅ ΠΈ ΡƒΠ½ΠΈΠ²Π΅Ρ€ΡΠ°Π»ΡŒΠ½ΠΎΠ΅ Ρ€Π΅ΡˆΠ΅Π½ΠΈΠ΅ для Π°Π²Ρ‚ΠΎΠΌΠ°Ρ‚ΠΈΠ·Π°Ρ†ΠΈΠΈ с ΠΌΠΎΠ΄ΡƒΠ»ΡŒΠ½Ρ‹ΠΌ ΠΏΠΎΠ΄Ρ…ΠΎΠ΄ΠΎΠΌ , ΠΊΠΎΡ‚ΠΎΡ€ΠΎΠ΅ ΠΌΠΎΠΆΠ΅Ρ‚ Π±Ρ‹Ρ‚ΡŒ быстро Ρ€Π°Π·Π²Π΅Ρ€Π½ΡƒΡ‚ΠΎ Π² любой Ρ‚Π΅ΠΏΠ»ΠΈΡ†Π΅ (Π΄Π° ΠΈ Π²ΠΎΠΎΠ±Ρ‰Π΅ Π² любом ΠΎΠ±ΡŠΠ΅ΠΊΡ‚Π΅ Π°Π²Ρ‚ΠΎΠΌΠ°Ρ‚ΠΈΠ·Π°Ρ†ΠΈΠΈ).

Рис. 1 - 2. ΠŸΠΎΡ‚Π΅Π½Ρ†ΠΈΠ°Π»ΡŒΠ½Π°Ρ ΠΆΠ΅Ρ€Ρ‚Π²Π° Π°Π²Ρ‚ΠΎΠΌΠ°Ρ‚ΠΈΠ·Π°Ρ†ΠΈΠΈ.

ΠœΠ΅ΡΡ‚ΠΎ дляразвСртывания систСмы, ΠΊ ΡΡ‡Π°ΡΡ‚ΡŒΡŽ, нашлосьвмоСм унивСрситСтС, гдС студСнты ΡΡ‚Π°Ρ€ΡˆΠΈΡ… курсов давнособрали вотэту(рис.1, 2)Π³ΠΈΠ΄Ρ€ΠΎΠΏΠΎΠ½Π½ΡƒΡŽ Ρ‚Π΅ΠΏΠ»ΠΈΡ†Ρƒ для тСстирования Ρ€Π°Π·Π½Ρ‹Ρ… ΡƒΠΏΡ€Π°Π²Π»ΡΡŽΡ‰ΠΈΡ… систСм(СслимнС Π½Π΅ измСняСт ΠΏΠ°ΠΌΡΡ‚ΡŒ, послСднСС, Π½Π° Ρ‡Π΅ΠΌ ΠΊΡ€ΡƒΡ‚ΠΈΠ»Π°ΡΡŒ этаоранТСрСя,Π±Ρ‹Π»ΠŸΠ›Πš, ΠΎΡ‚Ρ‚ΡƒΠ΄Π°Β Π² Π½ΠΈΠΆΠ½Π΅ΠΉ части ΠΈ ΠΎΡΡ‚Π°Π»ΠΈΡΡŒ Ρ€Π΅Π»Π΅).

НСмного Ρ‚Π΅ΠΎΡ€ΠΈΠΈ ΠΈ ΠΏΠ»Π°Π½ΠΈΡ€ΠΎΠ²Π°Π½ΠΈΠ΅

БСспроводная сСнсорная ΡΠ΅Ρ‚ΡŒΒ β€” распрСдСлённая, ΡΠ°ΠΌΠΎΠΎΡ€Π³Π°Π½ΠΈΠ·ΡƒΡŽΡ‰Π°ΡΡΡ ΡΠ΅Ρ‚ΡŒ мноТСства Π΄Π°Ρ‚Ρ‡ΠΈΠΊΠΎΠ² (сСнсоров) ΠΈ ΠΈΡΠΏΠΎΠ»Π½ΠΈΡ‚Π΅Π»ΡŒΠ½Ρ‹Ρ… устройств, ΠΎΠ±ΡŠΠ΅Π΄ΠΈΠ½Π΅Π½Π½Ρ‹Ρ… ΠΌΠ΅ΠΆΠ΄Ρƒ собой посрСдством Ρ€Π°Π΄ΠΈΠΎΠΊΠ°Π½Π°Π»Π°. ΠžΠ±Π»Π°ΡΡ‚ΡŒ покрытия ΠΏΠΎΠ΄ΠΎΠ±Π½ΠΎΠΉ сСти ΠΌΠΎΠΆΠ΅Ρ‚ ΡΠΎΡΡ‚Π°Π²Π»ΡΡ‚ΡŒ ΠΎΡ‚ Π½Π΅ΡΠΊΠΎΠ»ΡŒΠΊΠΈΡ… ΠΌΠ΅Ρ‚Ρ€ΠΎΠ² Π΄ΠΎ Π½Π΅ΡΠΊΠΎΠ»ΡŒΠΊΠΈΡ… ΠΊΠΈΠ»ΠΎΠΌΠ΅Ρ‚Ρ€ΠΎΠ² Π·Π° счёт способности рСтрансляции сообщСний ΠΎΡ‚ ΠΎΠ΄Π½ΠΎΠ³ΠΎ элСмСнта ΠΊ Π΄Ρ€ΡƒΠ³ΠΎΠΌΡƒ.

БСспроводныС сСнсорныС сСти состоят ΠΈΠ· ΠΌΠΈΠ½ΠΈΠ°Ρ‚ΡŽΡ€Π½Ρ‹Ρ… Π²Ρ‹Ρ‡ΠΈΡΠ»ΠΈΡ‚Π΅Π»ΡŒΠ½Ρ‹Ρ… устройств — ΡƒΠ·Π»ΠΎΠ², снабТённых сСнсорами (Π΄Π°Ρ‚Ρ‡ΠΈΠΊΠ°ΠΌΠΈ Ρ‚Π΅ΠΌΠΏΠ΅Ρ€Π°Ρ‚ΡƒΡ€Ρ‹, давлСния, освСщСнности, уровня Π²ΠΈΠ±Ρ€Π°Ρ†ΠΈΠΈ, мСстополоТСния ΠΈΒ Ρ‚.Β ΠΏ.) ΠΈ трансивСрами, Ρ€Π°Π±ΠΎΡ‚Π°ΡŽΡ‰ΠΈΠΌΠΈ Π² Π·Π°Π΄Π°Π½Π½ΠΎΠΌ Ρ€Π°Π΄ΠΈΠΎΠ΄ΠΈΠ°ΠΏΠ°Π·ΠΎΠ½Π΅. Гибкая Π°Ρ€Ρ…ΠΈΡ‚Π΅ΠΊΡ‚ΡƒΡ€Π°, сниТСниС Π·Π°Ρ‚Ρ€Π°Ρ‚ ΠΏΡ€ΠΈ ΠΌΠΎΠ½Ρ‚Π°ΠΆΠ΅ Π²Ρ‹Π΄Π΅Π»ΡΡŽΡ‚ бСспроводныС сСти ΠΈΠ½Ρ‚Π΅Π»Π»Π΅ΠΊΡ‚ΡƒΠ°Π»ΡŒΠ½Ρ‹Ρ… Π΄Π°Ρ‚Ρ‡ΠΈΠΊΠΎΠ² срСди Π΄Ρ€ΡƒΠ³ΠΈΡ… бСспроводных ΠΈ ΠΏΡ€ΠΎΠ²ΠΎΠ΄Π½Ρ‹Ρ… интСрфСйсов ΠΏΠ΅Ρ€Π΅Π΄Π°Ρ‡ΠΈ Π΄Π°Π½Π½Ρ‹Ρ…, особСнно ΠΊΠΎΠ³Π΄Π° Ρ€Π΅Ρ‡ΡŒ ΠΈΠ΄Π΅Ρ‚ ΠΎ большом количСствС соСдинСнных ΠΌΠ΅ΠΆΠ΄Ρƒ собой устройств. ΠŸΠΎΡΡ‚ΠΎΡΠ½Π½ΠΎΠ΅ сниТСниС стоимости бСспроводных Ρ€Π΅ΡˆΠ΅Π½ΠΈΠΉ, ΠΏΠΎΠ²Ρ‹ΡˆΠ΅Π½ΠΈΠ΅ ΠΈΡ… эксплуатационных ΠΏΠ°Ρ€Π°ΠΌΠ΅Ρ‚Ρ€ΠΎΠ² ΠΏΠΎΠ·Π²ΠΎΠ»ΡΡŽΡ‚ постСпСнно ΠΏΠ΅Ρ€Π΅ΠΎΡ€ΠΈΠ΅Π½Ρ‚ΠΈΡ€ΠΎΠ²Π°Ρ‚ΡŒΡΡ с ΠΏΡ€ΠΎΠ²ΠΎΠ΄Π½Ρ‹Ρ… Ρ€Π΅ΡˆΠ΅Π½ΠΈΠΉ Π² систСмах сбора тСлСмСтричСских Π΄Π°Π½Π½Ρ‹Ρ…, срСдств дистанционной диагностики, ΠΎΠ±ΠΌΠ΅Π½Π° ΠΈΠ½Ρ„ΠΎΡ€ΠΌΠ°Ρ†ΠΈΠΈ. «БСнсорная ΡΠ΅Ρ‚ΡŒΒ» являСтся сСгодня ΡƒΡΡ‚ΠΎΡΠ²ΡˆΠΈΠΌΡΡ Ρ‚Π΅Ρ€ΠΌΠΈΠ½ΠΎΠΌ (Π°Π½Π³Π». Sensor Networks), ΠΎΠ±ΠΎΠ·Π½Π°Ρ‡Π°ΡŽΡ‰ΠΈΠΌ Ρ€Π°ΡΠΏΡ€Π΅Π΄Π΅Π»Π΅Π½Π½ΡƒΡŽ, ΡΠ°ΠΌΠΎΠΎΡ€Π³Π°Π½ΠΈΠ·ΡƒΡŽΡ‰ΡƒΡŽΡΡ, ΡƒΡΡ‚ΠΎΠΉΡ‡ΠΈΠ²ΡƒΡŽ ΠΊ ΠΎΡ‚ΠΊΠ°Π·Ρƒ ΠΎΡ‚Π΄Π΅Π»ΡŒΠ½Ρ‹Ρ… элСмСнтов ΡΠ΅Ρ‚ΡŒ ΠΈΠ· нСобслуТиваСмых ΠΈ Π½Π΅ Ρ‚Ρ€Π΅Π±ΡƒΡŽΡ‰ΠΈΡ… ΡΠΏΠ΅Ρ†ΠΈΠ°Π»ΡŒΠ½ΠΎΠΉ установки устройств. ΠšΠ°ΠΆΠ΄Ρ‹ΠΉ ΡƒΠ·Π΅Π» сСнсорной сСти ΠΌΠΎΠΆΠ΅Ρ‚ ΡΠΎΠ΄Π΅Ρ€ΠΆΠ°Ρ‚ΡŒ Ρ€Π°Π·Π»ΠΈΡ‡Π½Ρ‹Π΅ Π΄Π°Ρ‚Ρ‡ΠΈΠΊΠΈ для контроля внСшнСй срСды, ΠΌΠΈΠΊΡ€ΠΎΠΊΠΎΠΌΠΏΡŒΡŽΡ‚Π΅Ρ€ ΠΈ Ρ€Π°Π΄ΠΈΠΎΠΏΡ€ΠΈΠ΅ΠΌΠΎΠΏΠ΅Ρ€Π΅Π΄Π°Ρ‚Ρ‡ΠΈΠΊ. Π­Ρ‚ΠΎ позволяСт устройству ΠΏΡ€ΠΎΠ²ΠΎΠ΄ΠΈΡ‚ΡŒ измСрСния, ΡΠ°ΠΌΠΎΡΡ‚ΠΎΡΡ‚Π΅Π»ΡŒΠ½ΠΎ ΠΏΡ€ΠΎΠ²ΠΎΠ΄ΠΈΡ‚ΡŒ Π½Π°Ρ‡Π°Π»ΡŒΠ½ΡƒΡŽ ΠΎΠ±Ρ€Π°Π±ΠΎΡ‚ΠΊΡƒ Π΄Π°Π½Π½Ρ‹Ρ… ΠΈ ΠΏΠΎΠ΄Π΄Π΅Ρ€ΠΆΠΈΠ²Π°Ρ‚ΡŒ связь с внСшнСй ΠΈΠ½Ρ„ΠΎΡ€ΠΌΠ°Ρ†ΠΈΠΎΠ½Π½ΠΎΠΉ систСмой. (ΠœΠ°Ρ‚Π΅Ρ€ΠΈΠ°Π» ΠΈΠ· Π’ΠΈΠΊΠΈΠΏΠ΅Π΄ΠΈΠΈ, свободной энциклопСдии)

ΠžΠ±Ρ‰Π°Ρ схСмасСти,Β Ρ€Π°Π·Ρ€Π°Π±ΠΎΡ‚Π°Π½Π½ΠΎΠΉΠΌΠ½ΠΎΠΉ, ΠΏΠΎΠΊΠ°Π·Π°Π½Π°Π½Π° рисункС Π½ΠΈΠΆΠ΅:
Β 
Рис. 3. Π‘Ρ…Π΅ΠΌΠ° систСмы.

ΠšΠ°ΠΆΠ΄Ρ‹ΠΉ Π΄Π°Ρ‚Ρ‡ΠΈΠΊ/Π˜Π£ΠΎΡΠ½Π°Ρ‰Π΅Π½ΠΌΠΈΠΊΡ€ΠΎΠΊΠΎΠ½Ρ‚Ρ€ΠΎΠ»Π»Π΅Ρ€ΠΎΠΌ, ΠΊΠΎΡ‚ΠΎΡ€Ρ‹ΠΉ ΡƒΠ½ΠΈΠΊΠ°Π»ΡŒΠ½ΠΎ идСнтифицируСтэтот Π΄Π°Ρ‚Ρ‡ΠΈΠΊΠ²I2CсСти ипозволяСт ΠΏΠΎΠ»ΡŒΠ·ΠΎΠ²Π°Ρ‚Π΅Π»ΡŽΠ»Π΅Π³ΠΊΠΎΠΏΠΎΠ΄ΠΊΠ»ΡŽΡ‡ΠΈΡ‚ΡŒ ΠΈΡ…ΠΊ ΡƒΠ·Π»Π°ΠΌΠ² любом ΠΏΠΎΡ€ΡΠ΄ΠΊΠ΅ΠΈΠ»ΡŽΠ±ΠΎΠΌ количСствС(Π½Π΅ болССразмСраадрСсного пространстваI2C, ΠΎΡ‡Π΅Π²ΠΈΠ΄Π½ΠΎ). Π”Π²ΡƒΠ½Π°ΠΏΡ€Π°Π²Π»Π΅Π½Π½Π°ΡΡΠ²ΡΠ·ΡŒ ΡƒΡΡ‚Π°Π½Π°Π²Π»ΠΈΠ²Π°Π΅Ρ‚ΡΡΡ‡Π΅Ρ€Π΅Π·Ρ€Π°Π΄ΠΈΠΎΠΌΠΎΠ΄ΡƒΠ»ΡŒΡΡˆΠ»ΡŽΠ·ΠΎΠ²Ρ‹ΠΌ ΡƒΠ·Π»ΠΎΠΌ, ΠΊΠΎΡ‚ΠΎΡ€Ρ‹ΠΉ посылаСт ΠΊΠΎΠΌΠ°Π½Π΄Ρ‹ дляузлови ΠΏΡ€ΠΈΠ½ΠΈΠΌΠ°Π΅Ρ‚ Π΄Π°Π½Π½Ρ‹Π΅ отдатчиковдля рСтрансляцииихна сСрвСр. Π‘Π΅Ρ€Π²Π΅Ρ€ΠΌΠΎΠΆΠ΅Ρ‚ Π±Ρ‹Ρ‚ΡŒ Π»ΡŽΠ±Ρ‹ΠΌΠΎΠ΄Π½ΠΎΠΏΠ»Π°Ρ‚Π½Ρ‹ΠΌΠΊΠΎΠΌΠΏΡŒΡŽΡ‚Π΅Ρ€(Π½Π°ΠΏΡ€ΠΈΠΌΠ΅Ρ€,RaspberryPi) ΠΈΠ»ΠΈ Π΄Π°ΠΆΠ΅ΠΎΠ±Ρ‹ΠΊΠ½ΠΎΠ²Π΅Π½Π½Ρ‹ΠΉ ΡΡ‚Π°Ρ†ΠΈΠΎΠ½Π°Ρ€Π½Ρ‹ΠΉΠΊΠΎΠΌΠΏΡŒΡŽΡ‚Π΅Ρ€ , Π½Π° ΠΊΠΎΡ‚ΠΎΡ€ΠΎΠΌ Ρ€Π°Π±ΠΎΡ‚Π°Π΅Ρ‚ΠΏΡ€ΠΈΠ»ΠΎΠΆΠ΅Π½ΠΈΠ΅, ΠΎΡ‚Π²Π΅Ρ‡Π°ΡŽΡ‰Π΅Π΅ Π·Π° ΠΎΠ±Ρ‰Π΅Π½ΠΈΠ΅ с ΡˆΠ»ΡŽΠ·ΠΎΠ²Ρ‹ΠΌ ΡƒΠ·Π»ΠΎΠΌ.

Аппаратная структура

ΠšΠ°ΠΆΠ΄Ρ‹ΠΉ узСлснабТСнчипом CC430F5137с Ρ€Π°Π΄ΠΈΠΎΠΌΠΎΠ΄ΡƒΠ»Π΅ΠΌ, ΠΊΠΎΡ‚ΠΎΡ€Ρ‹ΠΉ ΠΎΡ‚Π²Π΅Ρ‡Π°Π΅Ρ‚ Π·Π°Π±Π΅ΡΠΏΡ€ΠΎΠ²ΠΎΠ΄Π½ΡƒΡŽΡΠ²ΡΠ·ΡŒΠΌΠ΅ΠΆΠ΄ΡƒΡƒΠ·Π»Π°ΠΌΠΈ ΠΈ Π·Π°ΠΏΠΎΠ΄ΠΊΠ»ΡŽΡ‡Π΅Π½ΠΈΠ΅ ксСти I2C.Частотабыла Π²Ρ‹Π±Ρ€Π°Π½Π°433 ΠœΠ“Ρ†, Ρ‚.ΠΊ. это нСлицСнзируСмаячастота длярСгиона 1 ITU. Π‘Ρ…Π΅ΠΌΠ° ΠΊΠ°ΠΆΠ΄ΠΎΠ³ΠΎ ΡƒΠ·Π»Π°ΠΏΠΎΠΊΠ°Π·Π°Π½Π° Π½ΠΈΠΆΠ΅.:
Рис. 4. Π‘Ρ…Π΅ΠΌΠ° ΡƒΠ·Π»Π° бСспроводной сСти Π½Π° CC430.
Π‘Ρ…Π΅ΠΌΠ° Π±Π°Π»ΡƒΠ½Π°Π±Ρ‹Π»Π° взята ΠΈΠ· Π½Π°ΠΏΡ€ΡΠΌΡƒΡŽ ΠΈΠ· Π°ΠΏΠΏΠ½ΠΎΡƒΡ‚Π° TIΠΈ ΠΏΡ€Π΅Π΄Π½Π°Π·Π½Π°Ρ‡Π΅Π½Π° ΡΠΏΠ΅Ρ†ΠΈΠ°Π»ΡŒΠ½ΠΎΠ΄Π»Ρ ΠΎΠΏΡ‚ΠΈΠΌΠ°Π»ΡŒΠ½ΠΎΠ³ΠΎ ΠΏΡ€ΠΈΠ΅ΠΌΠ° ΠΈ ΠΏΠ΅Ρ€Π΅Π΄Π°Ρ‡ΠΈΡ€Π°Π΄ΠΈΠΎΠ²ΠΎΠ»Π½ Π½Π° частотС433 ΠœΠ“Ρ†. ΠŸΡ€ΠΎΠ³Ρ€Π°ΠΌΠΌΠΈΡ€ΠΎΠ²Π°Π½ΠΈΠ΅ΠΎΡΡƒΡ‰Π΅ΡΡ‚Π²Π»ΡΠ΅Ρ‚ΡΡ чСрСзинтСрфСйсSpyBi-Wire (J2), ΠΈΠΌΠ΅ΡŽΡ‰ΠΈΠΉΡΡ Ρƒ всСхмикроконтроллСровсСрииMSP430. J3соСдиняСтузСлс Π΅Π³ΠΎΠ΄Π°Ρ‚Ρ‡ΠΈΠΊΠ°ΠΌΠΈ ΠΈ ΠΈΡΠΏΠΎΠ»Π½ΠΈΡ‚Π΅Π»ΡŒΠ½Ρ‹ΠΌΠΈ устройствами(Π΄Π°Π»Π΅Π΅ Π²Ρ‹ ΡƒΠ²ΠΈΠ΄ΠΈΡ‚Π΅, ΠΊΠ°ΠΊ соСдинСниСшиной ΠΏΠΎΠ·Π²ΠΎΠ»ΡΠ΅Ρ‚ΠΈΡΠΏΠΎΠ»ΡŒΠ·ΠΎΠ²Π°Ρ‚ΡŒ Ρ‚ΠΎΠ»ΡŒΠΊΠΎ ΠΎΠ΄ΠΈΠ½Ρ€Π°Π·ΡŠΠ΅ΠΌ дляприсоСдинСния практичСски Π½Π΅ΠΎΠ³Ρ€Π°Π½ΠΈΡ‡Π΅Π½Π½ΠΎΠ³ΠΎ количСствадатчиков/ΠΈΡΠΏΠΎΠ»Π½ΠΈΡ‚Π΅Π»ΡŒΠ½Ρ‹Ρ… устройств).

ΠšΠ°ΠΆΠ΄Ρ‹ΠΉ ΠΌΠΎΠ΄ΡƒΠ»ΡŒΠ΄Π°Ρ‚Ρ‡ΠΈΠΊΠΎΠ²/ΠΈΡΠΏΠΎΠ»Π½ΠΈΡ‚Π΅Π»ΡŒΠ½Ρ‹Ρ… устройствсостоит ΠΈΠ·ΠΌΠΈΠΊΡ€ΠΎΠΊΠΎΠ½Ρ‚Ρ€ΠΎΠ»Π»Π΅Ρ€Π° MSP430G2230Β 
ΠΈ обвязки. Π˜Π»Π»ΡŽΡΡ‚Ρ€Π°Ρ†ΠΈΠΈΠΎΡ‚ 5 Π΄ΠΎ 8ΡΠ²Π»ΡΡŽΡ‚ΡΡΡΡ…Π΅ΠΌΠ°ΠΌΠΈΠΌΠΎΠ΄ΡƒΠ»Π΅ΠΉΠ΄Π°Ρ‚Ρ‡ΠΈΠΊΠΎΠ²/ΠΈΡΠΏΠΎΠ»Π½ΠΈΡ‚Π΅Π»ΡŒΠ½Ρ‹Ρ…ΡƒΡΡ‚Ρ€ΠΎΠΉΡΡ‚Π²:

Рис. 5. ΠœΠΎΠ΄ΡƒΠ»ΡŒ ΠΊΠΎΠΌΠΌΡƒΡ‚Π°Ρ†ΠΈΠΈ сСти ΠΏΠ΅Ρ€Π΅ΠΌΠ΅Π½Π½ΠΎΠ³ΠΎ Ρ‚ΠΎΠΊΠ° (симистор BT139 + Π΄Ρ€Π°ΠΉΠ²Π΅Ρ€ MOC3041).

Рис. 6. Π”Π°Ρ‚Ρ‡ΠΈΠΊ Ρ‚Π΅ΠΌΠΏΠ΅Ρ€Π°Ρ‚ΡƒΡ€Ρ‹ ΠΈ влаТности Π²ΠΎΠ΄Ρ‹ (DHT22).

Рис. 7. Π”Π°Ρ‚Ρ‡ΠΈΠΊ интСнсивности свСта (ΠΎΠ±Ρ‹Ρ‡Π½Ρ‹ΠΉ фоторСзистор).

Рис. 8. Π”Π°Ρ‚Ρ‡ΠΈΠΊ Ρ‚Π΅ΠΌΠΏΠ΅Ρ€Π°Ρ‚ΡƒΡ€Ρ‹ Π²ΠΎΠ΄Ρ‹ (DS18B20 Π² Π²ΠΎΠ΄ΠΎΠ½Π΅ΠΏΡ€ΠΎΠ½ΠΈΡ†Π°Π΅ΠΌΠΎΠΌ корпусС).
АрхитСктура ΡΠΈΡΡ‚Π΅ΠΌΡ‹ΠΎΠ±Π΅ΡΠΏΠ΅Ρ‡ΠΈΠ²Π°Π΅Ρ‚Π²ΠΎΠ·ΠΌΠΎΠΆΠ½ΠΎΡΡ‚ΡŒ интСграцииизмСрСния Π΄Π°Π½Π½Ρ‹Ρ… сСнсорами иуправлСния ΠΈΡΠΏΠΎΠ»Π½ΠΈΡ‚Π΅Π»ΡŒΠ½Ρ‹ΠΌΠΈΡƒΡΡ‚Ρ€ΠΎΠΉΡΡ‚Π²Π°ΠΌΠΈ Π² 1ΡƒΠ·Π΅Π». Π­Ρ‚ΠΎ ΡƒΠΏΡ€ΠΎΡ‰Π°Π΅Ρ‚ΡƒΠΏΡ€Π°Π²Π»Π΅Π½ΠΈΠ΅ систСмой, Π° Ρ‚Π°ΠΊΠΆΠ΅ прСдоставляСт Π²ΠΎΠ·ΠΌΠΎΠΆΠ½ΠΎΡΡ‚ΡŒΡΠΎΠ±Ρ€Π°Ρ‚ΡŒΠΌΠΎΠ΄ΡƒΠ»ΠΈΡΠΏΠΎΡ…ΠΎΠΆΠΈΠΌ Π½Π°Π·Π½Π°Ρ‡Π΅Π½ΠΈΠ΅ΠΌΠ½Π° ΠΎΠ΄ΠΈΠ½ ΡƒΠ·Π΅Π»(Π½Π°ΠΏΡ€ΠΈΠΌΠ΅Ρ€,Π΄Π°Ρ‚Ρ‡ΠΈΠΊ тСмпСратурыскоммутатором нагрСватСля, Π΄Π°Ρ‚Ρ‡ΠΈΠΊ солСностискоммутаторомводяного насоса).

Π Π΅Π·ΡƒΠ»ΡŒΡ‚Π°Ρ‚Ρ‹


НСсколько Ρ„ΠΎΡ‚ΠΎΠ³Ρ€Π°Ρ„ΠΈΠΉ Π³ΠΎΡ‚ΠΎΠ²Ρ‹Ρ… ΠΏΠ΅Ρ‡Π°Ρ‚Π½Ρ‹Ρ… ΠΏΠ»Π°Ρ‚ снятых Π½Π° ΠΌΠΎΠ±ΠΈΠ»Ρƒ:

ЀизичСскоС Π²ΠΎΠΏΠ»ΠΎΡ‰Π΅Π½ΠΈΠ΅ ΡƒΠ·Π»Π° бСспроводной сСти.

И он даТС нС один!

Π£Π·Π΅Π» соСдинСнный с ΠΊΠΎΠΌΠΌΡƒΡ‚Π°Ρ†ΠΈΠΎΠ½Π½Ρ‹ΠΌΠΈ модулями.

ΠœΠΎΠ΄ΡƒΠ»ΡŒ ΠΊΠΎΠΌΠΌΡƒΡ‚Π°Ρ†ΠΈΠΈ сСти ΠΏΠ΅Ρ€Π΅ΠΌΠ΅Π½Π½ΠΎΠ³ΠΎ Ρ‚ΠΎΠΊΠ° (симистор BT139 + Π΄Ρ€Π°ΠΉΠ²Π΅Ρ€ MOC3041).

Π‘Π»Π΅Π²Π° Π½Π°ΠΏΡ€Π°Π²ΠΎ: Π΄Π°Ρ‚Ρ‡ΠΈΠΊ Ρ‚Π΅ΠΌΠΏ. Π²ΠΎΠ΄Ρ‹ (сСнсор Ρ‚ΠΎΡ€Ρ‡ΠΈΡ‚ снизу), Π΄Π°Ρ‚Ρ‡ΠΈΠΊ освСщСнности, Π΄Π°Ρ‚Ρ‡ΠΈΠΊ Ρ‚Π΅ΠΌΠΏΠ΅Ρ€Π°Ρ‚ΡƒΡ€Ρ‹ ΠΈ влаТности Π²ΠΎΠ·Π΄ΡƒΡ…Π°.

Π”Π°Ρ‚Ρ‡ΠΈΠΊ Ρ‚Π΅ΠΌΠΏΠ΅Ρ€Π°Ρ‚ΡƒΡ€Ρ‹ ΠΈ влаТности Π²ΠΎΠ΄Ρ‹ (DHT22).

Π”Π°Ρ‚Ρ‡ΠΈΠΊ интСнсивности свСта (фоторСзистор).

Π”Π°Ρ‚Ρ‡ΠΈΠΊ Ρ‚Π΅ΠΌΠΏΠ΅Ρ€Π°Ρ‚ΡƒΡ€Ρ‹ Π²ΠΎΠ΄Ρ‹ (DS18B20).

ЀинальноС Ρ„ΠΎΡ‚ΠΎ - ΠΊΠ°ΠΊ Π±Ρ‹ цвСтущая Ρ‚Π΅ΠΏΠ»ΠΈΡ†Π°.

Π§Ρ‚ΠΎ стоит Π΄ΠΎΠ΄Π΅Π»Π°Ρ‚ΡŒ.

Π― ΠΏΠ»Π°Π½ΠΈΡ€ΡƒΡŽΡ€Π°Π·Π²ΠΈΠ²Π°Ρ‚ΡŒ этот ΠΏΡ€ΠΎΠ΅ΠΊΡ‚ΠΈΒ ΡƒΠ»ΡƒΡ‡ΡˆΠΈΡ‚ΡŒ Π΅Π³ΠΎ.

Π’ настоящСС врСмя трСбуСтся Π½Π°ΠΏΠΈΡΠ°Ρ‚ΡŒΠΏΡ€ΠΎΡˆΠΈΠ²ΠΊΡƒΠ΄Π»Ρ ΠΌΠΈΠΊΡ€ΠΎΠΊΠΎΠ½Ρ‚Ρ€ΠΎΠ»Π»Π΅Ρ€ΠΎΠ², ΠΊΠΎΡ‚ΠΎΡ€Ρ‹Π΅ Π±ΡƒΠ΄ΡƒΡ‚Ρ€Π΅Π°Π»ΠΈΠ·ΠΎΠ²Π°Ρ‚ΡŒΡΡ‡Π΅ΠΈΡΡ‚ΡƒΡŽ ΡΠ΅Ρ‚ΡŒΠΈ ΠΏΡ€ΠΎΠ³Ρ€Π°ΠΌΠΌΠ½ΠΎΠ΅ обСспСчСниС длясСрвСра. Π‘ΠΏΠΈΡΠΎΠΊΡƒΠ»ΡƒΡ‡ΡˆΠ΅Π½ΠΈΠΉΠ²ΠΊΠ»ΡŽΡ‡Π°Π΅Ρ‚ Π² сСбя:

1)Π”ΠΎΠ±Π°Π²Π»Π΅Π½ΠΈΠ΅ΠΌΠΈΠ½ΠΈΠ°Ρ‚ΡŽΡ€Π½ΠΎΠΉΡΠΈΡΡ‚Π΅ΠΌΡ‹ΡΠ±ΠΎΡ€Π° энСргиина ΠΊΠ°ΠΆΠ΄Ρ‹ΠΉ ΡƒΠ·Π΅Π», Ρ‡Ρ‚ΠΎ сдСлаСт Π΅Π³ΠΎ ΠΏΠΎΠ»Π½ΠΎΡΡ‚ΡŒΡŽΠ±Π΅ΡΠΏΡ€ΠΎΠ²ΠΎΠ΄Π½Ρ‹ΠΌ ΠΈΠ°Π²Ρ‚ΠΎΠ½ΠΎΠΌΠ½Ρ‹ΠΌ.ЭнСргиябудСт ΡΠΎΠ±ΠΈΡ€Π°Ρ‚ΡŒΡΡΠΈΠ·ΡΠΎΠ»Π½Π΅Ρ‡Π½Ρ‹Ρ… Π±Π°Ρ‚Π°Ρ€Π΅ΠΉΠΈ хранится вионисторах. НаиболСС подходящиминтСгрированным Ρ€Π΅ΡˆΠ΅Π½ΠΈΠ΅ΠΌ для этого, ΠΏΠΎΠΆΠ°Π»ΡƒΠΉ, Π±ΡƒΠ΄Π΅Ρ‚ BQ25504.

2) Π Π°Π·Ρ€Π°Π±ΠΎΡ‚ΠΊΠ°ΠΏΠ΅Ρ‡Π°Ρ‚Π½Ρ‹Ρ… ΠΏΠ»Π°Ρ‚ с ΠΊΠΎΠΌΠΌΡƒΡ‚Π°Ρ‚ΠΎΡ€Π°ΠΌΠΈΠΏΠ΅Ρ€Π΅ΠΌΠ΅Π½Π½ΠΎΠ³ΠΎ Ρ‚ΠΎΠΊΠ°(Ρ€Π΅Π»Π΅ илисимисторы). Π­Ρ‚ΠΎ,сдСлаСт сдСлаСтпроСктСщС ΠΈ систСмой управлСния, Ρ‡Ρ‚ΠΎ ΠΏΠΎΠ·Π²ΠΎΠ»ΠΈΡ‚ Π½Π΅ Ρ‚ΠΎΠ»ΡŒΠΊΠΎΠΏΠΎΠ»ΡƒΡ‡ΠΈΡ‚ΡŒ Π΄Π°Π½Π½Ρ‹Π΅ΠΎΡ‚ Π΄Π°Ρ‚Ρ‡ΠΈΠΊΠΎΠ², Π½ΠΎ ΠΈΡƒΠΏΡ€Π°Π²Π»ΡΡ‚ΡŒ насосамии Ρ‚.Π΄.БдСлановскорС послС Ρ‚ΠΎΠ³ΠΎ ΠΊΠ°ΠΊΠΏΡ€ΠΎΠ΅ΠΊΡ‚ Π±Ρ‹Π» прСдставлСн Π½Π° конкурс.
↧
↧

Kogawa's simplest FM transmitter

$
0
0

Β 

Kogawa's simplest FM transmitter

Β After the last unsuccessful attempt at building this thing, I've finally got it working.
Some helpful tips:
Normal output (note the awful frequency drift-off)
Output with base overdriven
Signal's doppelganger to the left
  • Things like size of the pads (exactly 5x5 mm.), lead length (minimal) and component placement really DO matter. If you assembled a transmitter like this one and it doesn't seem to work (or it does, but the signal is noisy with lots of out-of-band emissions) you probably should check the layout.
  • Signal frequency drifts off with decrease of battery voltage, and really fast. Therefore, it's not practical to use transmitter as it is now. One should add a voltage regulator to power the circuit in order to stabilize output frequency.
  • Too large of an amplitude of the signal will saturate the transistor's base and "bloat" the output frequency band, rendering the sound almost unrecognizable.
  • Β Almost any sort of transistor will do, such as renowned 2N3904. Look in the datasheet for fT (Current Gain - Bandwidth Product). It shouldn't be less than 170MHz (Kogawa himself uses 2SC2001 with this figure, 2N3904 is even better with 300MHz).
  • The transmitter, other than the intended RF signal, will produce it's weakened undesired copies outside the band. Search for the strongest signal.
To-do:
  1. Stabilize the power supply to prevent frequency drif-off (add a simple 7809 voltage regulator and increase the power supply voltage).
  2. Add band-pass filter at the output to supress out-of-band noise.
  3. Add antenna to invade the neigborhood 8-)
↧

ΠŸΡ€ΠΎΡΡ‚Π΅ΠΉΡˆΠΈΠΉ FM ΠΏΠ΅Ρ€Π΅Π΄Π°Ρ‚Ρ‡ΠΈΠΊ ΠšΠΎΠ³Π°Π²Ρ‹

$
0
0

Β 

ПослС послСднСй Π½Π΅ΡƒΠ΄Π°Ρ‡Π½ΠΎΠΉ ΠΏΠΎΠΏΡ‹Ρ‚ΠΊΠΈ ΡΠΎΠ±Ρ€Π°Ρ‚ΡŒ эту ΡˆΡ‚ΡƒΠΊΡƒ, я, Π½Π°ΠΊΠΎΠ½Π΅Ρ†, добился Ρ‡Ρ‚ΠΎΠ±Ρ‹ ΠΎΠ½Π° Π·Π°Ρ€Π°Π±ΠΎΡ‚Π°Π»Π°.НСкоторыС ΠΏΠΎΠ»Π΅Π·Π½Ρ‹Π΅ совСты ΠΏΠΎ сборкС:
ΠΠΎΡ€ΠΌΠ°Π»ΡŒΠ½Π°Ρ Ρ€Π°Π±ΠΎΡ‚Π° (ΠΎΠ±Ρ€Π°Ρ‚ΠΈΡ‚Π΅ Π²Π½ΠΈΠΌΠ°Π½ΠΈΠ΅ Π½Π° уТасный Π΄Ρ€Π΅ΠΉΡ„ частоты)
Π‘ΠΈΠ³Π½Π°Π» с насыщСнной Π±Π°Π·ΠΎΠΉ транзистора
Π”Π²ΠΎΠΉΠ½ΠΈΠΊ сигнала слСва ΠΎΡ‚ ΠΎΡ€ΠΈΠ³ΠΈΠ½Π°Π»Π°
  • Π’Π°ΠΊΠΈΠ΅ Π²Π΅Ρ‰ΠΈ, ΠΊΠ°ΠΊ Ρ€Π°Π·ΠΌΠ΅Ρ€ ΠΏΠ»ΠΎΡ‰Π°Π΄ΠΎΠΊ (Ρ€ΠΎΠ²Π½ΠΎ 5 Π½Π° 5 ΠΌΠΌ.), Π΄Π»ΠΈΠ½Π° Π²Ρ‹Π²ΠΎΠ΄ΠΎΠ² ΠΊΠΎΠΌΠΏΠΎΠ½Π΅Π½Ρ‚ΠΎΠ² (минимальная) ΠΈ Ρ€Π°Π·ΠΌΠ΅Ρ‰Π΅Π½ΠΈΠ΅ Π”Π•Π™Π‘Π’Π’Π˜Π’Π•Π›Π¬ΠΠž ΠΈΠΌΠ΅ΡŽΡ‚ Π·Π½Π°Ρ‡Π΅Π½ΠΈΠ΅. Если Π²Ρ‹ собрали Ρ‚Π°ΠΊΠΎΠΉ ΠΆΠ΅ ΠΏΠ΅Ρ€Π΅Π΄Π°Ρ‚Ρ‡ΠΈΠΊ ΠΊΠ°ΠΊ этот ΠΈ ΠΎΠ½ Π½Π΅ Ρ€Π°Π±ΠΎΡ‚Π°Π΅Ρ‚ (ΠΈΠ»ΠΈ Ρ€Π°Π±ΠΎΡ‚Π°Π΅Ρ‚, Π½ΠΎ сигнал ΡˆΡƒΠΌΠ½Ρ‹ΠΉ с большим количСством ΠΏΠΎΠΌΠ΅Ρ… Π²Π½Π΅ частоты ΠΏΠ΅Ρ€Π΅Π΄Π°Ρ‡ΠΈ), вСроятно, слСдуСт ΠΏΡ€ΠΎΠ²Π΅Ρ€ΠΈΡ‚ΡŒ ΠΏΠ΅Ρ‡Π°Ρ‚Π½ΡƒΡŽ ΠΏΠ»Π°Ρ‚Ρƒ.
  • Частота сигнала Π΄Ρ€Π΅ΠΉΡ„ΡƒΠ΅Ρ‚ с ΡƒΠΌΠ΅Π½ΡŒΡˆΠ΅Π½ΠΈΠ΅ΠΌ напряТСния Π±Π°Ρ‚Π°Ρ€Π΅ΠΈ, ΠΈ ΠΎΡ‡Π΅Π½ΡŒ быстро. Π’Π°ΠΊΠΈΠΌ ΠΎΠ±Ρ€Π°Π·ΠΎΠΌ, ΠΏΠ΅Ρ€Π΅Π΄Π°Ρ‚Ρ‡ΠΈΠΊ Π½Π΅ ΠΏΡ€Π°ΠΊΡ‚ΠΈΡ‡Π΅Π½ Π±Π΅Π· ΠΌΠΎΠ΄ΠΈΡ„ΠΈΠΊΠ°Ρ†ΠΈΠΉ. Π‘Π»Π΅Π΄ΡƒΠ΅Ρ‚ Π΄ΠΎΠ±Π°Π²ΠΈΡ‚ΡŒ стабилизатор напряТСния для питания схСмы для Ρ‚ΠΎΠ³ΠΎ, Ρ‡Ρ‚ΠΎΠ±Ρ‹ ΡΡ‚Π°Π±ΠΈΠ»ΠΈΠ·ΠΈΡ€ΠΎΠ²Π°Ρ‚ΡŒ Π²Ρ‹Ρ…ΠΎΠ΄Π½ΡƒΡŽ частоту.
  • Блишком большая Π°ΠΌΠΏΠ»ΠΈΡ‚ΡƒΠ΄Π° сигнала насыщаСт Π±Π°Π·Ρƒ транзистора ΠΈ "Ρ€Π°Π·Π΄ΡƒΠ²Π°Ρ‚ΡŒ"Π²Ρ‹Ρ…ΠΎΠ΄Π½ΠΎΠΉ сигнал, Ρ‡Ρ‚ΠΎ Π΄Π΅Π»Π°Π΅Ρ‚ Π·Π²ΡƒΠΊ ΠΏΠΎΡ‡Ρ‚ΠΈ Π½Π΅ΡƒΠ·Π½Π°Π²Π°Π΅ΠΌΡ‹ΠΌ.
  • ΠŸΠΎΡ‡Ρ‚ΠΈ любой Π²ΠΈΠ΄ транзистора ΠΏΠΎΠΉΠ΄Π΅Ρ‚, Π½Π°ΠΏΡ€ΠΈΠΌΠ΅Ρ€, извСстный 2N3904. Π’ Π΄Π°Ρ‚Π°ΡˆΠΈΡ‚Π΅ слСдуСт ΠΈΡΠΊΠ°Ρ‚ΡŒ ΠΏΠ°Ρ€Π°ΠΌΠ΅Ρ‚Ρ€ fT (Current Gain - Bandwidth Product). Он Π½Π΅ Π΄ΠΎΠ»ΠΆΠ΅Π½ Π±Ρ‹Ρ‚ΡŒ мСньшС, Ρ‡Π΅ΠΌ 170MHz (сам Когава ΠΈΡΠΏΠΎΠ»ΡŒΠ·ΡƒΠ΅Ρ‚Β 2SC2001с этим Π·Π½Π°Ρ‡Π΅Π½ΠΈΠ΅ΠΌ ΠΏΠ°Ρ€Π°ΠΌΠ΅Ρ‚Ρ€Π°, 2N3904 Π΅Ρ‰Π΅ Π»ΡƒΡ‡ΡˆΠ΅ - 300 ΠœΠ“Ρ†).
  • ΠŸΠ΅Ρ€Π΅Π΄Π°Ρ‚Ρ‡ΠΈΠΊ, ΠΊΡ€ΠΎΠΌΠ΅ ΠΆΠ΅Π»Π°Π΅ΠΌΠΎΠ³ΠΎ радиочастотного сигнала, Π±ΡƒΠ΄Π΅Ρ‚ ΠΏΡ€ΠΎΠΈΠ·Π²ΠΎΠ΄ΠΈΡ‚ΡŒ Π΅Π³ΠΎ ослаблСнныС ΠΊΠΎΠΏΠΈΠΈ. Π˜Ρ‰ΠΈΡ‚Π΅ самый ΡΠΈΠ»ΡŒΠ½Ρ‹ΠΉ сигнал.
Π§Ρ‚ΠΎ ΡΠ΄Π΅Π»Π°Ρ‚ΡŒ:
  1. Π‘Ρ‚Π°Π±ΠΈΠ»ΠΈΠ·ΠΈΡ€ΠΎΠ²Π°Ρ‚ΡŒ ΠΏΠΈΡ‚Π°Π½ΠΈΠ΅, Ρ‡Ρ‚ΠΎΠ±Ρ‹ ΠΏΡ€Π΅Π΄ΠΎΡ‚Π²Ρ€Π°Ρ‚ΠΈΡ‚ΡŒ ΡƒΠΏΠ»Ρ‹Π²Π°Π½ΠΈΠ΅ частоты (Π΄ΠΎΠ±Π°Π²ΠΈΡ‚ΡŒ простой рСгулятор напряТСния 7809 ΠΈ ΡƒΠ²Π΅Π»ΠΈΡ‡ΠΈΡ‚ΡŒ напряТСниС питания).
  2. Π”ΠΎΠ±Π°Π²ΠΈΡ‚ΡŒ полосовой Ρ„ΠΈΠ»ΡŒΡ‚Ρ€ Π½Π° Π²Ρ‹Ρ…ΠΎΠ΄Π΅ для подавлСния ΡˆΡƒΠΌΠ° Π²Π½Π΅ Π΄ΠΈΠ°ΠΏΠ°Π·ΠΎΠ½Π°.
  3. Π”ΠΎΠ±Π°Π²ΠΈΡ‚ΡŒ Π°Π½Ρ‚Π΅Π½Π½Ρƒ Ρ‡Ρ‚ΠΎΠ±Ρ‹ ΡƒΡΡ‚Ρ€ΠΎΠΈΡ‚ΡŒ Π»ΠΎΠΊΠ°Π»ΡŒΠ½ΡƒΡŽ Ρ€Π°Π΄ΠΈΠΎΡΡ‚Π°Π½Ρ†ΠΈΡŽ 8-)
↧

ΠŸΠ΅Ρ€Π΅Π΄Π΅Π»ΠΊΠ° часов Π­Π»Π΅ΠΊΡ‚Ρ€ΠΎΠ½ΠΈΠΊΠ° 7

$
0
0

I'm not going to make an English version of this post because the possibility of someone who doesn't speak Russian coming into possession of an old Soviet clock is basically 0.


Π˜Ρ‚Π°ΠΊ, ΠΏΡ€ΠΈΠΌΠ΅Ρ€Π½ΠΎ ΠΏΠΎΠ»Π³ΠΎΠ΄Π° Π½Π°Π·Π°Π΄ Π΄ΠΎΠ±Ρ€Ρ‹Π΅ люди Π½Π° ΠΊΠ°Ρ„Π΅Π΄Ρ€Π΅ ΠΎΡ‚Π΄Π°Π»ΠΈ ΠΌΠ½Π΅ старыС ΠΈ Π½Π΅Ρ€Π°Π±ΠΎΡ‡ΠΈΠ΅ часы "Π­Π»Π΅ΠΊΡ‚Ρ€ΠΎΠ½ΠΈΠΊΠ° 7". Π’Π°ΠΊ ΠΎΠ½ΠΈ выглядСли:


Π§Ρ‚ΠΎ Π½Π΅ Ρ€Π°Π±ΠΎΡ‚Π°Π΅Ρ‚ Π² часах Π²ΠΈΠ΄Π½ΠΎ ΠΏΠΎ ΠΊΠ°Ρ€Ρ‚ΠΈΠ½ΠΊΠ΅ - ΠΏΠΎΠ»ΠΎΠ²ΠΈΠ½Π° сСгмСнтов Π² Π²Π°ΠΊΡƒΡƒΠΌΠ½Ρ‹Ρ… Ρ‚Ρ€ΡƒΠ±ΠΊΠ°Ρ… Π²Ρ‹Π³ΠΎΡ€Π΅Π»ΠΈ. МнС ΠΏΡ€ΠΈΡˆΠ»Π° Π² Π³ΠΎΠ»ΠΎΠ²Ρƒ идСя Ρ€Π΅ΡΡ‚Π°Π²Ρ€ΠΈΡ€ΠΎΠ²Π°Ρ‚ΡŒ Ρ‚Π°ΠΊΠΎΠ΅ Ρ‡ΡƒΠ΄ΠΎ совСтской ΠΈΠ½ΠΆΠ΅Π½Π΅Ρ€ΠΈΠΈ с шиком - Π·Π°ΠΌΠ΅Π½ΠΈΡ‚ΡŒ Π²Π°ΠΊΡƒΡƒΠΌΠ½ΠΎ-Π»ΡŽΠΌΠΈΠ½ΠΈΡΡ†Π΅Π½Ρ‚Π½Ρ‹Π΅ ΠΈΠ½Π΄ΠΈΠΊΠ°Ρ‚ΠΎΡ€Ρ‹ соврСмСнными яркими свСтодиодами "ΠŸΠΈΡ€Π°Π½ΡŒΡ"ΠΈ Π·Π°ΠΌΠ΅Π½ΠΈΡ‚ΡŒ саму элСктронику Π²Π½ΡƒΡ‚Ρ€ΠΈ.

Π”Π°Π»Π΅Π΅ ΠΈΠ΄Π΅Ρ‚ описаниС процСсса рСставрации для Ρ‚ΠΎΠ³ΠΎ Ρ‡Ρ‚ΠΎΠ±Ρ‹ любой Ρ‡Π΅Π»ΠΎΠ²Π΅ΠΊ с прямыми Ρ€ΡƒΠΊΠ°ΠΌΠΈ ΠΌΠΎΠ³ Π΅Π³ΠΎ ΠΏΠΎΠ²Ρ‚ΠΎΡ€ΠΈΡ‚ΡŒ. Для привлСчСния внимания ΠΏΠΎΠΊΠ°ΠΆΡƒ Ρ„ΠΎΡ‚ΠΎ Ρ€Π΅Π·ΡƒΠ»ΡŒΡ‚Π°Ρ‚Π°:

Π― Π·Π°ΠΌΠ΅Π½ΠΈΠ» Ρ€Π°ΠΌΡƒ ΠΈΠ· Π”Π’ΠŸ Π½Π° Π΄Ρ€ΡƒΠ³ΡƒΡŽ.


Π¨Π°Π³ 1. Π Π°Π±ΠΎΡ‚Π° Π½Π°Π΄ корпусом.

НачнСм с выдирания старой элСктроники - Π½ΡƒΠΆΠ½ΠΎ Π²Ρ‹Ρ‚Π°Ρ‰ΠΈΡ‚ΡŒ ΠΈΠ· часов всС ΠΏΠ΅Ρ‡Π°Ρ‚Π½Ρ‹Π΅ ΠΏΠ»Π°Ρ‚Ρ‹ ΠΈ Π’Π›Π˜. Π’Π΅ΠΏΠ΅Ρ€ΡŒ приступим ΠΊ созиданию - Π½Π°Π΄ΠΎ для Π½Π°Ρ‡Π°Π»Π° ΡΠ΄Π΅Π»Π°Ρ‚ΡŒ Π½ΠΎΠ²Ρ‹ΠΉ дисплСй ΠΈΠ· свСтодиодов. Для этого понадобится:
  • ΠΊΡƒΡ‡Π° свСтодиодов ΠŸΠΈΡ€Π°Π½ΡŒΡ любого Ρ†Π²Π΅Ρ‚Π°;
  • 2 ΠΌΠ°ΠΊΠ΅Ρ‚Π½Ρ‹Π΅ ΠΏΠ»Π°Ρ‚Ρ‹ 9Ρ…15 см;
  • кусок Ρ‡Π΅Ρ€Π½ΠΎΠ³ΠΎ ΠΊΠ°Ρ€Ρ‚ΠΎΠ½Π° ΠΈΠ»ΠΈ Ρ‡Π΅Π³ΠΎ-Ρ‚ΠΎ ΠΏΠΎΡ…ΠΎΠΆΠ΅Π³ΠΎ.
КаТдая макСтная ΠΏΠ»Π°Ρ‚Π° размСстит Π½Π° сСбС 2 Ρ†ΠΈΡ„Ρ€Ρ‹ ΠΏΠΎ 10 сСгмСнтов каТдая. Из-Π·Π° Ρ‚ΠΎΠ³ΠΎ Ρ‡Ρ‚ΠΎ сСгмСнты состоят ΠΈΠ· Ρ‚ΠΎΡ‡Π΅ΠΊ, Π½Π΅ получится ΠΎΠ±ΠΎΠΉΡ‚ΠΈΡΡŒ ΠΎΠ±Ρ‹Ρ‡Π½Ρ‹ΠΌΠΈ 7 сСгмСнтами. Π’Π½Π°Ρ‡Π°Π»Π΅ я попытался, ΠΈ Π²ΠΎΡ‚ какая Ρ‡Π΅ΠΏΡƒΡ…Π° ΠΏΠΎΠ»ΡƒΡ‡ΠΈΠ»Π°ΡΡŒ:
Часы с 7 сСгмСнтами Π½Π° Ρ†ΠΈΡ„Ρ€Ρƒ. Π’ΠΈΡ…ΠΈΠΉ уТас.

Β ΠžΡ€Π³Π°Π½ΠΈΠ·Π°Ρ†ΠΈΡ сСгмСнтов - ΠΎΠ±Ρ‰ΠΈΠΉ ΠΊΠ°Ρ‚ΠΎΠ΄:
Π’ ΠΊΠ°ΠΆΠ΄ΠΎΠΌ сСгмСнтС Π±ΡƒΠ΄Π΅Ρ‚ ΠΎΡ‚ 1 Π΄ΠΎ 3 свСтодиодов, ΠΈ ΡΠΎΠ΅Π΄ΠΈΠ½ΡΡ‚ΡŒΡΡ ΠΎΠ½ΠΈ Π±ΡƒΠ΄ΡƒΡ‚ ΠΏΠΎΡΠ»Π΅Π΄ΠΎΠ²Π°Ρ‚Π΅Π»ΡŒΠ½ΠΎ. Π“Π΄Π΅ располоТСн ΠΊΠ°ΠΊΠΎΠΉ сСгмСнт Π±ΡƒΠ΄Π΅Ρ‚ Π²ΠΈΠ΄Π½ΠΎ Π½Π° Ρ„ΠΎΡ‚ΠΎ Π½ΠΈΠΆΠ΅.
ΠŸΡ€ΠΎΡ†Π΅ΡΡ изготовлСния 1 ΠΌΠ°ΠΊΠ΅Ρ‚Π½ΠΎΠΉ ΠΏΠ»Π°Ρ‚Ρ‹ с 2 Ρ†ΠΈΡ„Ρ€Π°ΠΌΠΈ выглядит Ρ‚Π°ΠΊ:
  1. На ΠΌΠ°ΠΊΠ΅Ρ‚Π½ΠΎΠΉ ΠΏΠ»Π°Ρ‚Π΅ со стороны ΠΌΠ΅Ρ‚Π°Π»Π»ΠΈΠ·Π°Ρ†ΠΈΠΈ Ρ€Π°Π·ΠΌΠ΅Ρ‚ΠΈΡ‚ΡŒ отвСрстия для 2 Ρ†ΠΈΡ„Ρ€;
  2. ΠΠ°Π»ΠΎΠΆΠΈΡ‚ΡŒ ΠΊΠ°Ρ€Ρ‚ΠΎΠ½ с Π»ΠΈΡ†Π΅Π²ΠΎΠΉ стороны, ΠΏΡ€ΠΎΠ±ΠΈΡ‚ΡŒ Π² Π½Π΅ΠΌ отвСрстия ΠΏΠΎΠ΄ Π½ΠΎΠΆΠΊΠΈ свСтодиодов;
  3. ΠŸΠΎΡΡ‚Π°Π²ΠΈΡ‚ΡŒ свСтодиоды Π½Π° мСсто, ΡΠΏΠ°ΡΡ‚ΡŒ ΠΈΡ… соотвСствСнно схСмС "ΠΎΠ±Ρ‰ΠΈΠΉ ΠΊΠ°Ρ‚ΠΎΠ΄".
Π’Π°ΠΊ выглядят Π³ΠΎΡ‚ΠΎΠ²Ρ‹Π΅ ΠΌΠ°ΠΊΠ΅Ρ‚ΠΊΠΈ спСрСди ΠΈ сзади:

Π’Π°ΠΆΠ½ΠΎ ΠΏΠΎΠΌΠ΅Ρ‚ΠΈΡ‚ΡŒ Π²Π΅Ρ€Ρ…, Π° Ρ‚Π°ΠΊΠΆΠ΅ Π·Π° Ρ‡Ρ‚ΠΎ ΠΎΡ‚Π²Π΅Ρ‡Π°Π΅Ρ‚ данная ΠΏΠ»Π°Ρ‚Π° - часы ΠΈΠ»ΠΈ ΠΌΠΈΠ½ΡƒΡ‚Ρ‹, особСнно Ссли ΠΊΡ€Π΅ΠΏΠ»Π΅Π½ΠΈΠ΅ Ρ†ΠΈΡ„Ρ€ ΠΊ корпусу Π±ΡƒΠ΄Π΅Ρ‚ нСсиммСтричным. МалСнькая чСрная ΠΏΠ»Π°Ρ‚ΠΊΠ° содСрдит всСго 1 свСтодиод для Ρ€Π°Π·Π΄Π΅Π»ΠΈΡ‚Π΅Π»ΡŒΠ½ΠΎΠΉ Ρ‚ΠΎΡ‡ΠΊΠΈ.

Часовая ΠΈ минутная ΠΏΠ»Π°Ρ‚Ρ‹ Π² сборС.
ПослС Ρ‚ΠΎΠ³ΠΎ, ΠΊΠ°ΠΊ Ρ†ΠΈΡ„Ρ€Ρ‹ Π³ΠΎΡ‚ΠΎΠ²Ρ‹, ΠΌΠΎΠΆΠ½ΠΎ ΡΠΎΠ±ΠΈΡ€Π°Ρ‚ΡŒ ΠΈΡ… Π² корпус ΠΈ ΡΠΌΠΎΡ‚Ρ€Π΅Ρ‚ΡŒ Π½Π° Ρ€Π΅Π·ΡƒΠ»ΡŒΡ‚Π°Ρ‚:

ΠšΡ€Π΅ΠΏΠ»Π΅Π½ΠΈΠ΅ Ρ†ΠΈΡ„Ρ€ Π½Π° Ρ€Π°ΠΌΠ΅, Π²ΠΈΠ΄ сзади. Π£ΠΆΠ΅ ΠΏΡ€ΠΈΠΊΡ€Π΅ΠΏΠ»Π΅Π½Ρ‹ Π±Π»ΠΎΠΊΠΈ питания Π½Π° 5 ΠΈ 12 Π’ΠΎΠ»ΡŒΡ‚.

Если вас устраиваСт Ρ‚Π°ΠΊΠΎΠΉ Π²ΠΈΠ΄, Ρ‚ΠΎ ΠΌΠΎΠΆΠ½ΠΎ ΠΏΡ€ΠΈΡΡ‚ΡƒΠΏΠΈΡ‚ΡŒ ΠΊ ΡΠ»Π΅Π΄ΡƒΡŽΡ‰Π΅ΠΌΡƒ ΡˆΠ°Π³Ρƒ. МСня Π½Π΅ устроили ΡΠΊΠΎΡˆΠ΅Π½Π½Ρ‹Π΅ Ρ€Π°ΠΌΠΊΠΈ ΠΈΠ· Ρ‡Π΅Ρ€Π½ΠΎΠΉ краски Π½Π° стСклС, я снял краску со стСкла ΠΈ Π·Π°ΠΌΠ΅Π½ΠΈΠ» Π΅Π΅ Ρ‚ΠΎΠ½ΠΈΡ€ΠΎΠ²ΠΎΡ‡Π½ΠΎΠΉ ΠΏΠ»Π΅Π½ΠΊΠΎΠΉ:

На Ρ„ΠΎΡ‚ΠΎ Π²ΠΈΠ΄Π½Ρ‹ Π΄ΠΎΠΏΠΎΠ»Π½ΠΈΡ‚Π΅Π»ΡŒΠ½Ρ‹Π΅ Ρ†ΠΈΡ„Π΅Ρ€ΠΊΠΈ Π² Π²Π΅Ρ€Ρ…Π½Π΅ΠΌ Π»Π΅Π²ΠΎΠΌ ΡƒΠ³Π»Ρƒ. Π­Ρ‚ΠΎ ΠΏΠΎΡ‚ΠΎΠΌΡƒ, Ρ‡Ρ‚ΠΎ Π²Π½Π°Ρ‡Π°Π»Π΅ я Ρ…ΠΎΡ‚Π΅Π» Π΄ΠΎΠ±Π°Π²ΠΈΡ‚ΡŒ Π² часы Ρ‚Π΅Ρ€ΠΌΠΎΠΌΠ΅Ρ‚Ρ€, Π½ΠΎ ΠΏΠΎΡ‚ΠΎΠΌ ΠΏΠ΅Ρ€Π΅Π΄ΡƒΠΌΠ°Π» ΠΈ ΡƒΠ±Ρ€Π°Π» ΠΈΡ….
Π—Π°ΠΊΠΎΠ½Ρ‡Π΅Π½Π½Ρ‹ΠΉ Π²ΠΈΠ΄ ΡƒΠΆΠ΅ с ΠΏΠ»Π΅Π½ΠΊΠΎΠΉ.

Π¨Π°Π³ 2. Π Π°Π·Ρ€Π°Π±ΠΎΡ‚ΠΊΠ° элСктронной Π½Π°Ρ‡ΠΈΠ½ΠΊΠΈ.

Π’ основу я взял Ρ‚ΠΎ Ρ‡Ρ‚ΠΎ Π±Ρ‹Π»ΠΎ ΠΏΠΎΠ΄ Ρ€ΡƒΠΊΠΎΠΉ - ΠΌΠΈΠΊΡ€ΠΎΠΊΠΎΠ½Ρ‚Ρ€ΠΎΠ»Π»Π΅Ρ€ PIC16F887. Π‘Ρ…Π΅ΠΌΠ° ΠΏΠ΅Ρ€Π΅ΠΆΠΈΠ»Π° нСсколько вСрсий ΠΈ ΠΏΠ΅Ρ€Π΅Π΄Π΅Π»ΠΎΠΊ. Π˜Π·Π½Π°Ρ‡Π°Π»ΡŒΠ½ΠΎ всС транзисторы Π½Π° схСмС Π±Ρ‹Π»ΠΈ ΠΏΠΎΠ»Π΅Π²Ρ‹ΠΌΠΈ, Π½ΠΎ, ΠΊΠ°ΠΊ Π²Ρ‹ΡΡΠ½ΠΈΠ»ΠΎΡΡŒ, напряТСниС питания 5Π’ ΠΎΡ‚ΠΊΡ€Ρ‹Π²Π°Π΅Ρ‚ ΠΈΡ… Π½Π΅ ΠΏΠΎΠ»Π½ΠΎΡΡ‚ΡŒΡŽ, ΠΈ ΠΎΠ½ΠΈ Π±Ρ‹Π»ΠΈ Π·Π°ΠΌΠ΅Π½Π΅Π½Ρ‹ Π½Π° старыС Π΄ΠΎΠ±Ρ€Ρ‹Π΅ NPN транзисторы.
ВСрсия 1 схСмы ΠΈΡΠΏΠΎΠ»ΡŒΠ·ΡƒΠ΅Ρ‚ часовой ΠΊΠ²Π°Ρ€Ρ† для тактирования ΠΌΠΈΠΊΡ€ΠΎΠΊΠΎΠ½Ρ‚Ρ€ΠΎΠ»Π»Π΅Ρ€Π° ΠΈ ΠΈΠΌΠ΅Π΅Ρ‚ ΠΏΠΎΠ΄ΠΊΠ»ΡŽΡ‡Π΅Π½ΠΈΠ΅ ΠΊ дисплСю Ρ‚Π΅ΠΌΠΏΠ΅Ρ€Π°Ρ‚ΡƒΡ€Ρ‹:


Π’ΠΎ Π²Ρ‚ΠΎΡ€ΠΎΠΉ вСрсии я ΠΈΠ·ΠΌΠ΅Π½ΠΈΠ» источник тактирования МК Π½Π° Π²Π½ΡƒΡ‚Ρ€Π΅Π½Π½ΠΈΠΉ с частотой 4ΠœΠ“Ρ†, Ρ‚Π°ΠΊ ΠΊΠ°ΠΊ частоты часового кристалла Π±Ρ‹Π»ΠΎ нСдостаточно для ΠΌΡƒΠ»ΡŒΡ‚ΠΈΠΏΠ»Π΅ΠΊΡΠΈΡ€ΠΎΠ²Π°Π½ΠΈΡΠ΄ΠΈΡΠΏΠ»Π΅Ρ часов. ΠšΠ²Π°Ρ€Ρ† ΠΎΡ‚ часов Π±Ρ‹Π» поставлСн источником Ρ‚Π°ΠΉΠΌΠ΅Ρ€Π° 1.
Ѐинальная вСрсия схСмы часов.
Π‘Ρ…Π΅ΠΌΠ° простая ΠΈ Π½Π΅ ΠΈΠΌΠ΅Π΅Ρ‚ Π½ΠΈΡ‡Π΅Π³ΠΎ лишнСго, Ρ‚Π°ΠΊ Ρ‡Ρ‚ΠΎ ΠΎΠ±ΡŠΡΡΠ½ΡΡ‚ΡŒ Ρ‚ΡƒΡ‚ Π½Π΅Ρ‡Π΅Π³ΠΎ. МоТно ΠΏΡ€ΠΈΡΡ‚ΡƒΠΏΠ°Ρ‚ΡŒ ΠΊ сборкС  схСмы Π½Π° ΠΌΠ°ΠΊΠ΅Ρ‚Π½ΠΎΠΉ ΠΏΠ»Π°Ρ‚Π΅:

Β 
УТасно запутанная пСрвая вСрсия ΠΏΠ»Π°Ρ‚Ρ‹. Π― психанул ΠΈ спаял Π·Π°Π½ΠΎΠ²ΠΎ.

Ѐинальная вСрсия ΠΏΠ»Π°Ρ‚Ρ‹. Намного мСньшС спагСтти.
Β Π§Ρ‚ΠΎ Π½Π΅ Π·Π°Π±Ρ‹Ρ‚ΡŒ Π²ΠΎ врСмя ΠΏΠ°ΠΉΠΊΠΈ:
  • Π€ΠΈΠ»ΡŒΡ‚Ρ€ΡƒΡŽΡ‰ΠΈΠ΅ кондСнсаторы Π½Π° линиях питания 12 ΠΈ 5 Π’. Π‘ΠΎΠ»ΡŒΡˆΠΎΠΉ Смкости для низкочастотных ΠΏΠΎΠΌΠ΅Ρ… ΠΈ ΠΌΠ°Π»Π΅Π½ΡŒΠΊΠΈΡ… СмкостСй ΠΏΠΎΠ±Π»ΠΈΠΆΠ΅ ΠΊ МК для высокочастотных ΠΏΠΎΠΌΠ΅Ρ….
  • ΠŸΠΎΠ΄ΠΎΠ±Ρ€Π°Ρ‚ΡŒ Π½Π°Π³Ρ€ΡƒΠ·ΠΎΡ‡Π½ΡƒΡŽ Π΅ΠΌΠΊΠΎΡΡ‚ΡŒ для кристалла 32.768 ΠšΠ“Ρ†. ΠžΡ‚ этого Π±ΡƒΠ΄Π΅Ρ‚ Π·Π°Π²ΠΈΡΠΈΡ‚ΡŒ Ρ‚ΠΎΡ‡Π½ΠΎΡΡ‚ΡŒ часов. ΠŸΡ€ΠΎ свой кристалл я Π½Π΅ Π·Π½Π°Π» Π½ΠΈΡ‡Π΅Π³ΠΎ, поэтому ΠΏΠΎ ΠΎΡ‡Π΅Ρ€Π΅Π΄ΠΈ провСрял Ρ‚ΠΎΡ‡Π½ΠΎΡΡ‚ΡŒ с кондСнсаторами ΠΎΡ‚ 6.8 Π΄ΠΎ 20 ΠΏΠ€. Π›ΡƒΡ‡ΡˆΠΈΠ΅ Ρ€Π΅Π·ΡƒΠ»ΡŒΡ‚Π°Ρ‚Ρ‹ ΠΏΠΎΠ»ΡƒΡ‡ΠΈΠ»ΠΈΡΡŒ с 6.8 ΠΏΠ€ (Π·Π° 16 часов Π½Π΅ отстали Π½ΠΈ Π½Π° сСкунду).

Π¨Π°Π³ 3. Π‘ΠΎΠ±Ρ€Π°Ρ‚ΡŒ, Π½Π°ΡΠ»Π°ΠΆΠ΄Π°Ρ‚ΡŒΡΡ.

К этому ΠΌΠΎΠΌΠ΅Π½Ρ‚Ρƒ всС ΠΏΠΎ ΠΎΡ‚Π΄Π΅Π»ΡŒΠ½ΠΎΡΡ‚ΠΈ Π΄ΠΎΠ»ΠΆΠ½ΠΎ Π±Ρ‹Ρ‚ΡŒ Π³ΠΎΡ‚ΠΎΠ²ΠΎ. ΠžΡΡ‚Π°Π΅Ρ‚ΡΡ Ρ‚ΠΎΠ»ΡŒΠΊΠΎ Π·Π°Π»ΠΈΡ‚ΡŒ ΠΏΡ€ΠΎΡˆΠΈΠ²ΠΊΡƒ, ΡΠΎΠ±Ρ€Π°Ρ‚ΡŒ всС вмСстС ΠΈ Π·Π°ΠΏΡƒΡΠΊΠ°Ρ‚ΡŒ.

Π˜ΡΡ…ΠΎΠ΄Π½Ρ‹Π΅ ΠΊΠΎΠ΄Ρ‹ ΠΏΡ€ΠΎΡˆΠΈΠ²ΠΊΠΈ Π½Π° C ΠΈ схСма Π² Ρ„ΠΎΡ€ΠΌΠ°Ρ‚Π΅ Eagle CAD

Π’ ΠΌΠΎΠ΅ΠΌ случаС Ρ‚Ρ€Π°Π³ΠΈΡ‡Π½Ρ‹Π΅ события ΠΏΡ€ΠΈΠ²Π΅Π»ΠΈ ΠΊ Π³ΠΈΠ±Π΅Π»ΠΈ ΠΎΡ€ΠΈΠ³ΠΈΠ½Π°Π»ΡŒΠ½ΠΎΠΉ Ρ€Π°ΠΌΡ‹ ΠΈΠ· Π”Π‘ΠŸ ΠΈ Π²ΠΈΠ½ΠΎΠ²Π½ΠΈΠΊΡƒ ΠΏΡ€ΠΈΡˆΠ»ΠΎΡΡŒ ΡΠΎΠ±ΠΈΡ€Π°Ρ‚ΡŒ Π½ΠΎΠ²Ρ‹ΠΉ корпус. Если Ρƒ вас Ρ€ΡƒΠΊΠΈ растут ΠΏΡ€Π°Π²ΠΈΠ»ΡŒΠ½ΠΎ, Ρ‚ΠΎ ΡΠΎΠ±ΠΈΡ€Π°Ρ‚ΡŒ Π½ΠΎΠ²Ρ‹ΠΉ корпус Π½Π΅ ΠΎΠ±ΡΠ·Π°Ρ‚Π΅Π»ΡŒΠ½ΠΎ.
Π€ΠΎΡ‚ΠΎ ΠΎΠΊΠΎΠ½Ρ‡Π°Ρ‚Π΅Π»ΡŒΠ½ΠΎΠ³ΠΎ Ρ€Π΅Π·ΡƒΠ»ΡŒΡ‚Π°Ρ‚Π°:

↧
↧

Infrared remote controlled light switch with ATTiny2313

$
0
0
На русском

Back when I was only starting to dabble in electronics, I needed a project that would meet the following requirements:
  • simple to make;
  • original (i.e. done entirely by myself from scratch);
  • containing a microcontroller;
  • and maybe the most important of all, useful. I've had enough devices I assembled just to dismantle the whole thing a month later.
The thing I came up with at the time was a light swich for my room controlled over an IR remote from TV. Remote that I had used RC-5 protocol, hence the firmware is suited for any RC-5 compatible remote.
Everyone is familiar to the everliving problem with switching the lights off in your room before going to bed and stumbling back across the room. The IR switch I describe here solves that problem, and I can definitely tell that this project was a success - I am still using it with no regret.

That's what it looks like. The blue cover is a lid from some beauty product.


As usual, I am putting up the link for source code, schematic and PCB at the end of the article.

Schematics


The schematic is pretty straightforward. Although it may be simple for me, this device is intended for absolute beginners in electronics so I'll try to explain every bit of it.

Power is supplied from an external 5V power supply (not sure about current, should be a tiny figure). There's C1 for filtering ripples in power supply, it's an electrolytic capacitor and the value doesn't matter really much, can be anywhere from 10 to 1000uF. There's also C2 and C3 for the same purpose, and those are placed as close as possible to the point of consumption, that is, to microcontroller's power supply pins.

Β The heart of the circuit is ATTiny2313 clocked at 8MHz. C4 and C5 are load capacitors for crystal. There's input - the switch S1 with debouncing circuit and IR receiver designed specifically for reception of 36KHz pulses (TSOP1736); and then there's output - the relay which is switched on and off by means of a simple bipolar transistor. Diode D1 supresses the voltage spikes that appear at the time of switching across the relay coil.

The only thing leaft is an ICSP headerΒ  that I use to program my microcontrollers soldered on the board. And that's it, really.

Hardware

Now that the theory is behind you can start etching the PCB and assembling the device. My looks awful after lots of modifications of the original design, but here it goes:

Your switch is not supposed to look like crap, unlike mine.

Next step would be modifying (the code my remote sends when I press the OFF button may be different from what your remote sends, just edit the code) , compiling and uploading the firmware and installing the new smart switch in place of the old dumb one:

Hardware in Eagle and C code for AVRΒ 

That's it, no more cold feetsies for ya!

This is an open-source hardware, you are free to modify whatever you want.Β 
↧

Π’Ρ‹ΠΊΠ»ΡŽΡ‡Π°Ρ‚Π΅Π»ΡŒ свСта с ΡƒΠΏΡ€Π°Π²Π»Π΅Π½ΠΈΠ΅ΠΌ с ΠΏΡƒΠ»ΡŒΡ‚Π° ΠΎΡ‚ Π’Π’ Π½Π° ATTiny2313

$
0
0
In English

Когда ΡΡ‚ΠΎΠ»ΡŒΠΊΠΎ Π½Π°Ρ‡ΠΈΠ½Π°Π»Π±Π°Π»ΠΎΠ²Π°Ρ‚ΡŒΡΡΡΠ»Π΅ΠΊΡ‚Ρ€ΠΎΠ½ΠΈΠΊΠΎΠΉ, ΠΌΠ½Π΅ Π½ΡƒΠΆΠ΅Π½ Π±Ρ‹Π»ΠΏΡ€ΠΎΠ΅ΠΊΡ‚, ΠΊΠΎΡ‚ΠΎΡ€Ρ‹ΠΉ ΠΎΡ‚Π²Π΅Ρ‡Π°Π» Π±Ρ‹ ΡΠ»Π΅Π΄ΡƒΡŽΡ‰ΠΈΠΌ трСбованиям:
  • простой;
  • ΠΎΡ€ΠΈΠ³ΠΈΠ½Π°Π»ΡŒΠ½Ρ‹ΠΉ (Ρ‚.Π΅. сдСланный мною с нуля);
  • ΠΈΡΠΏΠΎΠ»ΡŒΠ·ΡƒΡŽΡ‰ΠΈΠΉ ΠΌΠΈΠΊΡ€ΠΎΠΊΠΎΠ½Ρ‚Ρ€ΠΎΠ»Π»Π΅Ρ€;
  • ΠΈ, Π²ΠΎΠ·ΠΌΠΎΠΆΠ½ΠΎ,самоС Π²Π°ΠΆΠ½ΠΎΠ΅, ΠΏΠΎΠ»Π΅Π·Π½Ρ‹ΠΉ. Π£ мСня былодостаточноустройств которыСя ΡΠΎΠ±Ρ€Π°Π»Ρ‚ΠΎΠ»ΡŒΠΊΠΎ для Ρ‚ΠΎΠ³ΠΎ Ρ‡Ρ‚ΠΎΠ±Ρ‹Ρ€Π°Π·Π»ΠΎΠΌΠ°Ρ‚ΡŒ Ρ‡Π΅Ρ€Π΅Π· мСсяц.
Π’ΠΎΡ‚ Ρ‡Ρ‚ΠΎ япридумал - Π²Ρ‹ΠΊΠ»ΡŽΡ‡Π°Ρ‚Π΅Π»ΡŒ свСта управляСмый ΠΏΡƒΠ»ΡŒΡ‚ΠΎΠΌ ΠΎΡ‚ Ρ‚Π΅Π»Π΅Π²ΠΈΠ·ΠΎΡ€Π°. ΠŸΡƒΠ»ΡŒΡ‚ΠΊΠΎΡ‚ΠΎΡ€Ρ‹ΠΉΡƒ мСня Π±Ρ‹Π» использовал ΠΏΡ€ΠΎΡ‚ΠΎΠΊΠΎΠ»RC-5, ΡΠ»Π΅Π΄ΠΎΠ²Π°Ρ‚Π΅Π»ΡŒΠ½ΠΎ,ΠΏΡ€ΠΎΡˆΠΈΠ²ΠΊΠ°ΠΏΠΎΠ΄Ρ…ΠΎΠ΄ΠΈΡ‚Π΄Π»Ρ Π»ΡŽΠ±ΠΎΠ³ΠΎΠΏΡƒΠ»ΡŒΡ‚Π°ΡΒ RC-5.

ВсС знакомыс бСссмСртной проблСмойс Π²Ρ‹ΠΊΠ»ΡŽΡ‡Π΅Π½ΠΈΠ΅ΠΌ свСта Π²ΠΊΠΎΠΌΠ½Π°Ρ‚Π΅ΠΏΠ΅Ρ€Π΅Π΄ сноми Π±Ρ€ΠΎΠΆΠ΄Π΅Π½ΠΈΠΈΒ Ρ‡Π΅Ρ€Π΅Π· Ρ‚Π΅ΠΌΠ½ΡƒΡŽ ΠΊΠΎΠΌΠ½Π°Ρ‚Ρƒ (ΠΏΡ€ΠΈΠ²Π΅Ρ‚, сломанный ΠΌΠΈΠ·ΠΈΠ½Π΅Ρ† Π½Π° Π½ΠΎΠ³Π΅!). ИК Π²Ρ‹ΠΊΠ»ΡŽΡ‡Π°Ρ‚Π΅Π»ΡŒ которыйя ΠΎΠΏΠΈΡΡ‹Π²Π°ΡŽΠ² этой ΡΡ‚Π°Ρ‚ΡŒΠ΅Ρ€Π΅ΡˆΠ°Π΅Ρ‚ эту ΠΏΡ€ΠΎΠ±Π»Π΅ΠΌΡƒ, ΠΈ я ΠΌΠΎΠ³ΡƒΠΎΠΏΡ€Π΅Π΄Π΅Π»Π΅Π½Π½ΠΎ ΡΠΊΠ°Π·Π°Ρ‚ΡŒ, чтоэтот проСктудался-ядо сих ΠΏΠΎΠ»ΡŒΠ·ΡƒΡŽΡΡŒ Π²Ρ‹ΠΊΠ»ΡŽΡ‡Π°Ρ‚Π΅Π»Π΅ΠΌ с ΡƒΠ΄ΠΎΠ²ΠΎΠ»ΡŒΡΡ‚Π²ΠΈΠ΅ΠΌ.


Π’ΠΎΡ‚ Ρ‚Π°ΠΊ ΠΎΠ½ выглядит. ΠšΡ€Ρ‹ΡˆΠΊΠ° снята с ΠΊΠ°ΠΊΠΎΠΉ-Ρ‚ΠΎ Π±Π°Π½ΠΊΠΈ с космСтикой.

Как ΠΎΠ±Ρ‹Ρ‡Π½ΠΎ,Π²ΠΊΠΎΠ½Ρ†Π΅ ΡΡ‚Π°Ρ‚ΡŒΠΈΡ ΠΏΠΎΡΡ‚Π°Π²Π»ΡŽΒ ΡΡΡ‹Π»ΠΊΡƒ наисходный ΠΊΠΎΠ΄, ΡΡ…Π΅ΠΌΡƒΠΈΠΏΠ΅Ρ‡Π°Ρ‚Π½ΡƒΡŽ ΠΏΠ»Π°Ρ‚Ρƒ.

ΠŸΡ€ΠΈΠ½Ρ†ΠΈΠΏΠΈΠ°Π»ΡŒΠ½Π°Ρ схСма


Π‘Ρ…Π΅ΠΌΠ° ΡƒΡΡ‚Ρ€ΠΎΠΉΡΡ‚Π²Π°Π΄ΠΎΠ²ΠΎΠ»ΡŒΠ½ΠΎ проста. Π₯ΠΎΡ‚ΡŒ это ΠΌΠΎΠΆΠ΅Ρ‚ Π±Ρ‹Ρ‚ΡŒΠΈ простодля мСня, Π½ΠΎ это устройство прСдназначСнодля Π°Π±ΡΠΎΠ»ΡŽΡ‚Π½Ρ‹Ρ… Π½ΠΎΠ²ΠΈΡ‡ΠΊΠΎΠ²Π² элСктроникС, Ρ‚Π°ΠΊ Ρ‡Ρ‚ΠΎ я ΠΏΠΎΡΡ‚Π°Ρ€Π°ΡŽΡΡŒ ΠΎΠ±ΡŠΡΡΠ½ΠΈΡ‚ΡŒΠΊΠ°ΠΆΠ΄ΡƒΡŽ Π΅Π³ΠΎ Ρ‡Π°ΡΡ‚ΡŒ.
ΠŸΠΈΡ‚Π°Π½ΠΈΠ΅ осущСствляСтся ΠΎΡ‚Π²Π½Π΅ΡˆΠ½Π΅Π³ΠΎ источникапитания 5 Π’. (Π½Π΅ΡƒΠ²Π΅Ρ€Π΅Π½ ΠΊΠ°ΠΊΠΎΠΉΡ‚ΠΎΠΊ, Π½ΠΎ Π΄ΠΎΠ»ΠΆΠ΅Π½ Π±Ρ‹Ρ‚ΡŒΠΊΡ€ΠΎΡˆΠ΅Ρ‡Π½Ρ‹ΠΌ). C1ΠΏΡ€Π΅Π΄Π½Π°Π·Π½Π°Ρ‡Π΅Π½ для Ρ„ΠΈΠ»ΡŒΡ‚Ρ€Π°Ρ†ΠΈΠΈΠΏΠΎΠΌΠ΅Ρ… ΠΏΠΎ ΠΏΠΈΡ‚Π°Π½ΠΈΡŽ, это элСктролитичСский кондСнсатори Π΅ΠΌΠΊΠΎΡΡ‚ΡŒ Π΅Π³ΠΎΒ Π½Π΅ ΠΈΠΌΠ΅Π΅Ρ‚ особого значСния,ΠΌΠΎΠΆΠ΅Ρ‚ Π±Ρ‹Ρ‚ΡŒ ΠΎΡ‚10 Π΄ΠΎ1000 ΠΌΠΊΠ€. Π’Π°ΠΊΠΆΠ΅Β  Π½Π° схСмС располоТСны Π‘2 ΠΈ Π‘3 для Ρ‚ΠΎΠΉ ΠΆΠ΅ Ρ†Π΅Π»ΠΈ, ΠΈΡ€Π°Π·ΠΌΠ΅Ρ‰Π΅Π½Ρ‹ΠΎΠ½ΠΈ ΠΊΠ°ΠΊ ΠΌΠΎΠΆΠ½ΠΎ блиТСкмСсту потрСблСниятока, Ρ‚ΠΎ Π΅ΡΡ‚ΡŒ, ΠΊ выводупитаниямикроконтроллСра. БСрдцСмсхСмы являСтсяATtiny2313с Ρ‚Π°ΠΊΡ‚ΠΎΠ²ΠΎΠΉ частотой8 ΠœΠ“Ρ†. Π‘4 ΠΈ Π‘5 - Π½Π°Π³Ρ€ΡƒΠ·ΠΎΡ‡Π½Ρ‹Π΅ кондСнсаторы длярСзонатора Q1. Π•ΡΡ‚ΡŒ устройстваввода- Π²Ρ‹ΠΊΠ»ΡŽΡ‡Π°Ρ‚Π΅Π»ΡŒS1собвязкой для устранСния Π΄Ρ€Π΅Π±Π΅Π·Π³Π° ΠΊΠΎΠ½Ρ‚Π°ΠΊΡ‚ΠΎΠ²ΠΈ ИК-ΠΏΡ€ΠΈΠ΅ΠΌΠ½ΠΈΠΊ, Ρ€Π°Π·Ρ€Π°Π±ΠΎΡ‚Π°Π½Π½Ρ‹ΠΉ ΡΠΏΠ΅Ρ†ΠΈΠ°Π»ΡŒΠ½ΠΎ Π΄Π»ΡΠΏΡ€ΠΈΠ΅ΠΌΠ°ΠΈΠΌΠΏΡƒΠ»ΡŒΡΠΎΠ² частотой36 ΠΊΠ“Ρ†(TSOP1736); ΠΈ Π΅ΡΡ‚ΡŒΒ  устройства Π²Ρ‹Π²ΠΎΠ΄Π° - Ρ€Π΅Π»Π΅, ΠΊΠΎΡ‚ΠΎΡ€ΠΎΠ΅Π²ΠΊΠ»ΡŽΡ‡Π°Π΅Ρ‚ΡΡ ΠΈ Π²Ρ‹ΠΊΠ»ΡŽΡ‡Π°Π΅Ρ‚ΡΡΡ ΠΏΠΎΠΌΠΎΡ‰ΡŒΡŽΠΏΡ€ΠΎΡΡ‚ΠΎΠ³ΠΎΠ±ΠΈΠΏΠΎΠ»ΡΡ€Π½ΠΎΠ³ΠΎ транзистора. Π”ΠΈΠΎΠ΄D1подавляСтскачки напряТСния, ΠΊΠΎΡ‚ΠΎΡ€Ρ‹Π΅ ΠΏΠΎΡΠ²Π»ΡΡŽΡ‚ΡΡ Π²ΠΎ Π²Ρ€Π΅ΠΌΡΠΏΠ΅Ρ€Π΅ΠΊΠ»ΡŽΡ‡Π΅Π½ΠΈΡΡ‚ΠΎΠΊΠ° Ρ‡Π΅Ρ€Π΅Π·ΠΊΠ°Ρ‚ΡƒΡˆΠΊΡƒ Ρ€Π΅Π»Π΅.
ЕдинствСнноС, Ρ‡Ρ‚ΠΎ ΠΎΡΡ‚Π°Π»ΠΎΡΡŒΡΡ‚ΠΎΡ€Π°Π·ΡŠΠ΅ΠΌ для внутрисхСмного программирования (ICSP). Π―ΠΈΡΠΏΠΎΠ»ΡŒΠ·ΡƒΡŽΠ΅Π³ΠΎ для программирования микроконтроллСровуТС напаянныхнаплату. Π’ΠΎΡ‚ ΠΈ всС.


Π–Π΅Π»Π΅Π·ΠΎ ΠΈ сборка

Π₯Π²Π°Ρ‚ΠΈΡ‚ Ρ‚Π΅ΠΎΡ€ΠΈΠΈ, ΠΌΠΎΠΆΠ½ΠΎ Π½Π°Ρ‡Π°Ρ‚ΡŒΡ‚Ρ€Π°Π²Π»Π΅Π½ΠΈΠ΅ΠΏΠ΅Ρ‡Π°Ρ‚Π½ΠΎΠΉ платыисборку устройства. Моя ΠΏΠ»Π°Ρ‚Π° выглядитуТасно послС ΠΌΠ½ΠΎΠ³ΠΎΡ‡ΠΈΡΠ»Π΅Π½Π½Ρ‹Ρ…ΠΌΠΎΠ΄ΠΈΡ„ΠΈΠΊΠ°Ρ†ΠΈΠΉΠΎΡ€ΠΈΠ³ΠΈΠ½Π°Π»ΡŒΠ½ΠΎΠ³ΠΎ устройства, Π²ΠΎΡ‚ ΠΎΠ½Π°:

Π’Π°ΡˆΠ° ΠΏΠ»Π°Ρ‚Π° Π½Π΅ Π΄ΠΎΠ»ΠΆΠ½Π° Π²Ρ‹Π³Π»ΡΠ΄Π΅Ρ‚ΡŒ ΠΊΠ°ΠΊ ΠΊΠ°Π», Π² ΠΎΡ‚Π»ΠΈΡ‡ΠΈΠ΅ ΠΎΡ‚ ΠΌΠΎΠ΅ΠΉ.

Π‘Π»Π΅Π΄ΡƒΡŽΡ‰ΠΈΠΌ ΡˆΠ°Π³ΠΎΠΌΠ±ΡƒΠ΄Π΅Ρ‚ΠΌΠΎΠ΄ΠΈΡ„ΠΈΠΊΠ°Ρ†ΠΈΡ(ΠΊΠΎΠ΄ ΠΊΠΎΡ‚ΠΎΡ€Ρ‹ΠΉ посылаСт ΠΌΠΎΠΉ ΠΏΡƒΠ»ΡŒΡ‚ ΠΏΡ€ΠΈ Π½Π°ΠΆΠ°Ρ‚ΠΈΠΈΠ½Π° ΠΊΠ½ΠΎΠΏΠΊΡƒΠ’Π«ΠšΠ›ΠΌΠΎΠΆΠ΅Ρ‚ ΠΎΡ‚Π»ΠΈΡ‡Π°Ρ‚ΡŒΡΡΠΎΡ‚ Ρ‚ΠΎΠ³ΠΎ, чтопосылаСт Π²Π°ΡˆΠΏΡƒΠ»ΡŒΡ‚, просто ΠΎΡ‚Ρ€Π΅Π΄Π°ΠΊΡ‚ΠΈΡ€ΡƒΠΉΡ‚Π΅ ΠΊΠΎΠ΄), компиляция ΠΈΠ·Π°Π³Ρ€ΡƒΠ·ΠΊΠ°ΠΏΡ€ΠΎΡˆΠΈΠ²ΠΊΠΈ, послС Ρ‡Π΅Π³ΠΎ слСдуСтустановка Π½ΠΎΠ²ΠΎΠ³ΠΎΡƒΠΌΠ½ΠΎΠ³ΠΎ ΠΏΠ΅Ρ€Π΅ΠΊΠ»ΡŽΡ‡Π°Ρ‚Π΅Π»Ρ Π½Π° мСстСстарогои Ρ‚ΡƒΠΏΠΎΠ³ΠΎ:

Код ΠΏΡ€ΠΎΡˆΠΈΠ²ΠΊΠΈ Π½Π° C, схСма ΠΈ пСчатная ΠΏΠ»Π°Ρ‚Π° Eagle CADΒ 

Π‘ΠΊΠ°ΠΆΠΈΡ‚Π΅ Ρ…ΠΎΠ»ΠΎΠ΄Π½Ρ‹ΠΌ ступням ΠΏΡ€ΠΎΡ‰Π°ΠΉ!

Π­Ρ‚ΠΎΡ‚ ΠΏΡ€ΠΎΠ΅ΠΊΡ‚ являСтся ΠΎΡ‚ΠΊΡ€Ρ‹Ρ‚Ρ‹ΠΌ, Π²Ρ‹ ΠΌΠΎΠΆΠ΅Ρ‚Π΅ свободно Π²Π½ΠΎΡΠΈΡ‚ΡŒ Π»ΡŽΠ±Ρ‹Π΅ ΠΌΠΎΠ΄ΠΈΡ„ΠΈΠΊΠ°Ρ†ΠΈΠΈ.Β 
↧

Improvements to Arduino

$
0
0

Preface

Everyone knows Arduino. It's a versatile board that is great for when you need to make some piece of hadware work really quick without building a custom board and writing low-level code. Ever since I discovered that board I've been using it where flexibility and speed matter - robotics contests, mostly.
Now, considering Arduino is an open hardware, a lot of Arduino variations exist - actually too much to even try to list - and all of those clones try to either overcome some limitations that exist in original platform or add some useful functions to it.
This article is an aggregation of tricks for those who have an original Arduino board - some of those tricks are just improvisations I had to make up while I was working with Arduino, some of those I just found on the Internet and considered interesting.
Anyway, here's a collection of improvements:


Add a jumper to Vin pin

Original Arduino has a diode (D1) that protects the board from reverse polarity applied to DC jack connector.
Unfortunately, the creators didn't seem to want to protect Vin pin which serves the same function - supplying external voltage. For instance, accidentally shorting pins Vin and GND (they are located nex to each other) with power supplied from DC jack results in destroyed diode and burnt traces.

What you need to do is:

  • sever the trace from Vin to diode (which probably already blew during the short circuit),
  • replace a diode (definitely) and capacitors (maybe) - if an accident had already happened. Look for bulging tops on capacitors,
  • solder a preferably solid core wire between Vin pin and power jack.

Result:


Speed up and optimize


Convert to 3.3V

Here's a great writeup.

Make another

Bonus for those apt with soldering iron - a guide to making your perfect Arduino to suit all your needs.
1) Pick a microcontroller and make a basic Arduino boardΒ with whatever voltage and frequiency you want.
2) Add whatever you want to make it truly universal. For instance, I always found pin headers too flimsy for repeated use in prototyping. You could either make your board fit on a breadboard like this:
or replace pin headers altogether with screwless terminal blocks, possibly adding multiple headers for GND, 5V and 3.3V (three 5Vs, two 3.3Vs and 5 GNDs is what I consider perfect for most prototyping tasks):

To be continued

If you have some nifty hacks to add to this list, please write me back: headcra6 at gmail com.
↧

A guide to more finished PCBs

$
0
0
If you ever had your PCB manufactured at factory, odds are you're familiar with the following situation. You design a schematic, lay out the board, check it multiple times, then send Gerbers to manufacturer and some time later the box of shiny PCBs has arrived. You assemble it (or don't, some manufacturers offer a full assembly at moderate cost) only to find that something SO obvious is amiss.
There's so much to keep in mind when designing a schematic and PCB, and it's even harder when you don't do it regularly. That's why I decided to compile a list of

things to check before you submit your PCB to fab

Schematic

PCBs start with schematic diagram, that's why it's important to tidy it up first.

1)Draw dots at junctions. How's your schematic capture sofware supposed to know these crossing lines connect and those crossing lines do not? That's right, with the help of dots.
Well-arranged multivibrator. Notice the dots at the crossing junctions.

2)Add filtering capacitors: big electrolytics for low frequencies, small ceramics for high frequencies.
Two ceramic capacitors by the part for bypassing.

Small caps (100 nF generally) should be placed as close as possible to IC pins (on schematic, too!).
In serious analog circuitry also add inductor/mutual inductor/inductor-capacitor filters for better noice reduction.
Good links to learn about power supply filtering:
Designers guide manual on power supply filtering

TI SCAA048
Analog MT-101
Maxim AN4713
IntersilΒ AN1325

Filter calculator

3) Add protection - fuses, flyback diodes etc. (a thin trace can happen to be a fuse - see item 1 under "PCB")
NPN transistor protected by flyback diode
Ditto for PNP transistor

4) Add some means to program and test your rig!
Any fresh board needs testing and programming first. That's why you need a way to make temporary connections for measuring equipment. For these purposes you have a choice between the following:
Test pads for pogo pins
PogoISP Project
TagConnect ICSP Cable
Great choice for cases when you need maximal portability and high-density PCBs.
Test points for hook clips
Π‘onvenient in most through-hole designs.
Regular pin headers
(I assume everyone knows how those look)
Well, if you haven't stocked up on real test accesories, it's your choice.

PCB

1) Check the thickness of every trace. Insufficient thickness of any trace will result in that trace burning after you connect power to your PCB. Look at my example of PCB that modulates flyback transformer's arc so it would play music (nevermind the horrible arrangement of PCB):
I've outlined the path where high currents are switched through the primary of flyback xformer.
Aaand it corresponds to 2 traces that are only good for carrying signal!
Now this looks better:
Power traces should be thick even if they don't carry much current, it makes them more recognizable on the board.
2) 45 degree rule
It doesn't matter how you route your schematic if the signals don't go higher than 1MHz. Still, routing your board with 45 degrees everywhere makes its appearance more aesthetic:

Arbitrary angles
45 deg. everywhere

3) Arrange names on silkscreen, add meaningful designations wherever possible. Imagine you see your board for the first time and you have to figure out what to do to make it work - what to connect here and which jumper to close etc. Example of PCB for a wireless network node can be seen below:
I didn't take heed at proper silkscreen when I ordered the first batch which resulted in ugly boards
This looks better. Names, dates, pin names - everything is there.

4) Add ground and power planes for shortest possible current return path length. Also add planes under surface-mount components that tend to heat when used (voltage regulators, FETs etc.) for better thermal performance.

That's obviously not everything you have to keep in mind. All I described in this article is based on personal experience I have aquired over years of doing PCBs as a hobby.
↧
↧

Vocore tutorial: blinking an LED, using software SPI and unbricking

$
0
0

Β Introduction


Hello everyone, I've recently laid my hands on this interesting piece of hardware and this article will describe my experience with it. It is an attempt to gather together all those scattered pieces of information I found on Internet to get this thing running.
Predictably, I managed to brick Vocore while messing around with its operating system (the only working thing left in memory was the bootloader), so I'll describe how to easily get it running again.

Requirements

  • PC running Linux (I used Arch Linux)
  • LED, any value resistor, any button or switch.
  • Any USB to Serial board- Only for unbricking!


    Some helpful links we'll frequently use

    One page you're going to look at a lot is its layout.
    Hardware: descriptions, schematics, etc.

    Let's start!

    So, you have this board in front of you. You probably already connected 5v to it, switched on your power supply and login'd via ssh. If you didn't, go to this link and do it!
    What's next? First, to be able to configure the kernel of Vocore and, more importantly, to get a cross-compilation toolchain, we will have to compile OpenWrt, which is the OS that runs Vocore.

    Β Building OpenWrt

    1) Download OpenWrt
    2) Configure feeds
    Optional: install some (or all) feeds. I just installed nano because that's my favorite text editor in Linux
    3) Apply Vocore patch
    It makes OpenWrt use 16Mb flash instead 8Mb, sets the access point SSID to VoCore, turns the radio on by default, sets the root password to "vocore" and ip to 192.168.61.1
    Optional: you can change whatever you want - e.g. change the SSID to something you like more, change the root password, add security to Wifi etc..
    4) Configure the kernel.
    The first 3 selections have to be:
    Now go to
    and tick the following:
    Optional: add or delete utilities, modules, features. Unset menu items only if you are sure what they mean. When I did it first time I went on a rampage and wiped all unnecessary (or so I thought) features which resulted in perfectly working kernel that didn't have WiFi drivers in it.
    I would definitely include dmesg which is a handy program that displays system log so you know exactly why doesn't something work. To make use of software SPI you will need to check

    and to test if it works okay you should also check

    Using GPIOs that have alternative function (like JTAG, PCM, UART etc)? You're in for a surprise. Lunux kernel probably won't let you export (or use) those GPIOs. If you're sure you'll never need this pin's function, you can modify

    and remove the section that corresponds to the pin you need, for me it was
    and use it freely!
    5) Run make and wait patiently...
    -jN is the number of your CPU cores + 1.
    6) Flash the new firmware
    We are going to use the easiest method. I even made a script update_openwrt_on_vocore.sh to assist that (requires packages zenity and sshpass):
    Just connect to Vocore AP and run
    Text that pops up in a windows is what you have to type in telnet window (Couldn't make ssh run a command even though it should be as easy as ssh user@host 'COMMAND'. Know how to do it? Please write a comment).
    That's it! Wait for the AP to reappear and you can telnet to your brand new custom OpenWrt.

    Adding some hardware

    My aim was to make Vocore work with REYAX CC110LM boards (containing TI's CC110L):


    However, as an old microcontroller enthusiast I decided to add a blinky light and a button to see if I can make Linux blink an LED and read the state of a button. So I got to soldering this all on, I hope you can make your soldering look less messy:


    Schematic:
    led -Β Β Β Β Β Β Β  gpio7
    button - gpio19

    cc110l:
    SI -Β Β Β Β Β Β Β  gpio12
    SO -Β Β Β Β Β  gpio13
    SCLK - gpio14
    CSN -Β Β  gpio21
    GDO -Β  gpio0

    As you can see, I also hotglued miniUSB jack as a power connector. Quite handy.

    First program - Blink

    To switch GPIO 7 (with LED connected to it) on and off from shell you can telnet into Vocore and type the following:
    If you can't export GPIO, that most likely means it's allocated for some other purpose. Either put the LED on the pin you can export or you can free the pin of it's functionΒ  when you compile OpenWrt (go to item 4 of section "Building OpenWrt")
    Controlling GPIO from command line is nice, but that's not how it should work, so let's compile and launch our first program that blinks an LED. I'm using makefiles to automate compiling and uploading.
    Program structure is simple, and so is makefile. To compile and upload to target you only have to changeΒ  this line:

    to where your toolchain is located (it was built when you compiled OpenWrt) and run make in Blink directory.
    Make system will compile your program, copy it to vocore's /root and login you to telnet.
    You only have to launch it ./blink and look at the LED.

    Next up - buttons

    Now that we've dealt with GPIOs in output mode, we have input mode ahead of us - that's what the button is for.
    To assess the button's state (gpio19) from command line enter the following:
    Writing the program that will utilise the button is up to you ;-)

    SPI

    I'll be using software SPI via spi-gpio-custom kernel module. Adding an SPI device is as simple as launching
    where 1 is device id,
    14 is pin for SCK
    12 is pin for MOSI
    13 is pin for MISO
    0 is SPI mode,
    1000000 is max clock freq. (in Hz, so 1Mhz in this case)
    21 is pin for SS
    and using the resulting /dev/spidev1.0 like this:

    To check if SPI really works without having any slave device connected to your board simply short MISO to MOSI on Vocore (gpio12 to gpio13 in my case) and run
    and that's what it's supposed to yield:
    Β If what you see is a page of '0's, 'F's or some rubbish that is inconsistent between spidev_test launches, check if your wiring (and insmod command) is correct and try again.

    So you spoiled it

    In fact, I bricked Vocore so many times I made a script that automatically restore the default firmware. You can get it HERE
    Let's begin by connecting USB-Serial adaptor to Vocore's UART at pins 15 and 16. Then install putty , open it and create a profile "ttyUSB0@57600" that is just a serial port on ttyUSB0 at 57600 baud. Launch ./unbrick_ckermit_uart.sh and wait for it to do the job.

    The end.

    I'll write about using CC110L with Vocore if I'll have enough time.
    ↧

    Neoway M590 GPRS Tutorial: sending and receiving files from/to SD card

    $
    0
    0


    Here's a bit of useful info from what I've been doing lately. I got a job to design a device that connects to a web-server via GPRS and downloads a bunch of tiny WAV files, that it later plays on a specific schedule. Now, there's a jellybean part for this kind of task, and that is SIM900 (or SIM800), but I have a knock for "optimising" my electronics. OptimisingΒ  in this context means making everything I can as cheap as possible, provided it doesn't impact overall quality in a negative way.
    That's how I came upon this el cheapo GPRS module - Neoway M590. It's sold as an assemble-it-yourself kit at Aliexpress, and at the moment of writing this article it retails for as low as 2USD.

    Advertisement not intended so I blurred the store id :-)

    Preparations:

    • One can easily find pictures of this thing assembled to know which way to solder diodes, sim card holders etc.Β 
    • I strongly suggest using an external 5V power supply rated at least 1A, Arduino cannot source enough current for transmit/receive operations.
    • Actually for proper operation you are supposed to power it from 3.3V supply and use level conversion on RX/TX lines with 5V Arduino, but personally I conntected this module straight to Arduino pins and nothing happened.
    After receiving it I wanted to do a quick check of its fuctions. Hooked it up with Arduino and started looking up pieces of code and docs... Hmmm, weird enough, the only useful piece of info I found was this, and it only covers SMS.
    So, after sifting through tons of garbage in the internet and failing to send proper HTTP GET requests I proudly present you my test sketches that just work (c). Those sketches are enought to get anyone started in sending SMS and sending/receiving info through TCP/IP.
    Β 

    Some notes about TCP/IP stack on M590:

    • Β TCP connection can only be established to IP address, so you can use AT+DNS="hostname.com" to request IP from known address.
    • Println function in Arduino terminates the string with CR LF sequence (ASCII codes 13 10 or special characters \r \n), and I don't use it for TCPSEND command to avoid confusion. You have to tell M590 how many characters to send. All characters between AT+TCPSEND=1,47\r and final character 0x0D count (including \r and \n).
    • You will need this document, itΒ  contains AT command set of this module.

    Sending SMS and detecting incoming calls:


    Download text file using GPRS


    Download WAV file to SD card

    This code requires the following physical setup:
    SD card MOSI - Arduino pin 11
    SD card MISO - Arduino pin 12
    SD card CLK - Arduino pin 13
    SD card CS - Arduino pin 4
    M590 TX - Arduino pin 2
    M590 RX - Arduino pin 3
    To avoid using level converters with peripherals (they're all 3.3V) I used my Arduino Uno modified for 3.3V operation.
    So, this one sketch I used to try and see what happens if you download something bigger than plaint text. I quickly whipped up a free web-site and downloaded a tiny 90kB wave file to it. Then I used the same old sketch to print this file in Serial monitor.
    This turned out a complete failure. First of all, M590 would reboot mid-download, what is worse, is that some bytes came corrupted. I'm attaching original WAV file and received bogus copy for future reference, with the conclusion that, as usual, you can get things either cheap or in good quiality, not both...
    ↧

    Application of Neoway M590: remote control for garage heater.

    $
    0
    0

    As those who read my previous article about M590 GSM/GPRS module know, it's not very reliable for GPRS operation. Recognizing this downside of M590s, I still wanted to use them (heaps of garbage wares from China have to go somewhere, right?). Thus a new idea of useful application was born: a remotely activated air heating unit for my garage.

    Heating part:

      The heating unit is built around a part I happened toΒ  have at the time - a huge heating element (about 1 meter long!).
      Beside that I only had to source a 1 m. piece ofΒ  round ventilation duct and a fan. The heater has to be positioned roughly at the center of duct. I also sawed out rectangular pieces from the duct so that the plastic fan wouldn't melt, to further protect it from overheating I installed an NC thermal switch that opens when the temperature is around 90Β°C.
      You should be able to easily replicate my setup just by looking at the pictures below:
      Β 
      The whole heater + fan setup is suspended from the ceiling by some copper braid. Note that:
      1. You can use anything that won't melt for suspension - steel or copper wire is what you'll probably find lying aroundΒ  in no time.
      2. Hanging the heater was the dumbest thing done in this project. When you heat air it goes UP whereas the cold air stays down below. The fastest and the most efficient way to heat air is to install this on the floor.

      Electronics part:

        Yeah I used Arduino for this pls don't shame me.
        I also went full ghetto with the enclosure, which is a plastic box from some power tool painted black. It gives off the air of something quickly put together from scraps and that's what I like about it - I'm all about improvisation :-)
        Schematics:

          The schematics is pretty simple. I use a contactor to switch heater on and off, which is probably overkill. The relays on the schematics are actually 12V relay modules, which is why I can drive them from an AVR pin. Here are some pictures of the insides of the enclosure:

          Ready to be connected!


          Arduino sketch:


          I'm using an official Arduino Bounce library for debouncing (I'm that lazy). The heater has 3 modes: ON, OFF and AUTO, which are switched by the switch on the main panel. When switched off, the controller turns off the heater but lets fan blow off the heat for a preset time (120 seconds in my case). In AUTO mode you can send SMS to switch the heating on or off, but there's a timeout of 3 hrs. for safety reasons. So, if I were to switch on the heater and forget about it completely it would not waste tons of energy waiting for me to come to the garage.

          Seeing how impressed my friends were when they saw this thing controlled by an SMS I immediately felt it was worth making. And with cold season coming it's going to become my greatest friend :-).


          ↧

          ΠŸΠΈΠ²ΠΎΠ²Π°Ρ€Π½Ρ ΠΈΠ· ΡΡ‚ΠΈΡ€Π°Π»ΡŒΠ½ΠΎΠΉ ΠΌΠ°ΡˆΠΈΠ½Ρ‹

          $
          0
          0
          БСгодня я ΠΏΠΎΠΊΠ°ΠΆΡƒ ΠΊΠ°ΠΊ Π½Π°Ρ‡Π°Ρ‚ΡŒ Π²Π°Ρ€ΠΈΡ‚ΡŒ ΠΏΠΈΠ²ΠΎ ΠΏΡ€ΠΈ Π½Π°Π»ΠΈΡ‡ΠΈΠΈ большого ТСлания ΠΈ ΠΊΡƒΡ‡ΠΈ Ρ…Π»Π°ΠΌΠ° ΠΈ отсутствия Π΄Π΅Π½Π΅Π³. ИмСнно Π² Ρ‚Π°ΠΊΠΎΠΉ ситуации я Ρ€Π΅ΡˆΠΈΠ» ΠΏΠ΅Ρ€Π΅Π΄Π΅Π»Π°Ρ‚ΡŒ ΡΡ‚Π°Ρ€ΡƒΡŽ Π°ΠΊΡ‚ΠΈΠ²Π°Ρ‚ΠΎΡ€Π½ΡƒΡŽ ΡΡ‚ΠΈΡ€Π°Π»ΡŒΠ½ΡƒΡŽ ΠΌΠ°ΡˆΠΈΠ½ΠΊΡƒ Π² Π΅ΠΌΠΊΠΎΡΡ‚ΡŒ для варСния ΠΏΠΈΠ²Π°.
          ПослС прочтСния ΠΊΡƒΡ‡ΠΈ тСкстов ΠΏΡ€ΠΎ ΠΏΠΈΠ²ΠΎΠ²Π°Ρ€Π΅Π½ΠΈΠ΅ я нашСл интСрСсный ΠΈ простой ΠΌΠ΅Ρ‚ΠΎΠ΄ Π²Π°Ρ€ΠΊΠΈ Π² 1 Смкости : BIAB (brew in a bag ΠΈΠ»ΠΈ Π²Π°Ρ€ΠΊΠ° Π² мСшкС). Π₯ΠΎΡ€ΠΎΡˆΠ΅Π΅ руководство с ΠΊΠ°Ρ€Ρ‚ΠΈΠ½ΠΊΠ°ΠΌΠΈ ΠΌΠΎΠΆΠ½ΠΎ Π½Π°ΠΉΡ‚ΠΈ Π’Π£Π’ (английский).
          Π‘ΡƒΠ΄ΡƒΡ‡ΠΈ Π»ΡŽΠ±ΠΈΡ‚Π΅Π»Π΅ΠΌ Π°Π²Ρ‚ΠΎΠΌΠ°Ρ‚ΠΈΠ·Π°Ρ†ΠΈΠΈ, я сразу Π·Π°ΠΌΠ΅Ρ‚ΠΈΠ» Ρ‚ΠΎ, Ρ‡Ρ‚ΠΎ Π½Π΅ΠΏΠ»ΠΎΡ…ΠΎ Π±Ρ‹ Ρ‚Π΅ΠΌΠΏΠ΅Ρ€Π°Ρ‚ΡƒΡ€Π½Ρ‹Π΅ ΠΏΠ°ΡƒΠ·Ρ‹ ΠΏΡ€ΠΈ ΠΏΠΈΠ²ΠΎΠ²Π°Ρ€Π΅Π½ΠΈΠΈ ΠΏΠΎΠ΄Π΄Π΅Ρ€ΠΆΠΈΠ²Π°Ρ‚ΡŒ ΠΏΡ€ΠΈ ΠΏΠΎΠΌΠΎΡ‰ΠΈ ΠΌΠΈΠΊΡ€ΠΎΠΊΠΎΠ½Ρ‚Ρ€ΠΎΠ»Π»Π΅Ρ€Π°. Π’Π°ΠΊΠΈΠΌ ΠΈ появился монстр ΠΏΠΎΠ΄ Π½Π°Π·Π²Π°Π½ΠΈΠ΅ΠΌ ΡΡ‚ΠΈΡ€Π°Π»ΡŒΠ½Π°Ρ машинка - автоматизированная пивоварня.

          Π‘Ρ‚ΠΈΡ€Π°Π»ΡŒΠ½Π°Ρ машина

          ИмССм стиралку Вятка Π°ΠΊΡ‚ΠΈΠ²Π°Ρ‚ΠΎΡ€Π½ΡƒΡŽ (это Π·Π½Π°Ρ‡ΠΈΡ‚ Ρ‡Ρ‚ΠΎ ΠΎΠ½Π° устроСна Π½Π΅ ΠΊΠ°ΠΊ соврСмСнныС машинки с Π±Π°Ρ€Π°Π±Π°Π½ΠΎΠΌ ΠΊΠΎΡ‚ΠΎΡ€Ρ‹ΠΉ крутится, Π° с Π±Π°ΠΊΠΎΠΌ Π²Π½ΠΈΠ·Ρƒ ΠΊΠΎΡ‚ΠΎΡ€ΠΎΠ³ΠΎ крутится Ρ‡Ρ‚ΠΎ-Ρ‚ΠΎ Π²Ρ€ΠΎΠ΄Π΅ плоской мСшалки). ОбъСм Π±Π°ΠΊΠ° 28 Π»ΠΈΡ‚Ρ€ΠΎΠ², слив Π²ΠΎΠ΄Ρ‹ - снизу. Π‘Π°ΠΊ Ρ„ΠΎΡ€ΠΌΡ‹ Ρ†ΠΈΠ»ΠΈΠ½Π΄Ρ€Π° срСзанного снизу, Ρ‡Ρ‚ΠΎ ΠΎΡ‡Π΅Π½ΡŒ ΡƒΠ΄ΠΎΠ±Π½ΠΎ для слива сусла ΠΏΠΎ максимуму.

          Π’Π°ΠΊ выглядСла моя Вятка Π΄ΠΎ ΠΌΠΎΠ΄ΠΈΡ„ΠΈΠΊΠ°Ρ†ΠΈΠΉ.

          Для контроля Ρ‚Π΅ΠΌΠΏΠ΅Ρ€Π°Ρ‚ΡƒΡ€Ρ‹ Π½Π°Π΄ΠΎ ΡƒΡΡ‚Π°Π½ΠΎΠ²ΠΈΡ‚ΡŒ Π² Π±Π°ΠΊ Π½Π°Π³Ρ€Π΅Π²Π°Ρ‚Π΅Π»ΡŒΠ½Ρ‹ΠΉ элСмСнт ΠΈ Π΄Π°Ρ‚Ρ‡ΠΈΠΊ Ρ‚Π΅ΠΌΠΏΠ΅Ρ€Π°Ρ‚ΡƒΡ€Ρ‹. ΠŸΠΎΠ½Π°Π΄ΠΎΠ±ΠΈΡ‚ΡΡ ΡΠ»Π΅Π΄ΡƒΡŽΡ‰Π΅Π΅:

          ΠΠ°Π³Ρ€Π΅Π²Π°Ρ‚Π΅Π»ΡŒΠ½Ρ‹ΠΉ элСмСнт ΠΎΡ‚ Ρ‡Π°ΠΉΠ½ΠΈΠΊΠ°.
          Π”Π°Ρ‚Ρ‡ΠΈΠΊ Ρ‚Π΅ΠΌΠΏΠ΅Ρ€Π°Ρ‚ΡƒΡ€Ρ‹ DS18B20, ΠΆΠ΅Π»Π°Ρ‚Π΅Π»ΡŒΠ½ΠΎ
          сразу с гильзой для вворачивания Π²
          стСнку Смкости. ΠŸΠΎΠΊΡƒΠΏΠ°Π΅Ρ‚ΡΡ Π² ΠšΠΈΡ‚Π°Π΅.

          Π’Π°ΠΊΠΆΠ΅ понадобится Ρ‡Ρ‚ΠΎ-Ρ‚ΠΎ Ρ‡Π΅ΠΌ ΡΠΊΡ€Π΅ΠΏΠΈΡ‚ΡŒ Π½Π°Π³Ρ€Π΅Π²Π°Ρ‚Π΅Π»ΡŒ ΠΈ Π΅ΠΌΠΊΠΎΡΡ‚ΡŒ. Π― ΠΊΡƒΠΏΠΈΠ» для этого Ρ‚ΡŽΠ±ΠΈΠΊ Ρ…ΠΎΠ»ΠΎΠ΄Π½ΠΎΠΉ сварки. НС Π΄Π΅Π»Π°ΠΉΡ‚Π΅ этого! Π₯олодная "сварка" - это всСго лишь двухкомпонСнтная эпоксидная смола ΠΈ ΡΠΎΠ²Π΅Ρ€ΡˆΠ΅Π½Π½ΠΎ Π½Π΅ ΠΏΡ€ΠΈΠ³ΠΎΠ΄Π½Π° для ΠΊΠΎΠ½Ρ‚Π°ΠΊΡ‚Π° с ΠΏΠΈΡ‰Π΅ΠΉ. Π‘Ρ‚ΠΎΠΈΡ‚ ΠΏΠΎΠΈΡΠΊΠ°Ρ‚ΡŒ ΠΊΠ°ΠΊΠΎΠΉ-Ρ‚ΠΎ ΠΊΠ»Π΅ΠΉ для ΠΏΠΈΡ‰Π΅Π²ΠΎΠΉ ΠΏΡ€ΠΎΠΌΡ‹ΡˆΠ»Π΅Π½Π½ΠΎΡΡ‚ΠΈ Π»ΠΈΠ±ΠΎ Π²ΠΎΠΎΠ±Ρ‰Π΅ Π½Π΅ ΠΈΡΠΏΠΎΠ»ΡŒΠ·ΠΎΠ²Π°Ρ‚ΡŒ Ρ€Π΅Π·ΠΈΠ½ΠΎΠ²Ρ‹Π΅/мСталличСскиС ΠΏΡ€ΠΎΠΊΠ»Π°Π΄ΠΊΠΈ для соСдинСния.
          Π’Ρ‹Ρ€Π΅Π·Π°Π΅ΠΌ Π°ΠΊΡ‚ΠΈΠ²Π°Ρ‚ΠΎΡ€ ΠΈ Π½Π° Π΅Π³ΠΎ мСсто вставляСм Π½Π°Π³Ρ€Π΅Π²Π°Ρ‚Π΅Π»ΡŒΠ½Ρ‹ΠΉ элСмСнт. Π’Π°ΠΊΠΆΠ΅ Π³Π΄Π΅-Π½ΠΈΠ±ΡƒΠ΄ΡŒ Π² Π΅ΠΌΠΊΠΎΡΡ‚ΡŒ Π²Ρ€Π΅Π·Π°Π΅ΠΌ Π΄Π°Ρ‚Ρ‡ΠΈΠΊ Ρ‚Π΅ΠΌΠΏΠ΅Ρ€Π°Ρ‚ΡƒΡ€Ρ‹.
          (ΠžΠŸΠ¦Π˜ΠžΠΠΠ›Π¬ΠΠž) Π― Π΄ΠΎΠ±Π°Π²ΠΈΠ» ситСчко Π½Π°Π΄ Π½Π°Π³Ρ€Π΅Π²Π°Ρ‚Π΅Π»ΡŒΠ½Ρ‹ΠΌ элСмСнтом для Ρ‚ΠΎΠ³ΠΎ Ρ‡Ρ‚ΠΎΠ±Ρ‹ ΠΊ Π½Π΅ΠΌΡƒ Π½ΠΈΡ‡Π΅Π³ΠΎ Π½Π΅ ΠΏΡ€ΠΈΠ³ΠΎΡ€Π°Π»ΠΎ. Для Π²Π°Ρ€ΠΊΠΈ Π² мСшкС это Π½Π΅ трСбуСтся, Ρ‚.ΠΊ. вСсь солод ΠΈ Ρ…ΠΌΠ΅Π»ΡŒ ΠΏΡ€ΠΈ Π²Π°Ρ€ΠΊΠ΅ находятся Π² мСшкС, Π½ΠΎ Ссли я Π·Π°Ρ…ΠΎΡ‡Ρƒ ΠΏΠΎΠΏΡ€ΠΎΠ±ΠΎΠ²Π°Ρ‚ΡŒ Π²Π°Ρ€ΠΈΡ‚ΡŒ ΠΏΠΈΠ²ΠΎ ΠΎΠ±Ρ‹Ρ‡Π½Ρ‹ΠΌ ΠΌΠ΅Ρ‚ΠΎΠ΄ΠΎΠΌ, ΠΎΠ½ΠΎ пригодится. Для крСплСния ситСчка я использовал Π·Π°Ρ‰Π΅Π»ΠΊΡƒ ΠΊΠ°ΠΊ Π½Π° Ρ‡Π΅ΠΌΠΎΠ΄Π°Π½Π°Ρ…, ΠΊΡƒΠΏΠ»Π΅Π½Π½ΡƒΡŽ Π² ΠΌΠ°Π³Π°Π·ΠΈΠ½Π΅ ΠΊΡ€Π΅ΠΏΠ΅ΠΆΠ°.


          Π’Π΅ΠΏΠ΅Ρ€ΡŒ Π½Π°Π΄ΠΎ ΡƒΡΡ‚Π°Π½ΠΎΠ²ΠΈΡ‚ΡŒ Ρ„ΠΈΠ»ΡŒΡ‚Ρ€ΡƒΡŽΡ‰ΡƒΡŽ систСму ΠΈ ΠΊΡ€Π°Π½ для слива сусла. Для этого Π² любом хозяйствСнном ΠΌΠ°Π³Π°Π·ΠΈΠ½Π΅ ΠΏΠΎΠΊΡƒΠΏΠ°Π΅ΠΌ ΡΠ»Π΅Π΄ΡƒΡŽΡ‰ΡƒΠΈΠΉ Π½Π°Π±ΠΎΡ€ (всС Ρ€Π°Π·ΠΌΠ΅Ρ€Ρ‹ 1/2"):
          • Гибкая ΠΏΠΎΠ΄Π²ΠΎΠ΄ΠΊΠ° 1ΠΌ
          • Π‘Π³ΠΎΠ½
          • 2 Π³Π°ΠΉΠΊΠΈ
          • 2 мСталличСскиС ΡˆΠ°ΠΉΠ±Ρ‹
          • 2 Ρ€Π΅Π·ΠΈΠ½ΠΎΠ²Ρ‹Π΅ ΠΏΡ€ΠΎΠΊΠ»Π°Π΄ΠΊΠΈ
          • Гибкая ΠΏΠΎΠ΄Π²ΠΎΠ΄ΠΊΠ° 30см
          • РСзиновая ΠΏΡ€ΠΎΠΊΠ»Π°Π΄ΠΊΠ°
          • ΠšΡ€Π°Π½
          Длинная ΠΏΠΎΠ΄Π²ΠΎΠ΄ΠΊΠ° ΠΈ Π±ΡƒΠ΄Π΅Ρ‚ Ρ„ΠΈΠ»ΡŒΡ‚Ρ€ΠΎΠΌ. ΠžΡ‚Ρ€Π΅Π·Π°Π΅ΠΌ Π³Π°ΠΉΠΊΡƒ Π½Π° ΠΎΠ΄Π½ΠΎΠΌ ΠΊΠΎΠ½Ρ†Π΅ ΠΏΠΎΠ΄Π²ΠΎΠ΄ΠΊΠΈ, Π° Π½Π° Π΄Ρ€ΡƒΠ³ΠΎΠΌ ΠΊΠΎΠ½Ρ†Π΅ ΠΎΡ‡Π΅Π½ΡŒ острым ΠΈ Ρ‚ΠΎΠ½ΠΊΠΈΠΌ Π½ΠΎΠΆΠΎΠΌ ΠΏΡ€ΠΎΡ€Π΅Π·Π°Π΅ΠΌ Ρ€Π΅Π·ΠΈΠ½ΠΎΠ²Ρ‹ΠΉ шланг сквозь ΠΌΠ΅Ρ‚Π°Π»Π»ΠΈΡ‡Π΅ΡΠΊΡƒΡŽ ΠΎΠΏΠ»Π΅Ρ‚ΠΊΡƒ. ΠžΡΡ‚Π°Π΅Ρ‚ΡΡ Ρ‚ΠΎΠ»ΡŒΠΊΠΎ Π²Ρ‹Ρ€Π²Π°Ρ‚ΡŒ шланг ΠΈ Ρƒ нас Π² Ρ€ΡƒΠΊΠ°Ρ… остаСтся Ρ„ΠΈΠ»ΡŒΡ‚Ρ€ - мСталличСская ΠΎΠΏΠ»Π΅Ρ‚ΠΊΠ° с Π³Π°ΠΉΠΊΠΎΠΉ Π½Π° ΠΊΠΎΠ½Ρ†Π΅. Π”Ρ€ΡƒΠ³ΠΎΠΉ ΠΊΠΎΠ½Π΅Ρ† Π½Π°Π΄ΠΎ Π·Π°ΠΊΡ€Ρ‹Ρ‚ΡŒ, я просто Π·Π°ΠΊΡ€ΡƒΡ‚ΠΈΠ» Π΅Π³ΠΎ Π±ΠΎΠ»Ρ‚ΠΈΠΊΠΎΠΌ ΠΈ шайбами.

          ΠŸΠΎΡ‡Ρ‚ΠΈ Π³ΠΎΡ‚ΠΎΠ²Ρ‹ΠΉ Ρ„ΠΈΠ»ΡŒΡ‚Ρ€ ΠΈΠ· ΠΎΠΏΠ»Π΅Ρ‚ΠΊΠΈ. ПослС Ρ‚ΠΎΠ³ΠΎ ΠΊΠ°ΠΊ я это сфотографировал, я Π΅Ρ‰Π΅ Π²Ρ‹Ρ‚Π°Ρ‰ΠΈΠ» ΠΊΡ€Π°ΡΠ½ΡƒΡŽ ΠΈ синюю лСску.
          Π‘Π°ΠΊ с Ρ„ΠΈΠ»ΡŒΡ‚Ρ€ΠΎΠΌ - Π²ΠΈΠ΄ снаруТи. К Π³ΠΈΠ±ΠΊΠΎΠΉ ΠΏΠΎΠ΄Π²ΠΎΠ΄ΠΊΠ΅ привинчиваСтся ΠΊΡ€Π°Π½.
          Π‘Π°ΠΊ с Ρ„ΠΈΠ»ΡŒΡ‚Ρ€ΠΎΠΌ - Π²ΠΈΠ΄ ΠΈΠ·Π½ΡƒΡ‚Ρ€ΠΈ. Π’Π°ΠΊΠΆΠ΅ Ρ…ΠΎΡ€ΠΎΡˆΠΎ Π²ΠΈΠ΄Π½ΠΎ сито Π½Π°Π΄ Π½Π°Π³Ρ€Π΅Π²Π°Ρ‚Π΅Π»Π΅ΠΌ.

          Π­Π»Π΅ΠΊΡ‚Ρ€ΠΎΠ½ΠΈΠΊΠ°

          Π‘Ρ€Π°Π·Ρƒ ΠΏΡ€ΠΈΠΊΡ€Π΅ΠΏΠ»ΡŽ схСму ΡƒΠΏΡ€Π°Π²Π»ΡΡŽΡ‰Π΅ΠΉ ΠΊΠΎΡ€ΠΎΠ±ΠΊΠΈ - ΠΎΠ½Π° простая ΠΈ Π½Π΅ Ρ‚Ρ€Π΅Π±ΡƒΠ΅Ρ‚ мноТСства пояснСний. Для Π²Ρ‹Π²ΠΎΠ΄Π° ΠΈΠ½Ρ„ΠΎΡ€ΠΌΠ°Ρ†ΠΈΠΈ ΠΈΡΠΏΠΎΠ»ΡŒΠ·ΡƒΠ΅Ρ‚ΡΡ Π·Π½Π°ΠΊΠΎΡΠΈΠ½Ρ‚Π΅Π·ΠΈΡ€ΡƒΡŽΡ‰ΠΈΠΉ дисплСй (ищСтся ΠΏΠΎ ΠΊΠ»ΡŽΡ‡Π΅Π²ΠΎΠΌΡƒ слову hd44780 Π½Π° алиэкспрСссС ΠΈ ΠΏΡ€ΠΎΡ‡.), для Π²Π²ΠΎΠ΄Π° - 3 ΠΊΠ½ΠΎΠΏΠΊΠΈ ΠΈ энкодСр. ΠŸΠΈΡ‚Π°Π½ΠΈΠ΅ ΠΊΠΎΠΌΠΌΡƒΡ‚ΠΈΡ€ΡƒΡŽ ΠΏΡ€ΠΈ ΠΏΠΎΠΌΠΎΡ‰ΠΈ Ρ‚Π²Π΅Ρ€Π΄ΠΎΡ‚Π΅Π»ΡŒΠ½ΠΎΠ³ΠΎ Ρ€Π΅Π»Π΅ Π°ΠΆ Π½Π° 25 китайских Π°ΠΌΠΏΠ΅Ρ€, Ρ‡Ρ‚ΠΎ ΠΏΡ€ΠΈΠΌΠ΅Ρ€Π½ΠΎ Ρ€Π°Π²Π½ΠΎ 10 настоящим Π°ΠΌΠΏΠ΅Ρ€Π°ΠΌ нагрСватСля.


          Π‘ΠΎΠ±Ρ€Π°Π» всС Π² корпусС ΠΎΡ‚ ATX Π±Π»ΠΎΠΊΠ° питания, ΠΎΡ‚ Π΄Ρ€ΡƒΠ³ΠΎΠ³ΠΎ Π‘ΠŸ взял 12 ΠΈ 5 Π’ (ΠΏΠ΅Ρ€Π΅Π±ΠΎΡ€, ΠΊΠΎΠ½Π΅Ρ‡Π½ΠΎ, Π½ΠΎ Ρƒ мСня валялось ΠΏΠΎΠ»Π½ΠΎ этих Π±Π»ΠΎΠΊΠΎΠ²). ΠŸΡ€ΠΈΠ»Π°Π³Π°ΡŽ Ρ„ΠΎΡ‚ΠΎ сборки ΠΈ Π³ΠΎΡ‚ΠΎΠ²ΠΎΠ³ΠΎ устройства:

          Π’Ρ€Π΅Π·Π°Π΅ΠΌ ΠΎΡ€Π³Π°Π½Ρ‹ управлСния Π² ΠΏΠ΅Ρ€Π΅Π΄Π½ΡŽΡŽ панСль...
          ΠšΡ€Π΅ΠΏΠΈΠΌ Ардуино Π²Π΅Ρ€Ρ‚ΠΈΠΊΠ°Π»ΡŒΠ½ΠΎ Ρ‡Ρ‚ΠΎΠ±Ρ‹ ΡΡΠΊΠΎΠ½ΠΎΠΌΠΈΡ‚ΡŒ мСсто.
          ΠŸΠΎΡ‡Ρ‚ΠΈ Π³ΠΎΡ‚ΠΎΠ²ΠΎ. ΠžΠ³Ρ€ΠΎΠΌΠ½Ρ‹ΠΉ Ρ€Π°Π΄ΠΈΠ°Ρ‚ΠΎΡ€ - ΠΏΠ΅Ρ€Π΅Π±ΠΎΡ€, Π½ΠΎ это Π»ΡƒΡ‡ΡˆΠ΅ Ρ‡Π΅ΠΌ ΠΏΠ΅Ρ€Π΅Π³Ρ€Π΅Π² :)
          ΠšΠΎΡ€ΠΎΠ±ΠΊΠ° собрана ΠΈ Π·Π°Π»ΠΈΡ‚Π° пробная ΠΏΡ€ΠΎΠ³Ρ€Π°ΠΌΠΌΠ°.
          Вся систСма. Π‘Π½ΠΈΠ·Ρƒ Π‘ΠŸ, свСрху систСма управлСния с Ρ‚ΠΎΡ€Ρ‡Π°Ρ‰ΠΈΠΌ ΠΈΠ· Π½Π΅Π΅ Π΄Π°Ρ‚Ρ‡ΠΈΠΊΠΎΠΌ. ΠŸΠΈΡ‚Π°Π½ΠΈΠ΅ Π½Π° Π½Π°Π³Ρ€Π΅Π²Π°Ρ‚Π΅Π»ΡŒ подаСтся Π±Π΅Π»Ρ‹ΠΌ ΠΊΠ°Π±Π΅Π»Π΅ΠΌ ΠΏΠ°ΠΏΠ°-ΠΌΠ°ΠΌΠ°.
          Π‘Π΅Π»Ρ‹ΠΉ ΡˆΠ½ΡƒΡ€ Π΄Π°Π΅Ρ‚ 220Π’ Π½Π° Π½Π°Π³Ρ€Π΅Π²Π°Ρ‚Π΅Π»ΡŒ, ΠΏΠΈΡ‚Π°Π½ΠΈΠ΅ элСктроники осущСствляСтся ΠΎΡ‚Π΄Π΅Π»ΡŒΠ½ΠΎ Ρ‡Π΅Ρ€Π΅Π· Ρ‡Π΅Ρ€Π½Ρ‹ΠΉ ΡˆΠ½ΡƒΡ€ (Π² Π½Π΅ΠΌ 12Π’+5Π’+GND). ΠŸΡ€ΠΎΠ²ΠΎΠ΄ Π² Π±Π΅Π»ΠΎΠΌ Π²Π²ΠΎΠ΄Π΅ - Π΄Π°Ρ‚Ρ‡ΠΈΠΊ Ρ‚Π΅ΠΌΠΏΠ΅Ρ€Π°Ρ‚ΡƒΡ€Ρ‹.
          USB ΠΏΠΎΡ€Ρ‚ для удобства Π²Ρ‹Π²Π΅Π΄Π΅Π½ Π½Π°Ρ€ΡƒΠΆΡƒ.
          Π§Π΅Ρ€Π½Ρ‹ΠΉ ΠΊΠ°Π±Π΅Π»ΡŒΠ½Ρ‹ΠΉ Π²Π²ΠΎΠ΄ - для ΠΏΠΎΠ΄ΠΊΠ»ΡŽΡ‡Π΅Π½ΠΈΡ нагрСватСля.
          Π‘Π»ΠΎΠΊ управлСния Π²Ρ€Π΅Π·Π°Π½Π½Ρ‹ΠΉ Π² корпус ΠΎΡ‚ ΡΡ‚ΠΈΡ€Π°Π»ΡŒΠ½ΠΎΠΉ машинки.

          Код:


          Π’ Π½Π°Ρ‡Π°Π»Π΅ ΠΊΠΎΠ΄Π° Π΅ΡΡ‚ΡŒ ΠΊΠΎΠ΅-ΠΊΠ°ΠΊΠΈΠ΅ ΠΏΠΎΠ»Π΅Π·Π½Ρ‹Π΅ подстройки, Ρ‚Π°ΠΊΠΈΠ΅ ΠΊΠ°ΠΊ:

          #define DEBUG - Π»ΡŽΠ±ΠΈΠΌΡ‹ΠΉ Ρ€Π΅ΠΆΠΈΠΌ ΠΎΡ‚Π»Π°Π΄ΠΊΠΈ. Π’ Π½Π΅ΠΌ Π±ΡƒΠ΄Π΅Ρ‚ Π²Ρ‹Π²ΠΎΠ΄ всякой ΠΏΠΎΠ»Π΅Π·Π½ΠΎΠΉ ΠΈΠ½Ρ„Ρ‹ Π² Ρ‚Π΅Ρ€ΠΌΠΈΠ½Π°Π», Π² Ρ‚ΠΎΠΌ числС значСния Ρ‚Π΅ΠΌΠΏΠ΅Ρ€Π°Ρ‚ΡƒΡ€Ρ‹ для построСния Π³Ρ€Π°Ρ„ΠΈΠΊΠ° (Π½Π΅Π·Π°ΠΌΠ΅Π½ΠΈΠΌΠΎ для настройки PID Π°Π»Π³ΠΎΡ€ΠΈΡ‚ΠΌΠ°). ΠžΠ±Ρ‹Ρ‡Π½ΠΎ ΠΊΠΎΠ³Π΄Π° ΠΊΠΎΠ΄ Π³ΠΎΡ‚ΠΎΠ², я эту строку ΠΊΠΎΠΌΠΌΠ΅Π½Ρ‚ΠΈΡ€ΡƒΡŽ.

          #define USE_EEPROM - ΡΠΎΠ²Π΅Ρ‚ΡƒΡŽ Ρ€Π°ΡΠΊΠΎΠΌΠΌΠ΅Π½Ρ‚ΠΈΡ€ΠΎΠ²Π°Ρ‚ΡŒ послС настройки PID Π°Π»Π³ΠΎΡ€ΠΈΡ‚ΠΌΠ°, Ρ‚ΠΎΠ³Π΄Π° всС ΠΏΠ°Ρ€Π°ΠΌΠ΅Ρ‚Ρ€Ρ‹ Π±ΡƒΠ΄ΡƒΡ‚ ΡΠΎΡ…Ρ€Π°Π½ΡΡ‚ΡŒΡΡ/Π·Π°Π³Ρ€ΡƒΠΆΠ°Ρ‚ΡŒΡΡ Π² ΠΏΠΎΡΡ‚ΠΎΡΠ½Π½ΡƒΡŽ ΠΏΠ°ΠΌΡΡ‚ΡŒ.

          const int WindowSize = 5000; - Ρ€Π°Π·ΠΌΠ΅Ρ€ "ΠΎΠΊΠ½Π°"Π² Ρ‚Π΅Ρ‡Π΅Π½ΠΈΠ΅ ΠΊΠΎΡ‚ΠΎΡ€ΠΎΠ³ΠΎ происходит 1 Ρ†ΠΈΠΊΠ» Π²ΠΊΠ»ΡŽΡ‡Π΅Π½ΠΈΠ΅-Π²Ρ‹ΠΊΠ»ΡŽΡ‡Π΅Π½ΠΈΠ΅ Ρ€Π΅Π»Π΅ (здСсь 5с). Π§Ρ‚ΠΎ-Ρ‚ΠΎ Π²Ρ€ΠΎΠ΄Π΅ ΠΏΠ΅Ρ€ΠΈΠΎΠ΄Π° ΠΌΠ΅Π΄Π»Π΅Π½Π½ΠΎΠ³ΠΎ ШИМ сигнала.

          const double maxKp = 1000;
          const double maxKi = 500;
          const double maxKd = 100; - ΠΏΡ€Π΅Π΄Π΅Π»Ρ‹ подстройки коэффициСнтов ΠΏΠΎΠ»ΡŒΠ·ΠΎΠ²Π°Ρ‚Π΅Π»Π΅ΠΌ. Взял ΠΈΡ… ΠΎΡ‚ Π±Π°Π»Π΄Ρ‹, Π½ΠΎ Π²Π΄Ρ€ΡƒΠ³ ΠΊΠΎΠΌΡƒ-Ρ‚ΠΎ понадобится большС.

          ПослС Ρ‚ΠΎΠ³ΠΎ ΠΊΠ°ΠΊ всС собрано ΠΈ Π·Π°ΠΏΡ€ΠΎΠ³Ρ€Π°ΠΌΠΌΠΈΡ€ΠΎΠ²Π°Π½ΠΎ, самоС врСмя Π½Π°ΡΡ‚Ρ€ΠΎΠΈΡ‚ΡŒ PID Π°Π»Π³ΠΎΡ€ΠΈΡ‚ΠΌ.

          Настройка


          Для Π»ΡƒΡ‡ΡˆΠ΅ΠΉ Ρ€Π°Π±ΠΎΡ‚Ρ‹ Π°Π»Π³ΠΎΡ€ΠΈΡ‚ΠΌΠ° Π½Π°Π΄ΠΎ ΠΏΠΎΠ΄ΡΡ‚Ρ€ΠΎΠΈΡ‚ΡŒ коэффициСнты Kp, Ki ΠΈ Kd ΠΏΠΎΠ΄ ΠΊΠΎΠ½ΠΊΡ€Π΅Ρ‚Π½Ρ‹ΠΉ ΠΎΠ±ΡŠΠ΅ΠΊΡ‚ (ΠΈΠΌΠ΅Π½Π½ΠΎ ваш Π½Π°Π³Ρ€Π΅Π²Π°Ρ‚Π΅Π»ΡŒ, ΠΊΠΎΡ‚Π΅Π» ΠΈ Ρ‚.Π΄.). Π― Π΄Π΅Π»Π°Π» это ΡΠ»Π΅Π΄ΡƒΡŽΡ‰ΠΈΠΌ ΠΎΠ±Ρ€Π°Π·ΠΎΠΌ:
          1. Β 

          ΠŸΡ€ΠΎ саму Π²Π°Ρ€ΠΊΡƒ Π² мСшкС Ρ‡ΠΈΡ‚Π°ΠΉΡ‚Π΅ Π² ΡΠ»Π΅Π΄ΡƒΡŽΡ‰Π΅ΠΌ постС:

            ↧
            ↧

            Tutorial: IntelliJ IDEA Community Edition with Tomcat deployment

            $
            0
            0
            This tutorial will help the beginner developers of Java EE applications.
            IntelliJ IDEA is a great IDE for a Java developer, however its Community Edition is somewhat limited in regard to enterprise and web development toolbox. You can easily develop desktop applications in Community, but confronted with the need to develop an enterprise web application with Java EE you suddenly find out that Community Edition can't provide you with an application server or automatic deployment or anything, really.
            In this tutorial I'm going to show you how to sidestep this issue by integrating IntelliJ IDEA Community Edition with Tomcat (via Maven) to develop a sample website with servlets.
            As most projects within IDEs do, this one starts with New -> Project item from menu bar.
            Pick Maven on the left side and create a project from maven-archetype-webapp archetype (pic. 1):

            Pic. 1. Create a Maven project.

            The following screenshots demonstrate setting group id, artifact id, project name and location. Group id is the unique identifier of your project, usually the name of the package as per Java package naming conventions. Artifact id is the name of the JAR file that gets deployed into Maven repository, in this case mywebapp. See how to pick group id and artifact id here.


            After creating a project, you end up with the basic directory structure required for web application: WEB-INF folder, web.xml file and even an index page(pic. 2).

            Pic. 2. Basic web app structure.
            Β 
            Β Maven can build that, but there's still no directory for Java sources! That's what you have to do next (pic. 3). Create a folder java under My web app/src/main/ and mark it as source root. That's where all servlets go.

            Pic. 3. Create a source root.

            Let's proceed to make a sample servlet HelloServlet.java (pic. 4) and paste the following code there:


            Pic. 4. Create a sample servlet.

            The code is correct, but it's highlighted in red! Why? We forgot to add Java EE library as a dependence. Open your pom.xml and make it look like that:


            Modify pom.xml.

            Even though you don't need it to compile the project, your pom.xml now contains lines that pull tomcat7-maven plugin. Now let's make use of it: create a new Maven Run/Debug Configuration, name it whatever you want, put tomcat7:runin Command line field, and, finally, add a Maven goal clean to the list of things to do before launch (pic. 5):

            Pic. 5. Create a run configuration.

            Congratulations! You now have a working Java EE webapp project with run config that builds the entire thing and deploys it to Tomcat:


            Now you should be able to simply press Shift+F10 (or Run button, I'm not going to judge) and see index.jsp in your web browser of choice after clicking the link http://localhost:8888 in build output window:


            What about servlets? To see the servlet in your web browser you have to let Tomcat know where to look for it first. For that, change src/main/webapp/WEB_INF/web.xml and src/main/webapp/index.jsp to look like that:


            ↧

            IntelliJ IDEA Community Edition Π΄Π΅ΠΏΠ»ΠΎΠΉ Π²Π΅Π±-прилоТСния Π½Π° Tomcat

            $
            0
            0
            Π­Ρ‚ΠΎ ΠΊΡ€Π°Ρ‚ΠΊΠΎΠ΅ руководствопомоТСт Π½Π°Ρ‡ΠΈΠ½Π°ΡŽΡ‰ΠΈΠΌ Ρ€Π°Π·Ρ€Π°Π±ΠΎΡ‚Ρ‡ΠΈΠΊΠ°ΠΌ Java EE.

            IntelliJ IDEA - отличная IDE для Java, ΠΎΠ΄Π½Π°ΠΊΠΎ Π΅Π΅ бСсплатная вСрсия Community Edition нСсколько ΠΎΠ³Ρ€Π°Π½ΠΈΡ‡Π΅Π½Π° Π² Ρ€Π°Π·Ρ€Π°Π±ΠΎΡ‚ΠΊΠ΅ Π²Π΅Π±-ΠΏΡ€ΠΈΠ»ΠΎΠΆΠ΅Π½ΠΈΠΉ ΠΈ Java EE Π² Ρ†Π΅Π»ΠΎΠΌ. Π’ Community вСрсии ΠΎΡ‡Π΅Π½ΡŒ Π»Π΅Π³ΠΊΠΎ Ρ€Π°Π·Ρ€Π°Π±Π°Ρ‚Ρ‹Π²Π°Ρ‚ΡŒ desktop прилоТСния, Π½ΠΎ ΠΊΠ°ΠΊ Ρ‚ΠΎΠ»ΡŒΠΊΠΎ становится Π½Π΅ΠΎΠ±Ρ…ΠΎΠ΄ΠΈΠΌΠΎ Ρ€Π°Π·Ρ€Π°Π±ΠΎΡ‚Π°Ρ‚ΡŒ Π²Π΅Π±-ΠΏΡ€ΠΈΠ»ΠΎΠΆΠ΅Π½ΠΈΠ΅ с Java EE, Ρ‚Ρ‹ Π²Π΄Ρ€ΡƒΠ³ ΠΎΠ±Π½Π°Ρ€ΡƒΠΆΠΈΠ²Π°Π΅ΡˆΡŒ, Ρ‡Ρ‚ΠΎ Π² Community Π½Π΅Ρ‚ Π½ΠΈΠΊΠ°ΠΊΠΎΠΉ ΠΏΠΎΠ΄Π΄Π΅Ρ€ΠΆΠΊΠΈ Π½ΠΈ Π°ΠΏΠΏ сСрвСров (JBoss, GlassFish), Π½ΠΈ Π΄Π°ΠΆΠ΅ сСрвлСт ΠΊΠΎΠ½Ρ‚Π΅ΠΉΠ½Π΅Ρ€ΠΎΠ² (Tomcat).

            Π’ этом руководствС я ΠΏΠΎΠΊΠ°ΠΆΡƒ, ΠΊΠ°ΠΊ ΠΎΠ±ΠΎΠΉΡ‚ΠΈ эту ΠΏΡ€ΠΎΠ±Π»Π΅ΠΌΡƒ (Π±Π΅Π· установки довольно Π΄ΠΎΡ€ΠΎΠ³ΠΎΠΉ ΠΈΠ»ΠΈ крякнутой Ultimate Edition) ΠΏΡƒΡ‚Π΅ΠΌ ΠΈΠ½Ρ‚Π΅Π³Ρ€Π°Ρ†ΠΈΠΈ IntelliJ IDEA Community Edition с Tomcat (Ρ‡Π΅Ρ€Π΅Π· Maven) для Ρ€Π°Π·Ρ€Π°Π±ΠΎΡ‚ΠΊΠΈ Π²Π΅Π±-ΠΏΡ€ΠΈΠ»ΠΎΠΆΠ΅Π½ΠΈΠΉ с сСрвлСтами.

            НачнСм с Ρ‚ΠΎΠ³ΠΎ, Ρ‡Ρ‚ΠΎ создадим наш ΠΏΡ€ΠΎΠ΅ΠΊΡ‚, Ρ‰Π΅Π»ΠΊΠ½ΡƒΠ² Π½Π° ΠΏΡƒΠ½ΠΊΡ‚Π΅ New -> ProjectΠ² Π²Π΅Ρ€Ρ…Π½Π΅ΠΌ мСню.
            Π’ Π»Π΅Π²ΠΎΠΉ части Π²Ρ‹Π±ΠΈΡ€Π°Π΅ΠΌ Maven, Π° Π² ΠΏΡ€Π°Π²ΠΎΠΉ Π°Ρ€Ρ…Π΅Ρ‚ΠΈΠΏ maven-archetype-webapp (рис. 1):

            Рис. 1. Π‘ΠΎΠ·Π΄Π°ΠΉΡ‚Π΅ ΠΏΡ€ΠΎΠ΅ΠΊΡ‚ Maven.

            На ΡΠ»Π΅Π΄ΡƒΡŽΡ‰ΠΈΡ… ΡΠΊΡ€ΠΈΠ½ΡˆΠΎΡ‚Π°Ρ… Π²ΠΈΠ΄Π½ΠΎ, ΠΊΠ°ΠΊ Π·Π°Π΄Π°Π²Π°Ρ‚ΡŒ group id, artifact id, имя ΠΏΡ€ΠΎΠ΅ΠΊΡ‚Π° ΠΈ ΠΏΠ°ΠΏΠΊΡƒ для Π½Π΅Π³ΠΎ. Group id - ΡƒΠ½ΠΈΠΊΠ°Π»ΡŒΠ½Ρ‹ΠΉ ΠΈΠ΄Π΅Π½Ρ‚ΠΈΡ„ΠΈΠΊΠ°Ρ‚ΠΎΡ€ Ρ‚Π²ΠΎΠ΅Π³ΠΎ ΠΏΡ€ΠΎΠ΅ΠΊΡ‚Π°, ΠΎΠ±Ρ‹Ρ‡Π½ΠΎ это имя java ΠΏΠ°ΠΊΠ΅Ρ‚Π° Π² соотвСтствии с Java code conventions. Artifact idΒ  - имя JAR Ρ„Π°ΠΉΠ»Π° ΠΊΠΎΡ‚ΠΎΡ€Ρ‹ΠΉ заносится Π² Ρ€Π΅ΠΏΠΎΠ·ΠΈΡ‚ΠΎΡ€ΠΈΠΉ Maven, Π² Π΄Π°Π½Π½ΠΎΠΌ случаС mywebapp. Π—Π΄Π΅ΡΡŒΠΌΠΎΠΆΠ½ΠΎ ΠΏΠΎΠ΄Ρ€ΠΎΠ±Π½Π΅Π΅ ΠΏΠΎΡ‡ΠΈΡ‚Π°Ρ‚ΡŒ ΠΊΠ°ΠΊ Π²Ρ‹Π±Ρ€Π°Ρ‚ΡŒ group id ΠΈ artifact id.


            ПослС Ρ‚ΠΎΠ³ΠΎ ΠΊΠ°ΠΊ ΠΏΡ€ΠΎΠ΅ΠΊΡ‚ создан, появится стандартная структура папокнСобходимая для Π²Π΅Π±-прилоТСния: ΠΏΠ°ΠΏΠΊΠ° WEB-INF, Ρ„Π°ΠΉΠ» web.xmlΠΈ Π΄Π°ΠΆΠ΅ главная страница(рис. 2).

            Рис. 2. Бтандартная структура ΠΏΠ°ΠΏΠΎΠΊ.
            Β 
            Β Maven ΡƒΠΆΠ΅ смоТСт ΡΠΎΠ±Ρ€Π°Ρ‚ΡŒ Ρ‚Π°ΠΊΠΎΠΉ ΠΏΡ€ΠΎΠ΅ΠΊΡ‚, Π½ΠΎ Π΄ΠΎ сих ΠΏΠΎΡ€ Π½Π΅ΠΊΡƒΠ΄Π° ΠΊΠ»Π°ΡΡ‚ΡŒ исходный ΠΊΠΎΠ΄ Java! Π­Ρ‚ΠΎ Π½Π°ΠΌ ΠΈ Π½Π°Π΄ΠΎ ΠΈΡΠΏΡ€Π°Π²ΠΈΡ‚ΡŒ (рис. 3). Π‘ΠΎΠ·Π΄Π°Π΅ΠΌ ΠΏΠ°ΠΏΠΊΡƒ javaΠΏΠΎ адрСсу My web app/src/main/ΠΈ ΠΌΠ΅Ρ‚ΠΈΠΌ Π΅Π΅ ΠΊΠ°ΠΊ "source root". Π’ этой ΠΏΠ°ΠΏΠΊΠ΅ хранится ΠΊΠΎΠ΄ сСрвлСтов.

            Рис. 3. Π‘ΠΎΠ·Π΄Π°Π΅ΠΌ ΠΏΠ°ΠΏΠΊΡƒ для исходников.

            Π‘ΠΎΠ·Π΄Π°Π΄ΠΈΠΌ для ΠΏΡ€ΠΈΠΌΠ΅Ρ€Π° сСрвлСт HelloServlet.java (рис. 4) ΠΈ вставляСм Ρ‚ΡƒΠ΄Π° ΡΠ»Π΅Π΄ΡƒΡŽΡ‰ΠΈΠΉ ΠΊΠΎΠ΄:


            Рис. 4. Π‘ΠΎΠ·Π΄Π°Π΅ΠΌ сСрвлСт.

            Код ΠΏΡ€Π°Π²ΠΈΠ»ΡŒΠ½Ρ‹ΠΉ, Π½ΠΎ ΠΏΠΎΡ‡Π΅ΠΌΡƒ ΠΎΠ½ подчСркиваСтся красным ΠΊΠ°ΠΊ ошибка? Надо Π΄ΠΎΠ±Π°Π²ΠΈΡ‚ΡŒ Π±ΠΈΠ±Π»ΠΈΠΎΡ‚Π΅ΠΊΠΈ Java EE ΠΏΡ€ΠΈ ΠΏΠΎΠΌΠΎΡ‰ΠΈ Maven. ΠžΡ‚ΠΊΡ€Ρ‹Π²Π°Π΅ΠΌ pom.xml ΠΈ ΠΏΡ€ΠΈΠ²ΠΎΠ΄ΠΈΠΌ Π΅Π³ΠΎ ΠΊ Ρ‚Π°ΠΊΠΎΠΌΡƒ Π²ΠΈΠ΄Ρƒ:


            ИзмСнСния в pom.xml.

            Π₯отя это ΠΈ Π½Π΅ трСбуСтся для Ρ‚ΠΎΠ³ΠΎ Ρ‡Ρ‚ΠΎΠ±Ρ‹ ΡΠΎΠ±Ρ€Π°Ρ‚ΡŒ ΠΏΡ€ΠΎΠ΅ΠΊΡ‚, ΠΌΡ‹ Ρ‚Π°ΠΊΠΆΠ΅ Π΄ΠΎΠ±Π°Π²ΠΈΠ»ΠΈ Π² pom.xml Π΄ΠΈΡ€Π΅ΠΊΡ‚ΠΈΠ²Ρ‹ ΠΊΠΎΡ‚ΠΎΡ€Ρ‹Π΅ Π²Ρ‹Ρ‚ΡΠ³ΠΈΠ²Π°ΡŽΡ‚ с сСрвСров Maven ΠΏΠ»Π°Π³ΠΈΠ½ tomcat7-maven. Π’Π΅ΠΏΠ΅Ρ€ΡŒ Π²ΠΎΡΠΏΠΎΠ»ΡŒΠ·ΡƒΠ΅ΠΌΡΡ этим ΠΏΠ»Π°Π³ΠΈΠ½ΠΎΠΌ: создаСм Π½ΠΎΠ²ΡƒΡŽ Run/Debug ConfigurationΡ‚ΠΈΠΏΠ° Maven, Π½Π°Π·Ρ‹Π²Π°Π΅ΠΌ Π΅Π΅ ΠΊΠ°ΠΊ ΡƒΠ³ΠΎΠ΄Π½ΠΎ, Π² ΠΏΠΎΠ»Π΅ Command line пишСм tomcat7:run, ΠΈ Π½Π°ΠΊΠΎΠ½Π΅Ρ† добавляСм cleanΠ² список Ρ†Π΅Π»Π΅ΠΉ Maven ΠΏΠ΅Ρ€Π΅Π΄ запуском (рис. 5):

            Рис. 5. Π‘ΠΎΠ·Π΄Π°Π΅ΠΌ ΠΊΠΎΠ½Ρ„ΠΈΠ³ΡƒΡ€Π°Ρ†ΠΈΡŽ запуска.

            ΠŸΠΎΠ·Π΄Ρ€Π°Π²Π»ΡΡŽ! Π’Π΅ΠΏΠ΅Ρ€ΡŒ Ρƒ тСбя Π΅ΡΡ‚ΡŒ Ρ€Π°Π±ΠΎΡ‡Π΅Π΅ Π²Π΅Π±-ΠΏΡ€ΠΈΠ»ΠΎΠΆΠ΅Π½ΠΈΠ΅ Java EE с ΠΊΠΎΠ½Ρ„ΠΈΠ³ΡƒΡ€Π°Ρ†ΠΈΠ΅ΠΉ запуска которая Π΅Π³ΠΎ собираСт, Π΄Π΅Π»Π°Π΅Ρ‚ WAR Π°Ρ€Ρ…ΠΈΠ² ΠΈ Π΄Π΅ΠΏΠ»ΠΎΠΈΡ‚ Π΅Π³ΠΎ Π² Tomcat:


            Π’Π΅ΠΏΠ΅Ρ€ΡŒ ΠΌΠΎΠΆΠ½ΠΎ просто Π½Π°ΠΆΠ°Ρ‚ΡŒ Shift+F10 (ΠΈΠ»ΠΈ ΠΊΠ½ΠΎΠΏΠΊΡƒ RunΠ½Π° ΠΏΠ°Π½Π΅Π»ΠΈ Π²Π²Π΅Ρ€Ρ…Ρƒ) ΠΈ ΡƒΠ²ΠΈΠ΄Π΅Ρ‚ΡŒ Π² Π±Ρ€Π°ΡƒΠ·Π΅Ρ€Π΅ страницу index.jsp ΠΏΠΎ адрСсу http://localhost:8888 (ссылка Π±ΡƒΠ΄Π΅Ρ‚ Π² ΠΎΠΊΠ½Π΅ Π²Ρ‹Π²ΠΎΠ΄Π° ΠΈΠ½Ρ„ΠΎΡ€ΠΌΠ°Ρ†ΠΈΠΈ ΠΎ сборкС):


            JSP Π΅ΡΡ‚ΡŒ, Π° Ρ‡Ρ‚ΠΎ насчСт сСрвлСтов? Π§Ρ‚ΠΎΠ±Ρ‹ ΠΎΠ±Ρ€Π°Ρ‚ΠΈΡ‚ΡŒΡΡ ΠΊ сСрвлСту, Π½Π°Π΄ΠΎ Π΄Π°Ρ‚ΡŒ Tomcat ΠΏΠΎΠ½ΡΡ‚ΡŒ, Π³Π΄Π΅ Π΅Π³ΠΎ ΠΈΡΠΊΠ°Ρ‚ΡŒ ΠΈ Π½Π° ΠΊΠ°ΠΊΠΎΠΉ адрСс Π·Π°ΠΌΠ°ΠΏΠΈΡ‚ΡŒ. Для этого помСняСм 2 Ρ„Π°ΠΉΠ»Π°: src/main/webapp/WEB_INF/web.xmlΠΈ src/main/webapp/index.jsp :


            ↧

            Tiva and Stellaris Launchpad RTC usage in Energia

            $
            0
            0


            For those of you who still have one of those old Stellaris Launchpads, I'm going to show how to utilize one of its most useful features - real time clock - in a simple way. Actually, the Hibernation module is the same in the new Tiva Launchpad, so it's supposed to work there as well.

            Some time ago I ordered one of those Stellaris boards, which were great for their price (about 12USD) - 80MHz ARM core with lots of I/O, UARTs, SPIs and I2Cs, USB device, Hibernation module and Arduino-like IDE (called Energia) support for simplicity of programming. Later, the line got rebranded to Tiva and Texas Instruments made another launchpad, almost identical to this one.
            Basically, Tiva Launchad is the same Stellaris Launchpad with a slightly different processor - LM4F120 on Stellaris was replaced with TM4C123G on Tiva.
            Meanwhile, the Stellaris Launchpad was collecting dust on my shelf, when I realized - it can be used as simply as any Arduino-compatible dev board, but it has something more to offer - RTC in Hibernation module!
            I started digging the internet and eventually I had this proof-of-concept code that makes use of Hibernation module as a simple RTC. It's limited to only telling you time (without date), but that was what I needed anyway.


            Upload it to your Stellaris or Tiva Launchpad and open Serial monitor:


            Send g to get current time, send s to set time. That's all, you are welcome to use this anywhere you want. This code snipped could be a base for a digital clock with some cool features, or an automated watering system, it's up to you!

            ↧

            Π‘heap but ugly variable bench power supply

            $
            0
            0

            Β Every full-fledged tinkerer in electronics needs a variable power supply, and, as a tinkerer prefers to do, usually builds it instead of just buying. Personally, I did it because I didn't want to spend money on it, eventually discovering that now my PSU has a unique combination of features that no money can by. In this write-up I'll attempt to provide the reader with a comprehensive step-by-step guide on how to build something similar (and probably looking less like crap πŸ˜€ )


            I based my design on this splendid homemade PSU:

            Β Made by ThomasVDD
            You can learn how to make it at:

            http://www.instructables.com/id/Variable-ATX-bench-powersupply-FabLab-edition

            Since I didn't have access to a laser cutter and couldn't be bothered cutting the box manually with a jigsaw, I just found a plasic box of sufficient size and cut some holes in it.
            My PSU was supposed to be a carbon copy of the one on the link above (and I certainly wouldn't write this if it stayed this way). This model has some added features like:
            • Separate ground terminal with ammeter (0-1A and 0-5A range - selectable)
            • 2 additional terminals to measure and display zener diode's voltage
            • A display that shows voltage at variable voltage terminal
            • Additional -5V terminalΒ 
            • A switch that lets you measure current through USB port
            • Awful exterior
            If this looks good to you, then please proceed:

            What you'll need

            • Working ATX Power supply
            • Some enclosure
            • A matching number of banana plugs and terminals (not exactly matching, based on my experience you never need more than 4 connection leads at once, so probably just 4 plugs and at least 9 terminals)
            Banana terminals that I used.
            Not the only kind at the market, you're free to choose something fancier.
            Banana plugs.

            • 7 fuse holders and fuses

            Β 

            • 2 voltmeters with 3 wires (Power, Ground and Signal aka measured voltage) - most voltmeters sold on Aliexpress are 2-wired meaning they measure the voltage of the power source. You don't need them - as soon as voltage drops below 4.5V they will switch off.
            • USB port - I found that the easiest in procurement panel-mounted USB connector is "USB Female to Female cable" (BTW most suppliers incorrectly list it as type B):
            For a price of 1 item you get 2 connectors after snapping it in the middle! Yay!
            • Β 2 Ammeters - 0..1A and 0..5A
            NEVER buy digital ammeters, they just burn for no reason at all after a month of usage. I personally replaced 2 digitals before switching to analog.
            Analog is the way to go!
            • Β For variable voltage circuit you will need: LM317, some filtering capacitors, 1.2k Ohm resistor, 10k Ohm potentiometer, 1N4007 (or similar) diode, heatsink for LM317, screw terminals (x3).
            • Miscellaneous: 2 SPDT switches (changeover), 1 SPST switch (on/off), 1k resistor, a couple of screws and standoffs to attach voltmeters to the enclosure.
            This "item list" picture was relevant when I started working
            on the original PSU, since then I replaced ugly usb ports
            and added lots of features. Still, this picture is inspiring so I'll just leave it here.

            Building

            Here's the schematic for the whole project.

            A picture is worth a thousand words, so here's some pictures of build in progress:


            1) Attach the box-less PSU to the lid.
            2) Fan is essential for keeping the power supply nice and cool.
            Don't forget to make some holes for air outflow as well.

            3) Build and attach the variable voltage circuit.


            4) Plan ahead, make a grid according to which you'll place
            your posts and fuse holders. Note a huge analog ammeter
            on top center - got fried in less than a month.


            Aaaand there goes the cheap chinese ammeter...

            At least it works without it just fine.

            Finished product:


            ↧
            ↧

            Hack SC2262/PT2262 transmitter to send commands for each button

            $
            0
            0


            Applications of RF transmitters based on 2262-type chips (datasheet) are innumerable. You can find it in most remote controlled things on the market - toy cars, light switches. This one in particular came from a fog machine and was used to trigger it remotely.

            Β Recently I needed a way to remotely tell a robot to start and stop doing a simple task, and this thing seemed a perfect solution for this - use Lock button to stop and Unlock to start.
            RF transmitters and receivers come in several flavors, most commonly 315, 433, 868 and 915MHz. To determine which one I had, I had to crack it open:


            Now we got to read it somehow... Luckily for me, you can buy receivers for any frequency in China by boatloads and dirt cheap. That's what I did!

            315MHz variety as marked in silkscreen table
            Now hook it up to Arduino and quickly check that everything is ok... (that's the library I use BTW)
            Except that when I tried to read the code for those buttons there was something unexpected in my terminal window...

            2 buttons yield the same code
            Β  Looks like optimisation in production of fog machines really came a long way - even though transmitter's enclosure implies you can send 2 commands, it actually transmits one and the same command when you press any one of those 2 buttons.

            Checking the layout, my suspicions that 2 buttons are just connected to the same input were confirmed:


            That's how this works: any button pressed will connect 12V to the whole circuit: VCC pin and some address pins of 2262 IC and red LED thus sending one of 3^12 address codes possible.
            What you need to make 2 buttons work is separate them and make each of them send 12V to different address pins and VCC.
            Time to whip out your trusty scalpel 8-)
            Aand that's the result:

            You can see that in order to separately provide VCC to chip, I used 2 diodes.
            Now I have a fully functional remote control:


            Was it worth the hassle? Hell yeah, knowledge about internal works of stuff never hurt anyone. Hope someone will find this article at least educational, and maybe even practical!

            ↧

            Interface board between industrial controllers and FischerTechnic construction set - for education and fun!

            $
            0
            0
            Have you ever seen an industrial programmer? Those half-gods who write programs for PLCs (industrial controllers, in short) and turn lifeless heaps of relays, controllers, motors and sensors into working factories, pump stations and other industrial objects?

            Those fortunate enough to see them doing their job probably wondered how they acquire their most vital trade skill - avoiding bugs in code. While a bug in code written by a conventional software developer could lead to system freeze-up or, worst case, loss of data, only one incorrect bit set by an industrial programmer in his code could send a gantry crane hook crashing into some really costly equipment (that's not a real-world example, I swear) or even harm people directly. Yeah, we all know that most mistakes in any equipment that interacts with outside world through something other than mouse and a keyboard do notcome cheap.

            The truth is, in most cases a newly hatched industrial programmer can't simply start working with real equipment. You have to let them either watch their experienced colleagues work for a while or train on something that's much cheaper and simpler than a factory, but at the same time emulates a manufacturing process.


            Real-world automation

            To understand how to make something that emulates the whole factory, let's start by looking at how it works in real world.

            Each industrial object that employs automation aims to replace human labor, which is expensive and prone to errors, with control systems (cheap to use, quite pricey to buy and install) to operate equipment. To understand what's going on out there and react to it, we connect various sensors and actuators to our control system. In the heart of any industrial control system is one or more steel cabinets that hold all the power and control electronics. That's what a typical Siemens-based cabinet looks like:

            Top part of the cabinet
            ... and the bottom part.

            Out of this assorted bunch of hardware, what really matters in terms of programmer's education is presence of PLC. Some IDEs for industrial controllers offer simulators, but that's only good for simple POC code, not complex systems where number of used I/O ports can exceed 100.

            That's what coding looks like in IDE for Siemens controllers called TIA Portal.
            Oh, and quite obviously any PLC only works when it's powered up. Most frequently PLCs are powered from either AC mains or 24VDC (latter is an industry standart - that's why it's not 12 or 5V)

            Sensors and actuators, from a programmer's standpoint, are divided into digital (0 and 1) and analog (0...MAX_VAL). There's lots and lots of different sensors and actuators out there, but what makes them useful to programmer is their involvement into manufacturing process.

            Thus, this arrangement is more educational than just any optical sensor dangling from a wire and pointing anywhere:


            Let's summarize what kind of equipment we need to hone industry involved programmer's skills:
            • Not prohibitively expensive - not any university can buy PLCs for each student in class, fewer still can provide them with expensive industry-grade sensors and actuators. As an alternative, there are some factory simulation software suites like Plant Simulation - they cost money too, besides, no program can be more visual and educational than a real piece of hardware in front of you.
            • Easy to fix if broken.
            • Involves a real PLC.
            • Sensors and actuators are embedded in some sort of manufacturing process.

            Solution

            Here's the solution they came up with in my university: real PLCsΒ  in conjunction with toy control objects. FischerTechnic was the toy of choice: they offer this - ready-made control objects, and those we use as industrial robotic manipulators.
            Controllers they bought for educational purposes

            Some of our mock control objects - assembly line and robotic manipulator

            FischerTechnics really make excellent sets for every conceivable purpose -Β  sets include motors for vehicles, air compressors, valves and pistons for pneumatic contraptions, all kinds of sensors:


            All electric connections are made with a peculiar type of barrel connector. While it is easy to crimp (strip a wire, plug a wire into a barrel, tighten a screw) it's way too uncommon.
            It should also be noted that of all this assortment, only switches are indifferent to voltage applied to them,Β  for the rest of them you need some kind of level shifting between 24V and 9V.

            So, in order to solve these 2 problems, I set out to make an interface board that could bridge the gap between an industrial controller and child's toy. I'll be sharing with you some build pictures of the 2 versions of this board, as well as Kicad files and BOMs for both of them.

            Build (version) 1


            Requirements for this board were determined by PLCs we bought - it was Siemens S7-1200 with 10 digital outputs, 14 digital inputs and 2 analog inputs (0-10V), enhanced by 1 analog output module (0-10V as well). People with microcontroller background will be surprised to learn that even though there are microcontrollers inside any PLC, PLCs themselves can only have ports that are either input or output, not both.

            Since motors usually need to be operated in both directions, I arranged digital outputs in pairs in H-bridge set-up. Thus, any given pair of digital outputs can act as a driver for either 2 separate loads (valves, unidirectional motors etc.) or 1 bidirectional load such as a motor.

            What did I use for Fischer barrel connectors? After hours of lurking through local shops and markets, I found something that easily accepted a Fischer barrel - 9mm hollow rivets for clothes:


            Having bought a few of them, I tried to solder them and it turns out they are solderable (some metals like aluminum are a pain in the ass to solder with a conventional soldering iron+rosin+Pb solder) and conductive - a perfect match for my barrels!

            Features of this version:
            • Can drive either 10 loads in ON-OFF mode or 5 loads in polarity-switch mode (or any combination of thereof e.g. 2 bidirectional motors + 6 valves). Voltage level on each output is 0-9V.
            • 14 digital inputs where you can connect a switch or a phototransistor.
            • 2 analog inputs with 10V power supply terminals.
            • 1 analog output configured as a 9V PWM signal.
            • All inputs and outputs have LED indication.
            Here's some 3D renders of the first attempt:

            Top side
            Bottom side

            It seemed good enough for a first try and I ordered 5 boards at PCBWay.com - i found it via PCB Shopper service. This service allows you to enter your board's specs and shows you how much it will cost in each fab house from quite an extensive list. I went for the cheapest this time and here's what the cheapest PCB 5-pack looks like:

            They even add some tiny breadboards to your order for free!

            Top side
            Bottom side
            Soldering everyting to your board costs extra money, besides, what kind of electronics enthusiast would voluntary relinquish the joys of hand-soldering each individual part? πŸ˜€

            There's a couple of shots of soldered board (not finished yet though):

            Top side
            Bottom side
            As usual, there were lots of bugs in this first revision of board. Some were due to my lack of attention while committing Gerbers to fab house (that's how I ended up without mounting holes in boards's corners - just forgot to save changes in layout), some due to blatant lack of knowledge in electronics. Anyway, someone had to fix that, that's why I had to reroute some stuff here and there, getting a Frankenstein PCB as a result:

            That's a completely fixed PCB. Doesn't look as virgin as it did, innit?
            Some morbid closeup shots:


            I didn't even think about the fact that analog sensors needed 10 volts to have an output range 0..10V, that's why there's a 7805 on the bottom of all first revision boards now!


            Eventually all 5 boards were ready to go into testing phase:

            Yeah, for some reason I took a picture of 4 out of 5.
            Board already hooked up to some assembly line

            Quality control line to the left (sorts the mock wares into 2 chutes - good and reject)


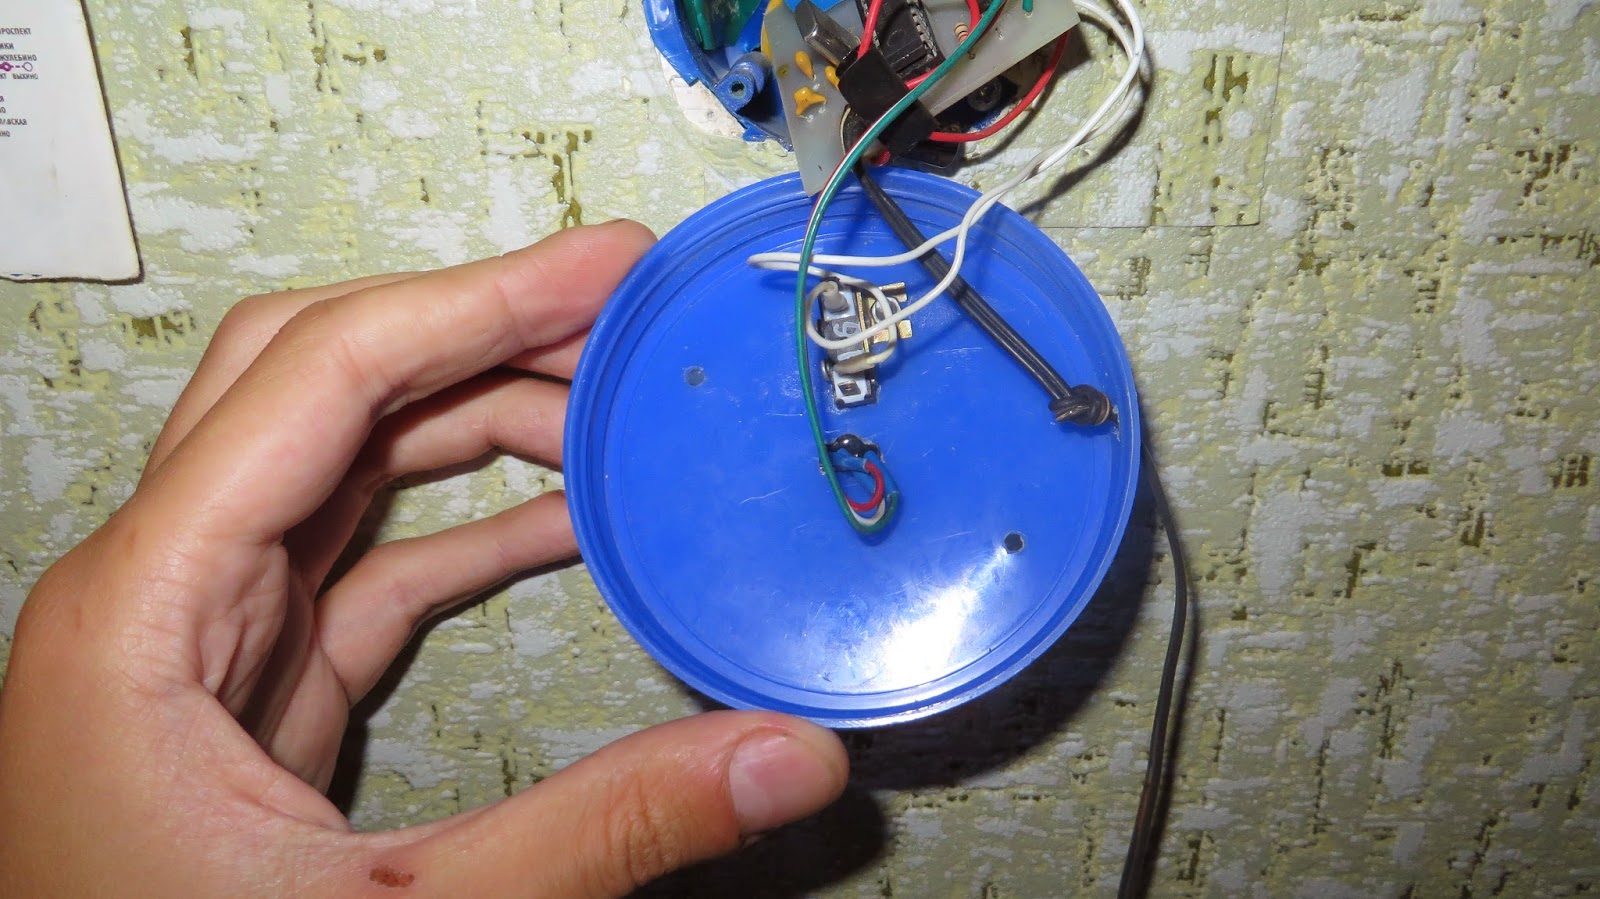
            Clothing rivets turned out to be a perfectly acceptable replacement for real connectors
            I'm attaching Kicad files, PDF schematic and gerbers for this build. Some ugly stuff has been fixed in this revision, but the analog input part is still whack...

            Preliminary second revision fixed most bugs in schematic, but then I had to convert the board to smaller relays and different connectors, therefore it's completely different layout, parts etc...

            Preliminary second version of board before drastic changes, nothing from it survived but this 3D render.

            Only grab this if you'd rather build a board with Fischer connectors - second revision of my board completely eliminates them. In this case you should look at rev.2 schematic (it's much better) and fix this revision.

            Build 2Β 


            Tester guys from university, apart from finding a couple of bugs in rev. 1, didn't like using barrel connectors at all. Wires kept falling out of them when people didn't tighten screws enough and snapping when they tried too hard. Oh, and they look way too bulky and outdated, so I've been asked to find a way to eliminate them altogether.

            Here's what I managed to devise second time:

            Rev. 2 rendered in Kicad
            Β Notice some vital features I added/changed:
            • Β Barrel receptables dropped in favor of spring cage terminals - you can just plug the bare wire directly to the board now.
            • Separate fused connection for lamps (optocouplers need them to detect a broken beam of light when something passes a particular point on a conveyor for instance).
            • PTC fuses on each digital output - now careless freshmen can short-circuit anything they like without burning my board!
            • Silkscreen is more informative now - it's possible to assemble the board without its schematic as all the values are printed directly in silk. Now I can hand over the assembly part to undergrad students and rest assured they won't mess it up (or at least be more sure than usual...)
            • Smaller relays.
            • You can pick PWM voltage between 9 and 24V.
            • 10V output to power analog sensors.
            • Smoothing capacitors on 24V, 10V and 9V power rails.
            • Power indication on 9V input.
            • LEDs are surface mount now except 9V power indication.
            • Stand-offs were added around 40-pin and 10-pin IDC connectors to prevent board bending and snapping while plugging male connectors.
            Now, some pictures of the build as usual...

            Top side
            Bottom side

            Board were ordered from PCBWay again (I'm not affiliated with them, it's just they offered the cheapest quote for this revision of the board, too).

            Top side
            Bottom side with plastic standoffs

            Even a couple of vanity shots. She looks beautiful, doesn't she?
            Β 

            Board being used - now connecting a peripheral device is as simple as pressing a terminal's fin with a screwdriver and plugging in your wire.
            All 5 boards assembled and ready to go.
            Here's the link to all the sources of this board.

            A little extra


            As a bonus, I designed this little contraption to mount my rev. 2 board on a DIN rail, which is an industry standart too BTW.


            Now this can go in a real control cabinet together with PLCs and relays.
            I'm feeling generous today with models any idiot can design, so I'm sharing this too. It was made with Autodesk Inventor.

            The result


            I wouldn't start and proceed through this great undertaking if it wasn't for my overwhelming desire to see the fruits of my work.

            Alma-mater used those boards not only to teach some bright minds to become undustry-affiliated programmers one day, but also to organize a region-wide contest in PLC programming.

            I'll now indulge myself in uploading innumerous pictures of my boards being used in this contest and in process of teaching. One picture is worth a thousand words, so what comes next could probably populate a skinny paperback book. πŸ˜€


            photoplaceholder photoplaceholder


            photoplaceholder photoplaceholder


            Here's even a video:


            ↧

            ΠŸΠΈΠ²ΠΎΠ²Π°Ρ€Π½Ρ ΠΈΠ· ΡΡ‚ΠΈΡ€Π°Π»ΡŒΠ½ΠΎΠΉ ΠΌΠ°ΡˆΠΈΠ½Ρ‹

            $
            0
            0


            БСгодня я ΠΏΠΎΠΊΠ°ΠΆΡƒ ΠΊΠ°ΠΊ Π½Π°Ρ‡Π°Ρ‚ΡŒ Π²Π°Ρ€ΠΈΡ‚ΡŒ ΠΏΠΈΠ²ΠΎ ΠΏΡ€ΠΈ Π½Π°Π»ΠΈΡ‡ΠΈΠΈ большого ТСлания, ΠΊΡƒΡ‡ΠΈ Ρ…Π»Π°ΠΌΠ° ΠΈ отсутствия Π΄Π΅Π½Π΅Π³. ИмСнно Π±ΡƒΠ΄ΡƒΡ‡ΠΈ Π² Ρ‚Π°ΠΊΠΎΠΉ ситуации я Ρ€Π΅ΡˆΠΈΠ» ΠΏΠ΅Ρ€Π΅Π΄Π΅Π»Π°Ρ‚ΡŒ Π°ΠΊΡ‚ΠΈΠ²Π°Ρ‚ΠΎΡ€Π½ΡƒΡŽ ΡΡ‚ΠΈΡ€Π°Π»ΡŒΠ½ΡƒΡŽ ΠΌΠ°ΡˆΠΈΠ½ΠΊΡƒ совСтских Π²Ρ€Π΅ΠΌΠ΅Π½ "Вятка"Π² Π΅ΠΌΠΊΠΎΡΡ‚ΡŒ для варСния ΠΏΠΈΠ²Π°.

            ПослС прочтСния ΠΊΡƒΡ‡ΠΈ тСкста ΠΏΡ€ΠΎ ΠΏΠΈΠ²ΠΎΠ²Π°Ρ€Π΅Π½ΠΈΠ΅ Π² ΠΈΠ½Ρ‚Π΅Ρ€Π½Π΅Ρ‚Π΅ я понял, Ρ‡Ρ‚ΠΎ для варСния ΠΏΠΈΠ²Π° ΠΎΠ±Ρ‹Ρ‡Π½ΠΎ Π½Π°Π΄ΠΎ ΠΌΠ½ΠΎΠ³ΠΎ СмкостСй большого объСма, ΠΈ Ρ‡Π΅ΠΌ ΠΈΡ… большС - Ρ‚Π΅ΠΌ ΠΏΡ€ΠΎΡ‰Π΅ (мСньшС ΠΏΠ΅Ρ€Π΅Π»ΠΈΠ²Π°Π½ΠΈΠΉ ΠΈΠ· 1 Π²ΠΎ Π²Ρ‚ΠΎΡ€ΠΎΠΉ Π° ΠΏΠΎΡ‚ΠΎΠΌ ΠΎΠ±Ρ€Π°Ρ‚Π½ΠΎ). Но ΠΏΠΎΡ‚ΠΎΠΌ я нашСл интСрСсный ΠΈ простой ΠΌΠ΅Ρ‚ΠΎΠ΄ Π²Π°Ρ€ΠΊΠΈ Π² 1 Смкости : BIAB (brew in a bag ΠΈΠ»ΠΈ Π²Π°Ρ€ΠΊΠ° Π² мСшкС). Π₯ΠΎΡ€ΠΎΡˆΠ΅Π΅ руководство с ΠΊΠ°Ρ€Ρ‚ΠΈΠ½ΠΊΠ°ΠΌΠΈ ΠΌΠΎΠΆΠ½ΠΎ Π½Π°ΠΉΡ‚ΠΈ Π’Π£Π’ (английский).

            Π‘ΡƒΠ΄ΡƒΡ‡ΠΈ Π»ΡŽΠ±ΠΈΡ‚Π΅Π»Π΅ΠΌ Π°Π²Ρ‚ΠΎΠΌΠ°Ρ‚ΠΈΠ·Π°Ρ†ΠΈΠΈ, я сразу Π·Π°ΠΌΠ΅Ρ‚ΠΈΠ» Ρ‚ΠΎ, Ρ‡Ρ‚ΠΎ Π½Π΅ΠΏΠ»ΠΎΡ…ΠΎ Π±Ρ‹ Ρ‚Π΅ΠΌΠΏΠ΅Ρ€Π°Ρ‚ΡƒΡ€Π½Ρ‹Π΅ ΠΏΠ°ΡƒΠ·Ρ‹ ΠΏΡ€ΠΈ ΠΏΠΈΠ²ΠΎΠ²Π°Ρ€Π΅Π½ΠΈΠΈ ΠΏΠΎΠ΄Π΄Π΅Ρ€ΠΆΠΈΠ²Π°Ρ‚ΡŒ ΠΏΡ€ΠΈ ΠΏΠΎΠΌΠΎΡ‰ΠΈ ΠΌΠΈΠΊΡ€ΠΎΠΊΠΎΠ½Ρ‚Ρ€ΠΎΠ»Π»Π΅Ρ€Π°. Π’Π°ΠΊΠΈΠΌ ΠΈ появился монстр ΠΏΠΎΠ΄ Π½Π°Π·Π²Π°Π½ΠΈΠ΅ΠΌ "Π‘Ρ‚ΠΈΡ€Π°Π»ΡŒΠ½Π°Ρ-Машинка-Автоматизированная-ΠŸΠΈΠ²ΠΎΠ²Π°Ρ€Π½Ρ".

            Π§Ρ‚ΠΎΠ±Ρ‹ Π²Π°Ρ€ΠΈΡ‚ΡŒ Π·Π΅Ρ€Π½ΠΎΠ²ΠΎΠ΅ ΠΏΠΈΠ²ΠΎ ΠΎΠ±Ρ‹Ρ‡Π½Ρ‹ΠΌ ΠΌΠ΅Ρ‚ΠΎΠ΄ΠΎΠΌ(Π½Π΅ Π² мСшкС),Β  потрСбуСтся Π½Π΅ΠΌΠ½ΠΎΠ³ΠΎ Π΄ΠΎΠΏΠΎΠ»Π½ΠΈΡ‚ΡŒ ΠΏΠΎΠ»ΡƒΡ‡ΠΈΠ²ΡˆΡƒΡŽΡΡ ΠΌΠ°ΡˆΠΈΠ½Ρƒ, Ρ‡Ρ‚ΠΎ я Ρ‚Π°ΠΊΠΆΠ΅ ΠΎΠΏΠΈΡˆΡƒ Π² ΠΎΡ‚Π΄Π΅Π»ΡŒΠ½ΠΎΠΉ Π³Π»Π°Π²Π΅.

            Π‘Ρ‚ΠΈΡ€Π°Π»ΡŒΠ½Π°Ρ машина

            ИмССм стиралку Вятка Π°ΠΊΡ‚ΠΈΠ²Π°Ρ‚ΠΎΡ€Π½ΡƒΡŽ (это Π·Π½Π°Ρ‡ΠΈΡ‚ Ρ‡Ρ‚ΠΎ ΠΎΠ½Π° устроСна Π½Π΅ ΠΊΠ°ΠΊ соврСмСнныС машинки с Π±Π°Ρ€Π°Π±Π°Π½ΠΎΠΌ ΠΊΠΎΡ‚ΠΎΡ€Ρ‹ΠΉ крутится, Π° с Π±Π°ΠΊΠΎΠΌ Π²Π½ΠΈΠ·Ρƒ ΠΊΠΎΡ‚ΠΎΡ€ΠΎΠ³ΠΎ крутится Ρ‡Ρ‚ΠΎ-Ρ‚ΠΎ Π²Ρ€ΠΎΠ΄Π΅ плоской мСшалки). ОбъСм Π±Π°ΠΊΠ° 28 Π»ΠΈΡ‚Ρ€ΠΎΠ², слив Π²ΠΎΠ΄Ρ‹ - снизу. Π‘Π°ΠΊ Ρ„ΠΎΡ€ΠΌΡ‹ Ρ†ΠΈΠ»ΠΈΠ½Π΄Ρ€Π° срСзанного снизу, Ρ‡Ρ‚ΠΎ ΠΎΡ‡Π΅Π½ΡŒ ΡƒΠ΄ΠΎΠ±Π½ΠΎ для слива сусла ΠΏΠΎ максимуму.

            Π’Π°ΠΊ выглядСла моя Вятка Π΄ΠΎ ΠΌΠΎΠ΄ΠΈΡ„ΠΈΠΊΠ°Ρ†ΠΈΠΉ. (Ρ‚ΠΎΠ»ΡŒΠΊΠΎ Π±ΠΎΠ»Π΅Π΅ рТавая)

            Для контроля Ρ‚Π΅ΠΌΠΏΠ΅Ρ€Π°Ρ‚ΡƒΡ€Ρ‹ Π½Π°Π΄ΠΎ ΡƒΡΡ‚Π°Π½ΠΎΠ²ΠΈΡ‚ΡŒ Π² Π±Π°ΠΊ Π½Π°Π³Ρ€Π΅Π²Π°Ρ‚Π΅Π»ΡŒΠ½Ρ‹ΠΉ элСмСнт ΠΈ Π΄Π°Ρ‚Ρ‡ΠΈΠΊ Ρ‚Π΅ΠΌΠΏΠ΅Ρ€Π°Ρ‚ΡƒΡ€Ρ‹. ΠŸΠΎΠ½Π°Π΄ΠΎΠ±ΠΈΡ‚ΡΡ ΡΠ»Π΅Π΄ΡƒΡŽΡ‰Π΅Π΅:

            ΠΠ°Π³Ρ€Π΅Π²Π°Ρ‚Π΅Π»ΡŒΠ½Ρ‹ΠΉ элСмСнт - плоский ΠΈΠ»ΠΈ
            Ρ‚Ρ€ΡƒΠ±ΠΎΡ‡Π½Ρ‹ΠΉ. ДобываСтся ΠΈΠ· Ρ‡Π°ΠΉΠ½ΠΈΠΊΠ°
            Π”Π°Ρ‚Ρ‡ΠΈΠΊ Ρ‚Π΅ΠΌΠΏΠ΅Ρ€Π°Ρ‚ΡƒΡ€Ρ‹ - Ρƒ мСня DS18B20,
            ΠΆΠ΅Π»Π°Ρ‚Π΅Π»ΡŒΠ½ΠΎ сразу с гильзой для вворачивания Π²
            стСнку Смкости. ΠŸΠΎΠΊΡƒΠΏΠ°Π΅Ρ‚ΡΡ Π² ΠšΠΈΡ‚Π°Π΅.

            Π’Π°ΠΊΠΆΠ΅ понадобится Ρ‡Ρ‚ΠΎ-Ρ‚ΠΎ Ρ‡Π΅ΠΌ ΠΏΡ€ΠΈΠΊΡ€Π΅ΠΏΠΈΡ‚ΡŒ Π½Π°Π³Ρ€Π΅Π²Π°Ρ‚Π΅Π»ΡŒ ΠΊ Смкости. Π‘Π½Π°Ρ‡Π°Π»Π° я ΠΊΡƒΠΏΠΈΠ» для этого Ρ‚ΡŽΠ±ΠΈΠΊ Ρ…ΠΎΠ»ΠΎΠ΄Π½ΠΎΠΉ сварки. НС Π΄Π΅Π»Π°ΠΉΡ‚Π΅ этого!"Π₯олодная сварка" - это всСго лишь двухкомпонСнтная эпоксидная смола ΠΈ Π½Π΅ ΠΏΡ€ΠΈΠ³ΠΎΠ΄Π½Π° для ΠΊΠΎΠ½Ρ‚Π°ΠΊΡ‚Π° с ΠΏΠΈΡ‰Π΅ΠΉ. Π‘Ρ‚ΠΎΠΈΡ‚ ΠΏΠΎΠΈΡΠΊΠ°Ρ‚ΡŒ ΠΊΠ°ΠΊΠΎΠΉ-Ρ‚ΠΎ ΠΊΠ»Π΅ΠΉ для ΠΏΠΈΡ‰Π΅Π²ΠΎΠΉ ΠΏΡ€ΠΎΠΌΡ‹ΡˆΠ»Π΅Π½Π½ΠΎΡΡ‚ΠΈ (я Π½Π΅ нашСл) Π»ΠΈΠ±ΠΎ Π²ΠΎΠΎΠ±Ρ‰Π΅ ΠΈΡΠΏΠΎΠ»ΡŒΠ·ΠΎΠ²Π°Ρ‚ΡŒ силиконовыС/мСталличСскиС ΠΏΡ€ΠΎΠΊΠ»Π°Π΄ΠΊΠΈ для соСдинСния (Ρ‡Ρ‚ΠΎ я ΠΈ сдСлал, описано Π½ΠΈΠΆΠ΅).

            Π˜Ρ‚Π°ΠΊ, Π²Ρ‹Ρ€Π΅Π·Π°Π΅ΠΌ Π°ΠΊΡ‚ΠΈΠ²Π°Ρ‚ΠΎΡ€ ΠΈ Π½Π° Π΅Π³ΠΎ мСсто вставляСм Π½Π°Π³Ρ€Π΅Π²Π°Ρ‚Π΅Π»ΡŒΠ½Ρ‹ΠΉ элСмСнт. Π’Π°ΠΊΠΆΠ΅ Π³Π΄Π΅-Π½ΠΈΠ±ΡƒΠ΄ΡŒ Π² Π΅ΠΌΠΊΠΎΡΡ‚ΡŒ Π²Ρ€Π΅Π·Π°Π΅ΠΌ Π΄Π°Ρ‚Ρ‡ΠΈΠΊ Ρ‚Π΅ΠΌΠΏΠ΅Ρ€Π°Ρ‚ΡƒΡ€Ρ‹.

            ПослС этого добавляСм ΠΊΡ€Π°Π½ для слива сусла:

            ΠžΡ‚Π²Π΅Ρ€ΡΡ‚ΠΈΠ΅ для слива ΠΈ ΠΊΡ€Π°Π½ Π² стСнкС соСдиняСт обычная короткая гибкая ΠΏΠΎΠ΄Π²ΠΎΠ΄ΠΊΠ°. РазумССтся, Π½Π΅ стоит Π·Π°Π±Ρ‹Π²Π°Ρ‚ΡŒ ΠΏΡ€ΠΎ ΡΠΈΠ»ΠΈΠΊΠΎΠ½ΠΎΠ²ΡƒΡŽ ΡˆΠ°ΠΉΠ±Ρƒ Π½Π° отвСрстии для слива (Π½Π° ΠΊΠ°Ρ€Ρ‚ΠΈΠ½ΠΊΠ΅ рСзиновая, с Ρ‚Π°ΠΊΠΎΠΉ ΠΏΠΈΠ²ΠΎ Π±ΡƒΠ΄Π΅Ρ‚ Π½Π° вкус ΠΊΠ°ΠΊ Ρ€Π΅Π·ΠΈΠ½Π° πŸ˜„)

            UPDATE:Β 

            ПослС 1 заливания Π²ΠΎΠ΄Ρ‹ Π²Π½ΡƒΡ‚Ρ€ΡŒ Π±Π°ΠΊΠ° ΠΌΠ½Π΅, Ρ…ΠΎΡ‚ΡŒ ΠΈ ΠΏΠΎΠ·Π΄Π½ΠΎ, ΠΏΡ€ΠΈΡˆΠ»Π° Π² Π³ΠΎΠ»ΠΎΠ²Ρƒ ΠΌΡ‹ΡΠ»ΡŒ Ρ‡Ρ‚ΠΎ Π½Π°Π΄ΠΎ ΠΈΡΠΏΠΎΠ»ΡŒΠ·ΠΎΠ²Π°Ρ‚ΡŒ Ρ‚ΠΎΠ»ΡŒΠΊΠΎ Π½Π΅Ρ€ΠΆΠ°Π²Π΅ΡŽΡ‰ΠΈΠ΅ ΠΌΠ΅Ρ‚Π°Π»Π»Ρ‹. Π’ΠΎΡ‚Β  Ρ€Π΅Π·ΡƒΠ»ΡŒΡ‚Π°Ρ‚ нСсоблюдСния этого:

            На Ρ„ΠΎΡ‚ΠΎ ΠΏΠΎΠΊΠ°Π·Π°Π½Ρ‹ элСмСнты Ρ„ΠΈΠ»ΡŒΡ‚Ρ€Π° (змСюка ΠΈ ΠΊΡ€Π΅ΠΏΠ»Π΅Π½ΠΈΠ΅ для ситСчка ΠΈΠ· 2 ΡˆΡƒΡ€ΡƒΠΏΠΎΠ² ΠΈ Π·Π°Ρ‰Π΅Π»ΠΊΠΈ),
            ΠΊΠΎΡ‚ΠΎΡ€Ρ‹Π΅ Π½Π΅ Π½ΡƒΠΆΠ½Ρ‹ для Π²Π°Ρ€ΠΊΠΈ Π² мСшкС, ΠΏΠΎΡ‚ΠΎΠΌΡƒ Ρ‡Ρ‚ΠΎ мСшок сам Ρ„ΠΈΠ»ΡŒΡ‚Ρ€ΡƒΠ΅Ρ‚ сусло.

            ПослС Ρ‚Π°ΠΊΠΎΠΉ Π½Π΅ΡƒΠ΄Π°Ρ‡Π½ΠΎΠΉ конструкции я избавился ΠΎΡ‚ Ρ€ΠΆΠ°Π²Π΅ΡŽΡ‰ΠΈΡ… ΠΌΠ΅Ρ‚Π°Π»Π»ΠΎΠ² + Π·Π°ΠΌΠ΅Π½ΠΈΠ» Ρ…ΠΎΠ»ΠΎΠ΄Π½ΡƒΡŽ сварку Π½Π° ΠΎΠ³Ρ€ΠΎΠΌΠ½ΡƒΡŽ Π°Π»ΡŽΠΌΠΈΠ½ΠΈΠ΅Π²ΡƒΡŽ ΡˆΠ°ΠΉΠ±Ρƒ, ΠΊΠΎΡ‚ΠΎΡ€ΡƒΡŽ я сдСлал ΠΈΠ· алюминиСвой ΠΊΡ€Ρ‹ΡˆΠΊΠΈ ΠΎΡ‚ этой самой машинки:
            Β 

            АлюминиСвая шайба прикрСпляСтся Π½Π° Π΅ΠΌΠΊΠΎΡΡ‚ΡŒ Π±ΠΎΠ»Ρ‚Π°ΠΌΠΈ, соСдинСниС прокладываСтся силиконом. Π“Π΄Π΅ Π΄ΠΎΡΡ‚Π°Ρ‚ΡŒ силикон? ΠŸΠΎΠΊΡƒΠΏΠ°Π΅ΠΌ ΠΊΡ€ΡƒΠ³Π»ΡƒΡŽ ΡΠΈΠ»ΠΈΠΊΠΎΠ½ΠΎΠ²ΡƒΡŽ Ρ„ΠΎΡ€ΠΌΡƒ для Π²Ρ‹ΠΏΠ΅Ρ‡ΠΊΠΈ Π² ΠΌΠ°Π³Π°Π·ΠΈΠ½Π΅. Π’ΠΎΡ‚ Ρ„ΠΎΡ‚ΠΎ Π² процСссС ΠΈ Ρ€Π΅Π·ΡƒΠ»ΡŒΡ‚Π°Ρ‚:


            Π­Π»Π΅ΠΊΡ‚Ρ€ΠΎΠ½ΠΈΠΊΠ°

            Π’Π΅, Ρƒ ΠΊΠΎΠ³ΠΎ Π½Π΅ Ρ‡Π΅ΡˆΡƒΡ‚ΡΡ Ρ€ΡƒΠΊΠΈ ΠΈΠ·ΠΎΠ±Ρ€Π΅Ρ‚Π°Ρ‚ΡŒ вСлосипСд, ΠΌΠΎΠ³ΡƒΡ‚ Π²Π·ΡΡ‚ΡŒ Π² ΠšΠΈΡ‚Π°Π΅ PID-рСгулятор ΠΈ ΠΏΡ€ΠΎΠΏΡƒΡΡ‚ΠΈΡ‚ΡŒ сборку элСктроники ΠΈ написаниС ΠΊΠΎΠ΄Π°.Β  А я Ρ‚Π°ΠΊΠΎΠΉ 😊

            Π‘Ρ€Π°Π·Ρƒ ΠΏΡ€ΠΈΠΊΡ€Π΅ΠΏΠ»ΡŽ схСму ΡƒΠΏΡ€Π°Π²Π»ΡΡŽΡ‰Π΅ΠΉ ΠΊΠΎΡ€ΠΎΠ±ΠΊΠΈ - ΠΎΠ½Π° простая ΠΈ Π½Π΅ Ρ‚Ρ€Π΅Π±ΡƒΠ΅Ρ‚ мноТСства пояснСний. Для Π²Ρ‹Π²ΠΎΠ΄Π° ΠΈΠ½Ρ„ΠΎΡ€ΠΌΠ°Ρ†ΠΈΠΈ ΠΈΡΠΏΠΎΠ»ΡŒΠ·ΡƒΠ΅Ρ‚ΡΡ Π·Π½Π°ΠΊΠΎΡΠΈΠ½Ρ‚Π΅Π·ΠΈΡ€ΡƒΡŽΡ‰ΠΈΠΉ дисплСй (ищСтся ΠΏΠΎ ΠΊΠ»ΡŽΡ‡Π΅Π²ΠΎΠΌΡƒ слову hd44780 Π½Π° алиэкспрСссС ΠΈ ΠΏΡ€ΠΎΡ‡.), для Π²Π²ΠΎΠ΄Π° - 3 ΠΊΠ½ΠΎΠΏΠΊΠΈ ΠΈ энкодСр. ΠŸΠΈΡ‚Π°Π½ΠΈΠ΅ ΠΊΠΎΠΌΠΌΡƒΡ‚ΠΈΡ€ΡƒΡŽ ΠΏΡ€ΠΈ ΠΏΠΎΠΌΠΎΡ‰ΠΈ Ρ‚Π²Π΅Ρ€Π΄ΠΎΡ‚Π΅Π»ΡŒΠ½ΠΎΠ³ΠΎ Ρ€Π΅Π»Π΅ Π°ΠΆ Π½Π° 25 китайских Π°ΠΌΠΏΠ΅Ρ€, Ρ‡Ρ‚ΠΎ ΠΏΡ€ΠΈΠΌΠ΅Ρ€Π½ΠΎ Ρ€Π°Π²Π½ΠΎ 10 настоящим Π°ΠΌΠΏΠ΅Ρ€Π°ΠΌ нагрСватСля.


            Π‘ΠΎΠ±Ρ€Π°Π» всС Π² корпусС ΠΎΡ‚ ATX Π±Π»ΠΎΠΊΠ° питания, ΠΎΡ‚ Π΄Ρ€ΡƒΠ³ΠΎΠ³ΠΎ Π‘ΠŸ взял 12 ΠΈ 5 Π’ (ΠΏΠ΅Ρ€Π΅Π±ΠΎΡ€, ΠΊΠΎΠ½Π΅Ρ‡Π½ΠΎ, Π½ΠΎ Ρƒ мСня валялось ΠΏΠΎΠ»Π½ΠΎ этих Π±Π»ΠΎΠΊΠΎΠ²). ΠŸΡ€ΠΈΠ»Π°Π³Π°ΡŽ Ρ„ΠΎΡ‚ΠΎ сборки ΠΈ Π³ΠΎΡ‚ΠΎΠ²ΠΎΠ³ΠΎ устройства:

            Π’Ρ€Π΅Π·Π°Π΅ΠΌ ΠΎΡ€Π³Π°Π½Ρ‹ управлСния Π² ΠΏΠ΅Ρ€Π΅Π΄Π½ΡŽΡŽ панСль...
            ΠšΡ€Π΅ΠΏΠΈΠΌ Ардуино Π²Π΅Ρ€Ρ‚ΠΈΠΊΠ°Π»ΡŒΠ½ΠΎ Ρ‡Ρ‚ΠΎΠ±Ρ‹ ΡΡΠΊΠΎΠ½ΠΎΠΌΠΈΡ‚ΡŒ мСсто.
            ΠŸΠΎΡ‡Ρ‚ΠΈ Π³ΠΎΡ‚ΠΎΠ²ΠΎ. ΠžΠ³Ρ€ΠΎΠΌΠ½Ρ‹ΠΉ Ρ€Π°Π΄ΠΈΠ°Ρ‚ΠΎΡ€ - ΠΏΠ΅Ρ€Π΅Π±ΠΎΡ€, Π½ΠΎ это Π»ΡƒΡ‡ΡˆΠ΅ Ρ‡Π΅ΠΌ ΠΏΠ΅Ρ€Π΅Π³Ρ€Π΅Π² :)
            ΠšΠΎΡ€ΠΎΠ±ΠΊΠ° собрана ΠΈ Π·Π°Π»ΠΈΡ‚Π° пробная ΠΏΡ€ΠΎΠ³Ρ€Π°ΠΌΠΌΠ°.
            Вся систСма. Π‘Π½ΠΈΠ·Ρƒ Π‘ΠŸ, свСрху систСма управлСния с Ρ‚ΠΎΡ€Ρ‡Π°Ρ‰ΠΈΠΌ ΠΈΠ· Π½Π΅Π΅ Π΄Π°Ρ‚Ρ‡ΠΈΠΊΠΎΠΌ. ΠŸΠΈΡ‚Π°Π½ΠΈΠ΅ Π½Π° Π½Π°Π³Ρ€Π΅Π²Π°Ρ‚Π΅Π»ΡŒ подаСтся Π±Π΅Π»Ρ‹ΠΌ ΠΊΠ°Π±Π΅Π»Π΅ΠΌ ΠΏΠ°ΠΏΠ°-ΠΌΠ°ΠΌΠ°.
            Π‘Π΅Π»Ρ‹ΠΉ ΡˆΠ½ΡƒΡ€ Π΄Π°Π΅Ρ‚ 220Π’ Π½Π° Π½Π°Π³Ρ€Π΅Π²Π°Ρ‚Π΅Π»ΡŒ, ΠΏΠΈΡ‚Π°Π½ΠΈΠ΅ элСктроники осущСствляСтся ΠΎΡ‚Π΄Π΅Π»ΡŒΠ½ΠΎ Ρ‡Π΅Ρ€Π΅Π· Ρ‡Π΅Ρ€Π½Ρ‹ΠΉ ΡˆΠ½ΡƒΡ€ (Π² Π½Π΅ΠΌ 12Π’+5Π’+GND). ΠŸΡ€ΠΎΠ²ΠΎΠ΄ Π² Π±Π΅Π»ΠΎΠΌ Π²Π²ΠΎΠ΄Π΅ - Π΄Π°Ρ‚Ρ‡ΠΈΠΊ Ρ‚Π΅ΠΌΠΏΠ΅Ρ€Π°Ρ‚ΡƒΡ€Ρ‹.
            USB ΠΏΠΎΡ€Ρ‚ для удобства Π²Ρ‹Π²Π΅Π΄Π΅Π½ Π½Π°Ρ€ΡƒΠΆΡƒ.
            Π§Π΅Ρ€Π½Ρ‹ΠΉ ΠΊΠ°Π±Π΅Π»ΡŒΠ½Ρ‹ΠΉ Π²Π²ΠΎΠ΄ - для ΠΏΠΎΠ΄ΠΊΠ»ΡŽΡ‡Π΅Π½ΠΈΡ нагрСватСля.
            Π‘Π»ΠΎΠΊ управлСния Π²Ρ€Π΅Π·Π°Π½Π½Ρ‹ΠΉ Π² корпус ΠΎΡ‚ ΡΡ‚ΠΈΡ€Π°Π»ΡŒΠ½ΠΎΠΉ машинки.
            IT'S ALIVE!!!

            Код:

            Π’ Π½Π°Ρ‡Π°Π»Π΅ ΠΊΠΎΠ΄Π° Π΅ΡΡ‚ΡŒ ΠΊΠΎΠ΅-ΠΊΠ°ΠΊΠΈΠ΅ ΠΏΠΎΠ»Π΅Π·Π½Ρ‹Π΅ подстройки, Ρ‚Π°ΠΊΠΈΠ΅ ΠΊΠ°ΠΊ:

            • #define DEBUG - Ρ€Π΅ΠΆΠΈΠΌ ΠΎΡ‚Π»Π°Π΄ΠΊΠΈ. Π― Π²ΠΊΠ»ΡŽΡ‡Π°Π» Π΅Π³ΠΎ Π²ΠΎ врСмя Ρ€Π°Π·Ρ€Π°Π±ΠΎΡ‚ΠΊΠΈ ΠΏΡ€ΠΎΠ³Ρ€Π°ΠΌΠΌΡ‹, ΠΏΠΎΡ‚ΠΎΠΌ Π²Ρ‹ΠΊΠ»ΡŽΡ‡Π°Π». ΠŸΡ€ΠΈ Π½Π΅ΠΌ Π²ΠΊΠ»ΡŽΡ‡Π°Π΅Ρ‚ΡΡ Π²Ρ‹Π²ΠΎΠ΄ ΠΌΠ½ΠΎΠ³ΠΈΡ…Β  событий Π² Serial, Π½Π°ΠΏΡ€ΠΈΠΌΠ΅Ρ€ наТатия ΠΊΠ½ΠΎΠΏΠΎΠΊ, ΠΏΠ΅Ρ€Π΅ΠΊΠ»ΡŽΡ‡Π΅Π½ΠΈΡ Ρ€Π΅ΠΆΠΈΠΌΠΎΠ². ΠžΠ±Ρ‹Ρ‡Π½ΠΎ ΠΊΠΎΠ³Π΄Π° ΠΊΠΎΠ΄ Π³ΠΎΡ‚ΠΎΠ² ΠΈ всС ΠΎΠ±ΠΎΡ€ΡƒΠ΄ΠΎΠ²Π°Π½ΠΈΠ΅ Ρ€Π°Π±ΠΎΡ‚Π°Π΅Ρ‚, я эту строку ΠΊΠΎΠΌΠΌΠ΅Π½Ρ‚ΠΈΡ€ΡƒΡŽ.Β 
            • #define PLOT - Ρ€Π΅ΠΆΠΈΠΌ построСния Π³Ρ€Π°Ρ„ΠΈΠΊΠ° Ρ‚Π΅ΠΌΠΏΠ΅Ρ€Π°Ρ‚ΡƒΡ€Ρ‹. ЗначСния Ρ‚Π΅ΠΌΠΏΠ΅Ρ€Π°Ρ‚ΡƒΡ€Ρ‹ выводятся Π² Serial real-time для построСния Π³Ρ€Π°Ρ„ΠΈΠΊΠ°. НСзамСнимо для настройки PID Π°Π»Π³ΠΎΡ€ΠΈΡ‚ΠΌΠ°, ΠΏΠΎΡ‚ΠΎΠΌ ΠΌΠΎΠΆΠ½ΠΎ ΠΈ ΠΎΡ‚ΠΊΠ»ΡŽΡ‡ΠΈΡ‚ΡŒ.
            • Π Π΅ΠΆΠΈΠΌΡ‹ DEBUG ΠΈ PLOT нСсовмСстимы Π΄Ρ€ΡƒΠ³ с Π΄Ρ€ΡƒΠ³ΠΎΠΌ, ΠΏΠΎΡ‚ΠΎΠΌΡƒ Ρ‡Ρ‚ΠΎ выводят Π² ΠΎΠ΄ΠΈΠ½ ΠΈ Ρ‚ΠΎΡ‚ ΠΆΠ΅ ΠΏΠΎΡ€Ρ‚ Ρ€Π°Π·Π½ΡƒΡŽ ΠΈΠ½Ρ„Ρƒ. ΠŸΠΎΡΡ‚Ρ€ΠΎΠ΅Π½ΠΈΠ΅ Π³Ρ€Π°Ρ„ΠΈΠΊΠ° ΠΏΡ€ΠΈ DEBUG Ρ€Π°Π±ΠΎΡ‚Π°Ρ‚ΡŒ Π½Π΅ Π±ΡƒΠ΄Π΅Ρ‚.
            • #define USE_EEPROM - ΡΠΎΠ²Π΅Ρ‚ΡƒΡŽ Ρ€Π°ΡΠΊΠΎΠΌΠΌΠ΅Π½Ρ‚ΠΈΡ€ΠΎΠ²Π°Ρ‚ΡŒ послС настройки PID Π°Π»Π³ΠΎΡ€ΠΈΡ‚ΠΌΠ°, Ρ‚ΠΎΠ³Π΄Π° всС ΠΏΠ°Ρ€Π°ΠΌΠ΅Ρ‚Ρ€Ρ‹ Π±ΡƒΠ΄ΡƒΡ‚ ΡΠΎΡ…Ρ€Π°Π½ΡΡ‚ΡŒΡΡ/Π·Π°Π³Ρ€ΡƒΠΆΠ°Ρ‚ΡŒΡΡ Π² ΠΏΠΎΡΡ‚ΠΎΡΠ½Π½ΡƒΡŽ ΠΏΠ°ΠΌΡΡ‚ΡŒ.

            const int WindowSize = 5000; - Ρ€Π°Π·ΠΌΠ΅Ρ€ "ΠΎΠΊΠ½Π°"Π² Ρ‚Π΅Ρ‡Π΅Π½ΠΈΠ΅ ΠΊΠΎΡ‚ΠΎΡ€ΠΎΠ³ΠΎ происходит 1 Ρ†ΠΈΠΊΠ» Π²ΠΊΠ»ΡŽΡ‡Π΅Π½ΠΈΠ΅-Π²Ρ‹ΠΊΠ»ΡŽΡ‡Π΅Π½ΠΈΠ΅ Ρ€Π΅Π»Π΅ (здСсь 5с). Π§Ρ‚ΠΎ-Ρ‚ΠΎ Π²Ρ€ΠΎΠ΄Π΅ ΠΏΠ΅Ρ€ΠΈΠΎΠ΄Π° ΠΌΠ΅Π΄Π»Π΅Π½Π½ΠΎΠ³ΠΎ ШИМ сигнала.

            const double maxKp = 10000;
            const double maxKi = 5000;
            const double maxKd = 1000; - ΠΏΡ€Π΅Π΄Π΅Π»Ρ‹ подстройки коэффициСнтов ΠΏΠΎΠ»ΡŒΠ·ΠΎΠ²Π°Ρ‚Π΅Π»Π΅ΠΌ. Взял ΠΈΡ… ΠΎΡ‚ Π±Π°Π»Π΄Ρ‹, Π½ΠΎ Π²Π΄Ρ€ΡƒΠ³ ΠΊΠΎΠΌΡƒ-Ρ‚ΠΎ понадобится большС.

            Π‘ΠΈΠ±Π»ΠΈΠΎΡ‚Π΅ΠΊΠΈ, Π½ΡƒΠΆΠ½Ρ‹Π΅ для компиляции ΠΊΠΎΠ΄Π°, ΠΌΠΎΠΆΠ½ΠΎ ΡƒΡΡ‚Π°Π½ΠΎΠ²ΠΈΡ‚ΡŒ прямо ΠΈΠ· Arduino IDE.

            Π’Π΅ΠΏΠ΅Ρ€ΡŒ сам ΠšΠžΠ”:


            Когда ΠΊΠΎΠ΄ Π·Π°Π»ΠΈΡ‚ ΠΈ Ρ€Π°Π±ΠΎΡ‚Π°Π΅Ρ‚, ΠΏΠΎΠ»ΡƒΡ‡ΠΈΠΌ ΡΠ°ΠΌΠΎΠ΄Π΅Π»ΡŒΠ½Ρ‹ΠΉ PID рСгулятор:


            Настройка

            ПослС Ρ‚ΠΎΠ³ΠΎ ΠΊΠ°ΠΊ всС собрано ΠΈ Π·Π°ΠΏΡ€ΠΎΠ³Ρ€Π°ΠΌΠΌΠΈΡ€ΠΎΠ²Π°Π½ΠΎ, самоС врСмя Π½Π°ΡΡ‚Ρ€ΠΎΠΈΡ‚ΡŒ PID Π°Π»Π³ΠΎΡ€ΠΈΡ‚ΠΌ.

            Надо ΠΏΠΎΠ΄ΡΡ‚Ρ€ΠΎΠΈΡ‚ΡŒ коэффициСнты Kp, Ki ΠΈ Kd ΠΏΠΎΠ΄ ΠΊΠΎΠ½ΠΊΡ€Π΅Ρ‚Π½Ρ‹ΠΉ ΠΎΠ±ΡŠΠ΅ΠΊΡ‚ (ΠΈΠΌΠ΅Π½Π½ΠΎ ваш Π½Π°Π³Ρ€Π΅Π²Π°Ρ‚Π΅Π»ΡŒ, ΠΊΠΎΡ‚Π΅Π», объСм Π²ΠΎΠ΄Ρ‹ ΠΈ Ρ‚.Π΄.). Π― Π΄Π΅Π»Π°Π» это ΡΠ»Π΅Π΄ΡƒΡŽΡ‰ΠΈΠΌ ΠΎΠ±Ρ€Π°Π·ΠΎΠΌ:

            1. ΠžΠ±ΡŠΠ΅ΠΊΡ‚Ρ‹ с ΠΌΠ΅Π΄Π»Π΅Π½Π½ΠΎ ΠΌΠ΅Π½ΡΡŽΡ‰ΠΈΠΌΡΡ ΠΊΠΎΠ½Ρ‚Ρ€ΠΎΠ»ΠΈΡ€ΡƒΠ΅ΠΌΡ‹ΠΌ ΠΏΠ°Ρ€Π°ΠΌΠ΅Ρ‚Ρ€ΠΎΠΌ (Ρ‚Π΅ΠΌΠΏΠ΅Ρ€Π°Ρ‚ΡƒΡ€ΠΎΠΉ Π² ΠΌΠΎΠ΅ΠΌ случаС) ΠΎΠ±Ρ‹Ρ‡Π½ΠΎ Ρ€Π°Π±ΠΎΡ‚Π°ΡŽΡ‚ с большим Kp, ΠΌΠ°Π»Ρ‹ΠΌ Ki ΠΈ Π½ΡƒΠ»Π΅Π²Ρ‹ΠΌ Kd. Π’ ΠΈΡ‚ΠΎΠ³Π΅ Π΄ΠΎΠ»ΠΆΠ΅Π½ ΠΏΠΎΠ»ΡƒΡ‡ΠΈΡ‚ΡŒΡΡ ΠΈΠΌΠ΅Π½Π½ΠΎ Ρ‚Π°ΠΊΠΎΠΉ Ρ€Π΅Π·ΡƒΠ»ΡŒΡ‚Π°Ρ‚.
            2.  НачинаСм с ΠΌΠ°Π»ΠΎΠ³ΠΎ Kp, Π½ΡƒΠ»Π΅Π²ΠΎΠ³ΠΎ Ki ΠΈ Kd. Насколько ΠΌΠ°Π»Ρ‹ΠΉ? Π’ Π΄Π°Π½Π½Ρ‹ΠΉ ΠΌΠΎΠΌΠ΅Π½Ρ‚ Π½Π΅ скаТСшь Ρ‚ΠΎΡ‡Π½ΠΎ, Π½ΠΎ ΠΌΠΎΠΆΠ½ΠΎ Π²Π·ΡΡ‚ΡŒ минимальноС Π·Π½Π°Ρ‡Π΅Π½ΠΈΠ΅ ΠΏΡ€ΠΈ ΠΊΠΎΡ‚ΠΎΡ€ΠΎΠΌ Π½Π°Π³Ρ€Π΅Π²Π°Ρ‚Π΅Π»ΡŒ Π±ΡƒΠ΄Π΅Ρ‚ всСгда Π²ΠΊΠ»ΡŽΡ‡Π΅Π½ ΠΏΡ€ΠΈ Ρ€Π°Π·Π½ΠΈΡ†Π΅ ΠΌΠ΅ΠΆΠ΄Ρƒ Π·Π°Π΄Π°Π½Π½ΠΎΠΉ ΠΈ Ρ‚Π΅ΠΊΡƒΡ‰Π΅ΠΉ Ρ‚Π΅ΠΌΠΏΠ΅Ρ€Π°Ρ‚ΡƒΡ€ΠΎΠΉ Π² 10 градусов.
            3. Π—Π°Π»ΠΈΠ²Π°Π΅ΠΌ ΠΊΠΎΠ΄ с Ρ€Π΅ΠΆΠΈΠΌΠΎΠΌ PLOT, ΠΏΠΎΠ΄ΠΊΠ»ΡŽΡ‡Π°Π΅ΠΌ Arduino ΠΊ ПК ΠΈ запускаСм Serial plotter Π² Arduino IDE. Π’ΠΊΠ»ΡŽΡ‡Π°Π΅ΠΌ Π½Π°Π³Ρ€Π΅Π² ΠΈ Π²ΠΈΠ΄ΠΈΠΌ ΠΌΠ΅Π΄Π»Π΅Π½Π½ΠΎ ΠΏΠΎΠ»Π·ΡƒΡ‰ΠΈΠΉ Π²Π²Π΅Ρ€Ρ… Π³Ρ€Π°Ρ„ΠΈΠΊ:
              А Ρ‚Π°ΠΊΠΆΠ΅ ΠΌΠ΅Π΄Π»Π΅Π½Π½ΠΎ Π½Π°Π³Ρ€Π΅Π²Π°ΡŽΡ‰ΡƒΡŽΡΡ Π²ΠΎΠ΄Ρƒ...
            4. Π Π°Π½ΠΎ ΠΈΠ»ΠΈ ΠΏΠΎΠ·Π΄Π½ΠΎ тСкущая Ρ‚Π΅ΠΌΠΏΠ΅Ρ€Π°Ρ‚ΡƒΡ€Π° Π½Π°Ρ‡Π½Π΅Ρ‚ ΠΊΠΎΠ»Π΅Π±Π°Ρ‚ΡŒΡΡ Π²ΠΎΠΊΡ€ΡƒΠ³ Π·Π°Π΄Π°Π½Π½ΠΎΠΉ:
              Setpoint = 40C
            5. Π£Π΄Π²Π°ΠΈΠ²Π°Π΅ΠΌ Kp Π΄ΠΎ Ρ‚Π΅Ρ… ΠΏΠΎΡ€, ΠΏΠΎΠΊΠ° колСбания Π½Π΅ станут ΠΏΠ΅Ρ€ΠΈΠΎΠ΄ΠΈΡ‡Π½Ρ‹ΠΌΠΈ. Π—Π°Ρ‚Π΅ΠΌ Π±Π΅Ρ€Π΅ΠΌ Kp Π² 2 Ρ€Π°Π·Π° мСньшС, Ρ‡Ρ‚ΠΎΠ±Ρ‹ колСбания Π±Ρ‹Π»ΠΈ Π»ΠΈΠ±ΠΎ ΡΡ‚Π°Π±ΠΈΠ»ΡŒΠ½Ρ‹Π΅, Π»ΠΈΠ±ΠΎ Π²ΠΎΠΎΠ±Ρ‰Π΅ отсутствовали.
            6. УстанавливаСм нСбольшой Ki. Π£Π΄Π²Π°ΠΈΠ²Π°Π΅ΠΌ Π΅Π³ΠΎ ΠΏΠΎΠΊΠ° Π½Π΅ начнутся колСбания, Π·Π°Ρ‚Π΅ΠΌ Π±Π΅Ρ€Π΅ΠΌ Π΅Π³ΠΎ Π² 2 Ρ€Π°Π·Π° мСньшС, Ρ‡Ρ‚ΠΎΠ±Ρ‹ ΠΊΠΎΠ»Π΅Π±Π°Π½ΠΈΠΉ Π½Π΅ Π±Ρ‹Π»ΠΎ.
            Если Ρ‡Ρ‚ΠΎ-Ρ‚ΠΎ Π½Π΅ получаСтся - Π±Π΅ΠΆΠΈΠΌ Ρ‡ΠΈΡ‚Π°Ρ‚ΡŒ ΠΈΠ½Ρ‚Π΅Ρ€Π½Π΅Ρ‚Ρ‹ (я Ρ‡ΠΈΡ‚Π°Π» здСсь) Π»ΠΈΠ±ΠΎ Π΄Π΅Π»Π°Π΅ΠΌ всС ΠΏΡƒΡ‚Π΅ΠΌ ΠΏΡ€ΠΎΠ± ΠΈ ошибок (зная Ρ‡Ρ‚ΠΎ Π±ΡƒΠ΄Π΅Ρ‚ большоС Π·Π½Π°Ρ‡Π΅Π½ΠΈΠ΅ Kp, ΠΌΠ°Π»ΠΎΠ΅ Ki ΠΈ Π½ΡƒΠ»Π΅Π²ΠΎΠ΅ Kd).

            ΠžΠΏΡ†ΠΈΠΎΠ½Π°Π»ΡŒΠ½ΠΎ

            Для Ρ‚ΠΎΠ³ΠΎ Ρ‡Ρ‚ΠΎΠ±Ρ‹ Π²Π°Ρ€ΠΈΡ‚ΡŒ Π² этой Смкости ΠΏΠΈΠ²ΠΎ ΠΎΠ±Ρ‹Ρ‡Π½Ρ‹ΠΌ ΠΌΠ΅Ρ‚ΠΎΠ΄ΠΎΠΌ ΠΌΠΎΠΆΠ½ΠΎ Π΄ΠΎΠ±Π°Π²ΠΈΡ‚ΡŒ ситСчко Π½Π°Π΄ Π½Π°Π³Ρ€Π΅Π²Π°Ρ‚Π΅Π»ΡŒΠ½Ρ‹ΠΌ элСмСнтом для Ρ‚ΠΎΠ³ΠΎ Ρ‡Ρ‚ΠΎΠ±Ρ‹ ΠΊ Π½Π΅ΠΌΡƒ Π½ΠΈΡ‡Π΅Π³ΠΎ Π½Π΅ ΠΏΡ€ΠΈΠ³ΠΎΡ€Π°Π»ΠΎ (ΠΈΠ»ΠΈ ΠΌΠΎΠΆΠ½ΠΎ Π·Π°ΠΌΠΎΡ€ΠΎΡ‡ΠΈΡ‚ΡŒΡΡ ΠΈ ΡƒΡΡ‚Π°Π½ΠΎΠ²ΠΈΡ‚ΡŒ Ρ„Π°Π»ΡŒΡˆΠ΄Π½ΠΎ Π½Π°ΠΏΡ€ΠΈΠΌΠ΅Ρ€). Для Π²Π°Ρ€ΠΊΠΈ Π² мСшкС это Π½Π΅ трСбуСтся, Ρ‚.ΠΊ. вСсь солод ΠΈ Ρ…ΠΌΠ΅Π»ΡŒ ΠΏΡ€ΠΈ Π²Π°Ρ€ΠΊΠ΅ находятся Π² мСшкС. Для крСплСния ситСчка я использовал Π·Π°Ρ‰Π΅Π»ΠΊΡƒ ΠΊΠ°ΠΊ Π½Π° Ρ‡Π΅ΠΌΠΎΠ΄Π°Π½Π°Ρ…, ΠΊΡƒΠΏΠ»Π΅Π½Π½ΡƒΡŽ Π² ΠΌΠ°Π³Π°Π·ΠΈΠ½Π΅ ΠΊΡ€Π΅ΠΏΠ΅ΠΆΠ°.

            Π—Π΄Π΅ΡΡŒ Π·Π°Ρ‰Π΅Π»ΠΊΠ° сварСна с ситСчком - ΠΏΠ»ΠΎΡ…ΠΎΠ΅ Ρ€Π΅ΡˆΠ΅Π½ΠΈΠ΅, Π±ΡƒΠ΄Π΅Ρ‚ Ρ€ΠΆΠ°Π²Π΅Ρ‚ΡŒ. Надо ΡΠ΄Π΅Π»Π°Ρ‚ΡŒ нСсварноС соСдинСниС Π½Π° Π±ΠΎΠ»Ρ‚Π°Ρ….

            Π’Π°ΠΊΠΆΠ΅ для Ρ„ΠΈΠ»ΡŒΡ‚Ρ€Π°Ρ†ΠΈΠΈ сусла Π½Π°Π΄ΠΎ ΡƒΡΡ‚Π°Π½ΠΎΠ²ΠΈΡ‚ΡŒ Ρ„ΠΈΠ»ΡŒΡ‚Ρ€ΡƒΡŽΡ‰ΡƒΡŽ систСму ΠΈ ΠΊΡ€Π°Π½ для слива сусла. Для этого Π² любом хозяйствСнном ΠΌΠ°Π³Π°Π·ΠΈΠ½Π΅ ΠΏΠΎΠΊΡƒΠΏΠ°Π΅ΠΌ ΡΠ»Π΅Π΄ΡƒΡŽΡ‰ΡƒΠΈΠΉ Π½Π°Π±ΠΎΡ€ (всС Ρ€Π°Π·ΠΌΠ΅Ρ€Ρ‹ 1/2"):
            • Гибкая ΠΏΠΎΠ΄Π²ΠΎΠ΄ΠΊΠ° 1ΠΌ
            • Π‘Π³ΠΎΠ½
            • 2 Π³Π°ΠΉΠΊΠΈ
            • 2 мСталличСскиС ΡˆΠ°ΠΉΠ±Ρ‹
            • 2 Ρ€Π΅Π·ΠΈΠ½ΠΎΠ²Ρ‹Π΅ ΠΏΡ€ΠΎΠΊΠ»Π°Π΄ΠΊΠΈ
            • Гибкая ΠΏΠΎΠ΄Π²ΠΎΠ΄ΠΊΠ° 30см
            • РСзиновая ΠΏΡ€ΠΎΠΊΠ»Π°Π΄ΠΊΠ°
            • ΠšΡ€Π°Π½


            Длинная ΠΏΠΎΠ΄Π²ΠΎΠ΄ΠΊΠ° ΠΈ Π±ΡƒΠ΄Π΅Ρ‚ Ρ„ΠΈΠ»ΡŒΡ‚Ρ€ΠΎΠΌ. ΠžΡ‚Ρ€Π΅Π·Π°Π΅ΠΌ Π³Π°ΠΉΠΊΡƒ Π½Π° ΠΎΠ΄Π½ΠΎΠΌ ΠΊΠΎΠ½Ρ†Π΅ ΠΏΠΎΠ΄Π²ΠΎΠ΄ΠΊΠΈ, Π° Π½Π° Π΄Ρ€ΡƒΠ³ΠΎΠΌ ΠΊΠΎΠ½Ρ†Π΅ ΠΎΡ‡Π΅Π½ΡŒ острым ΠΈ Ρ‚ΠΎΠ½ΠΊΠΈΠΌ Π½ΠΎΠΆΠΎΠΌ ΠΏΡ€ΠΎΡ€Π΅Π·Π°Π΅ΠΌ Ρ€Π΅Π·ΠΈΠ½ΠΎΠ²Ρ‹ΠΉ шланг сквозь ΠΌΠ΅Ρ‚Π°Π»Π»ΠΈΡ‡Π΅ΡΠΊΡƒΡŽ ΠΎΠΏΠ»Π΅Ρ‚ΠΊΡƒ. ΠžΡΡ‚Π°Π΅Ρ‚ΡΡ Ρ‚ΠΎΠ»ΡŒΠΊΠΎ Π²Ρ‹Ρ€Π²Π°Ρ‚ΡŒ шланг ΠΈ Ρƒ нас Π² Ρ€ΡƒΠΊΠ°Ρ… остаСтся Ρ„ΠΈΠ»ΡŒΡ‚Ρ€ - мСталличСская ΠΎΠΏΠ»Π΅Ρ‚ΠΊΠ° с Π³Π°ΠΉΠΊΠΎΠΉ Π½Π° ΠΊΠΎΠ½Ρ†Π΅. Π”Ρ€ΡƒΠ³ΠΎΠΉ ΠΊΠΎΠ½Π΅Ρ† Π½Π°Π΄ΠΎ Π·Π°ΠΊΡ€Ρ‹Ρ‚ΡŒ, я просто Π·Π°ΠΊΡ€ΡƒΡ‚ΠΈΠ» Π΅Π³ΠΎ Π±ΠΎΠ»Ρ‚ΠΈΠΊΠΎΠΌ ΠΈ шайбами.

            Π“ΠΎΡ‚ΠΎΠ²Ρ‹ΠΉ Ρ„ΠΈΠ»ΡŒΡ‚Ρ€ ΠΈΠ· ΠΎΠΏΠ»Π΅Ρ‚ΠΊΠΈ.
            Π‘Π°ΠΊ с Ρ„ΠΈΠ»ΡŒΡ‚Ρ€ΠΎΠΌ - Π²ΠΈΠ΄ снаруТи. К Π³ΠΈΠ±ΠΊΠΎΠΉ ΠΏΠΎΠ΄Π²ΠΎΠ΄ΠΊΠ΅ привинчиваСтся ΠΊΡ€Π°Π½.
            Π‘Π°ΠΊ с Ρ„ΠΈΠ»ΡŒΡ‚Ρ€ΠΎΠΌ - Π²ΠΈΠ΄ ΠΈΠ·Π½ΡƒΡ‚Ρ€ΠΈ. Π’Π°ΠΊΠΆΠ΅ Ρ…ΠΎΡ€ΠΎΡˆΠΎ Π²ΠΈΠ΄Π½ΠΎ сито Π½Π°Π΄ Π½Π°Π³Ρ€Π΅Π²Π°Ρ‚Π΅Π»Π΅ΠΌ.

            Π’Π°Ρ€ΠΈΠΌ

            ΠŸΡ€ΠΎ саму Π²Π°Ρ€ΠΊΡƒ Π² мСшкС Ρ‡ΠΈΡ‚Π°ΠΉΡ‚Π΅ Π² ΡΠ»Π΅Π΄ΡƒΡŽΡ‰Π΅ΠΌ постС:

            TBD
              ↧
              Viewing all 66 articles
              Browse latest View live